 Paper towel tube rocket (PTTR)
This rocket is awesome because you build it out of junk you probably have around your house, and DIY rockets vary wildly in quality. Be ready for an exciting time!
If you’re totally new to rockets, here’s the minimum to get started:
- rocket, launchpad, and launch controller $22
- small engines $10 (and large $10 I recommend getting both)
- parachute wadding $5
- cardboard
- card-stock weight paper, like a manila folder
- Elmers glue
- string
- three skinny but long rubber bands
- old plastic bread bag, or similar weight plastic bag
- hole puch
- drinking straw
TOTAL $37 (or $47 with additional larger engines)
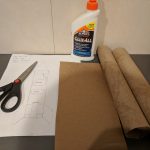 I want you to get both a kit rocket, and build build your own. You absolutely have to get a launch pad and launch controller. The kits are cheap enough, you may as well get a Ready-To-Fly RTF rocket with it too. This will give you both the fun of building your own rocket, and a more predictable experience of a kit rocket. Even kit rockets have their own challenges. Doing this Paper-Towel-Tube-Rocket PTTR, will give you the tips to assemble any RTF rocket as well.
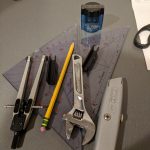 Building PTTR isn’t a slam bang and done project. There are a few steps, where you need to let that ol’ Elmers Glue dry. I’ve never tried building PTTR using a hot-glue gun, or quick-drying epoxy, though I’m sure it could be done. The steps would be the same, just faster.
There are a bunch of “drink breaks” in here. You can take that drink break, or you can jump to the other steps. Drink break simply means glue will need to dry, and you’ll have to revisit that part later.
Engine mounts
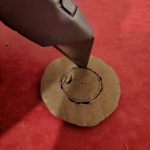 Cut doughnut shaped engine mount rings. Both inside and outside diameters need to be pretty darn close, +/- 3mm I’d say. That sweet sweet Elmers glue can make up for imperfections. Double and triple check the outside diameter of your engine mount rings against the inside diameter of your paper towel tube. Also double check the inside against the engine mount tube from the next step.
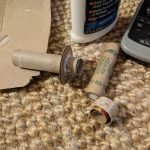 Use existing engine and roll some card-stock weight paper around an engine. The tube should be the same length as the engine. Put glue on there, secure with some tape until it dries.
- drink break
- Pull the tape off the engine mount tube, and glue both engine mount rings to the engine mount tube. You should leave about a half inch at either end.
- Cut a narrow strip of card stock, a 1/4″ or so. It should be long enough to go around the inside of the engine mount tube twice. Put a very light coating of glue all over this strip, and put it into, what will be the forward end of the engine mount tube. Expand this strip as much as it will go. This piece is going to be the engine stopper. It will keep the engine from shooting through your rocket, but still let the parachute charge blow out the top.
- drink break
- double check that the rocket engine you have can slide into the engine mount tube, while being stoppered at the end by that strip we installed in step 5. It should be snug.
- put another bead of glue on one side of the engine mount rings > engine mount tube
- drink break
- flip it over, put another bead of glue around that side of the engine mount rings > engine mount tube.
- drink break
Fins
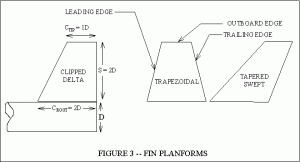 You can get creative with the shape of your fins. I’d like to point out one design detail here, and that’s some taper on the trailing edge. With swept fins like this, your rocket will stand on it’s 3 or 4 points on the launch pad, while holding the aft end of the engine, and igniter off the launch pad: very convenient!
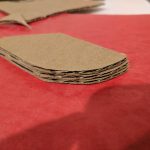 cut three or four fins, dealer choice
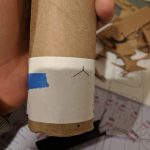
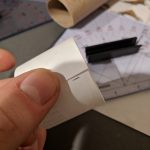
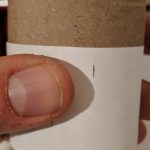
- get a small, long piece of paper and wrap it around the whole tube. Mark the paper on both the top wrap and bottom wrap, so you know the exact circumference. Use scissors and cut the strip so there’s about a 1/4″ longer than the circumference.
- If you’ve got three fins, as I’ve chosen in my example, play around with folding the paper in exactly two spots so you have three, equal length sections. The mark, the first fold, and the second fold will be where your three fins go.
- four fins is easier, you fold it in half twice. The mark, and three folds makes for your four fins.
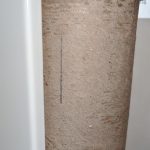
- Tape that piece of paper to the tube. Get a pencil, the tube, and head to any door jam. Hold the tube into a corner of the door jam, and run the pencil along the tube, so the line hits above the paper, the fold, and below the paper. Do this with all three or four fins. Pull that paper off, then, using the door jam for a straight edge, connect the two lines.
- between two of your fins, strike another line that is above the forward most fin, this will be for the launch lug
- Glue the first fin. Two tricks here. You can put the tube between some stuff on your desk so it doesn’t roll around, and balance that fin up there. If you cut it with a sharp knife, it might be square enough it will just sit there. If it falls over in a few minutes, don’t worry about it. The glue will be slowly getting tackier and tackier, and eventually it’ll stay close enough. Other trick is to slide the tube next to a wall, with the fin leaning against the wall – or whatever. As you slide the tube closer or further from the object, you’ll see the angle of the fin change. You want it to be pretty much perpendicular from the tube (perpendicular to a tangent. Oh God geometry)
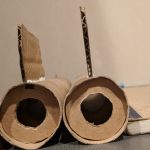
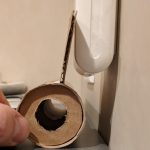

- drink break
- Glue second fin. For this one, I put the paper towel tube near the edge of a small book. This raises the tube up, so while the first fin is on the table, the second fin is straight up. Or, you can do that lean it-against-something trick.
- drink break
- Glue third fin. This one should be easy because as the rocket is resting on the first two fins, the third should be top and center. If you also chose to put a swept-angle fin on, you can maneuver the bottle of glue in there so it will just hold the after tip of the fin while it’s drying.
- drink break
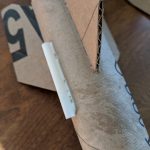 find that launch lug line between two of your fins, cut the drinking straw so it’s about an inch long. If you have sandpaper handy, scuff up the outside, then glue it, as straight as you can, to that line. It should sit a little above the fins.
- put an additional bead of glue on all fin seams you can see
- drink break
- flip rotate it, and put more glue on all seams
- drink break
- rotate it a little more, and you guessed it: another bead of glue on all the seams.
- put more beads of glue on the launch lug straw. Put LOADS on it. Straws hate sticking to Elmers glue for some lame reason. But don’t let a fat drop of glue sit at either end of the straw, that will keep the launch rod from running freely.
- fins are done.
- launch lug is done.
Nose cone
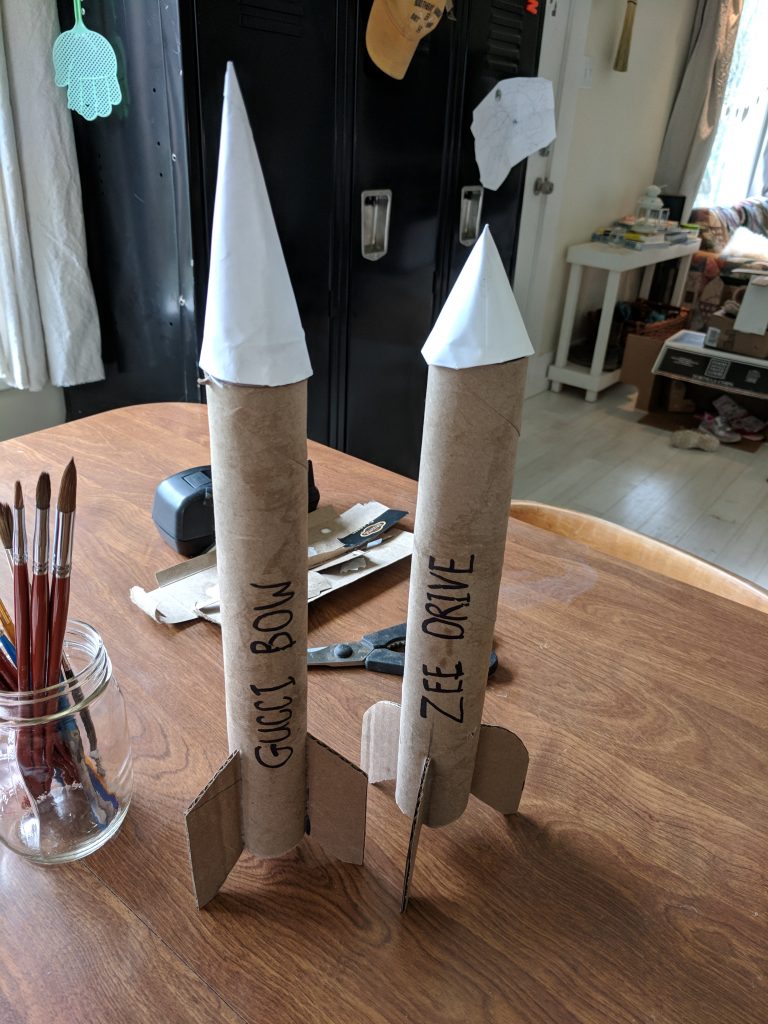
You can decide how pointy you want your nose cone. I was making two rockets, so I went with a stubby one, and a sharp one.
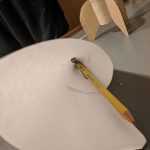 Cut a rainbow looking shape out of the card-stock. Or don’t, doesn’t matter too much here.
- Roll into a cone. The large end of the cone needs to be at least as big as the end of the paper towel tube. The other end should be a point.
- cut off any extra pieces to make life a little easier
- apply glue, and tape it in place to dry
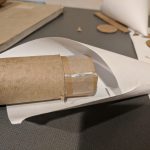 cut a rectangle of card-stock and roll it up. Stick it in the end of the paper towel tube. Using your thumb, force it larger until it’s pushing against the inside of the tube. Hold it tight, and put it in and out of the tube a few times. It should slide in and out easily. Err on the side of too small. Mark it, glue it, and tape it to dry. I’ll call this thing the nose cone base.
- drink break
- pull off the tape from both nose cone base, and the nose cone.
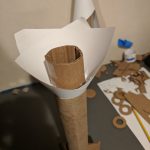 dry fit that nose cone base into the nose cone. Your nose cone should extend past the circumference the nose cone base touches, like a witches hat brim.
- put a fat bead of glue on the nose cone base, and put it into the nose cone.
- look at it from many angles, and get it adjusted so it’s pretty much square. It’s tricky, but not too big a deal if you get it a little off.
- a nice place to put the nose cone while it’s drying is in the end of a paper towel tube. If your only tube is indisposed because of the fins, grab a roll of toilet paper, and use the inside of that.
- drink break
- using scissors cut the brim of the hat off. This thing should really start to look like a nose cone now!
- smear more glue on the inside circumference of where the base meets the cone. More glue=better
- drink break
Shock cord
 cut your three rubber bands so they are strings.
- tie them all together using a square knot. Try to make the ends as short as possible so you get as much length as possible out of the whole shock cord.
- if your long piece is shorter than say 12″, tie in a piece of string to either end bringing the total length to at least 20″ or so. For that knot, you should use a sheet bend where the bight part (blue part in the animation I linked) is the rubber band.
- cut a rectangle shape piece of paper, that tapers a little towards one end about 2″ x 3/4″. This is going to be folded twice, so into thirds. Go ahead and fold it now.
- put a light glue on one entire side
- put the end of the rubber band or string on the paper, with the tip at the first fold.
- now fold the paper over your two folds so the rubber band or string bends one time
- do that to both ends, then put the wet foldy mess under the leg of a chair, or with some weight on it so it will dry
- drink break
Assemble: nose cone to rocket
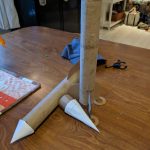 You need both the completed nose cone, and the shock cord
- put glue inside the nose cone base and press either end of the shock cord into the nosecone base. You may have to hold it there to get it to stay until the glue dries. You can also try pre-bending the paper so it will happily sit in there.
- Depending on how far the nose cone base goes into the rocket tube, you’ll have to glue the other end of the shock cord at least that deep. If this becomes a pain in the ass, you can always cut that nose cone base shorter. I’d leave at least 3/4″.
- done!
Assemble: engine mount and rocket
This part is pretty nifty, we’ll use a standard rocket trick of putting a bead of glue way up into the rocket body only where it’s needed. video
 hold the engine mount assembly next to your rocket. Probably between a couple of fins. You want the tail end of the engine mount tube to be either flush, or stick out a little from the aft end of the rocket tube.
- with a pencil make a mark where each of your engine mount rings will be, once the engine mount assembly is inside the tube
- get a piece of cardboard, or small stick, and hold it next to the rocket tube so that the end is slightly overlapping the upper/forward end engine mount ring.
- put a big glob of glue on a piece of scrap, and scoop and smear glue on the inside of the rocket tube, using where you’re holding that piece of scrap for reference. LOTS of GLUE here. put it all around the inside of the tube
- slide the engine mount assembly into the tail end of the rocket tube, and you should feel the engine mount ring squish into the glue. Give it a little twisty twist action to get the glue on all the parts
- flip the rocket upside down, apply liberal bead of glue to the lower, after engine mount ring
- leave the rocket upside down to dry
- drink break
- apply another bead of glue to the only engine mount ring you can see
- Done with rocket assembly!
Parachute
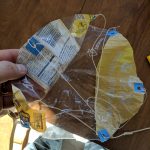 cut a 12″ diameter circle out of your plastic bag
- put six small pieces of tape on the edges of the parachute. I like to put two on there opposite each other, then move around about 1/3: two opposites, then split what’s left: two opposites.
- this tape should stick very well to the plastic bag. I think I used packing tape on one of my chutes, and blue painters tape on another. We’ll see what holds!
- punch holes through the tape and plastic
- cut three lengths of string about 18-24″ long
- square knot the ends through adjacent holes. Try not to leave much of a tail.
- this should get you three loops coming off three sides of the parachute
- gather the three loops in one hand, and cow hitch them somewhere to the rubber band part of your shock cord. You’ll put the loop behind the rubber band, then jam the whole parachute through that loop to make the cow hitch.
Balanced flight
I’m embarrassed that I launched several rockets that were not balanced. The results was exciting to say the least.
There are two forces that need to be in alignment for a rocket like this to fly straight: center of mass, and center of pressure. Here’s an easy 1:30 youtube showing the process. Here’s a 13min in depth explanation from Apogee Rockets.
- Put an engine into the tail end of your rocket.
- Find the center of mass by balance your rocket on your finger.
- Tie a 12ft string around that spot, add some tape to make sure it doesn’t slip around. Check it by hanging your rocket from that string, it should be approximately level with the ground.
- Swing the rocket around your head like a lasso. If it settles into nose first round-and-round: you’re good to go. If it doesn’t, you need to:
- Add some weight to the nose cone, glue a penny in there, or more.
- Find new center of mass (#2 above) and move string forward.
- Repeat experiment
Lots of steps, but you should be done! Pat yourself on the back, and look for a calm clear day and launch that rocket!!!
