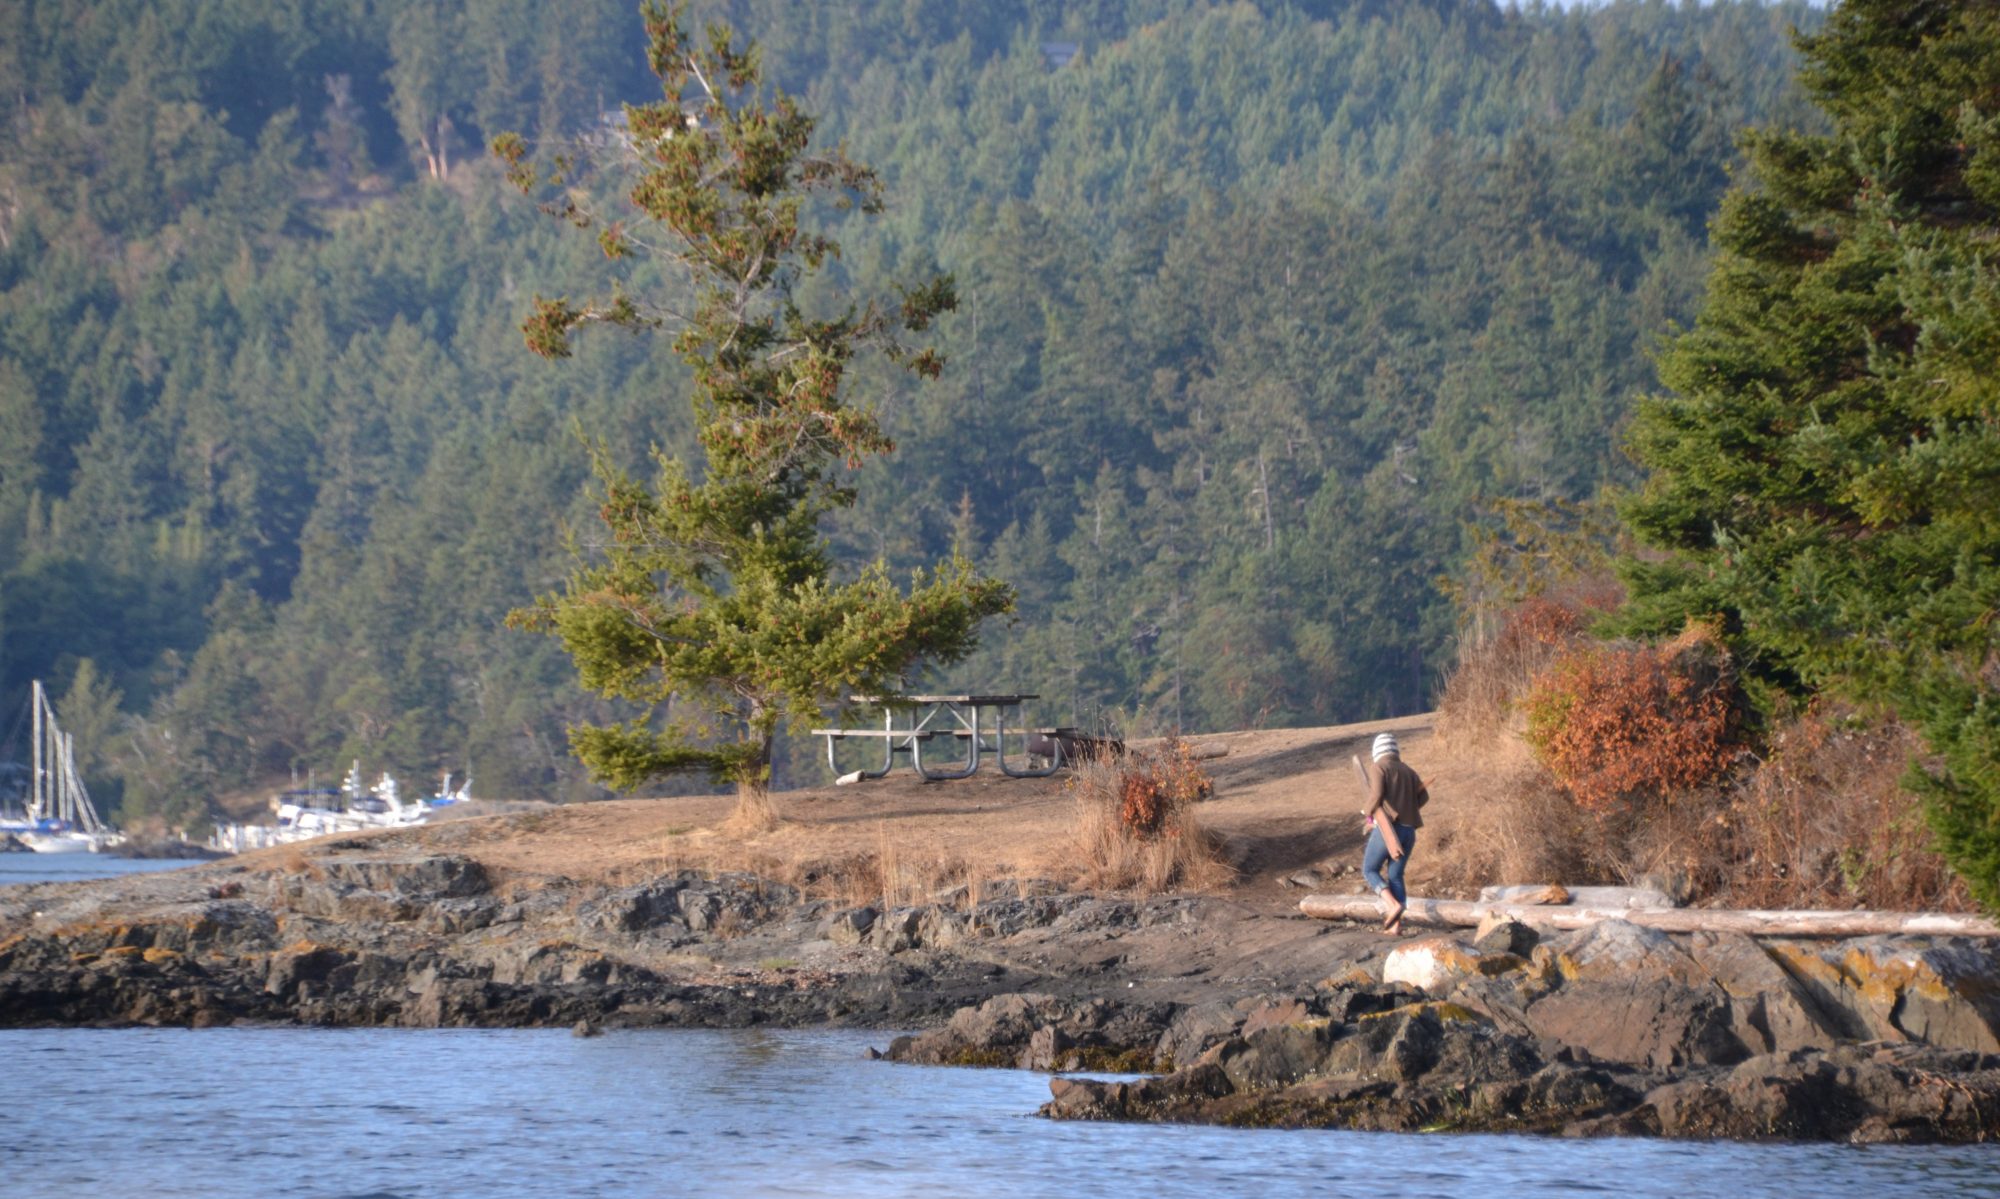
I’m referring to these pics I snapped as I was going through this process. I wanted the box to be able to breath. Finding some reasonable vents was harder than I thought. I ended up with a handful of these overpriced buggers at $5 a pop from polycase.com.
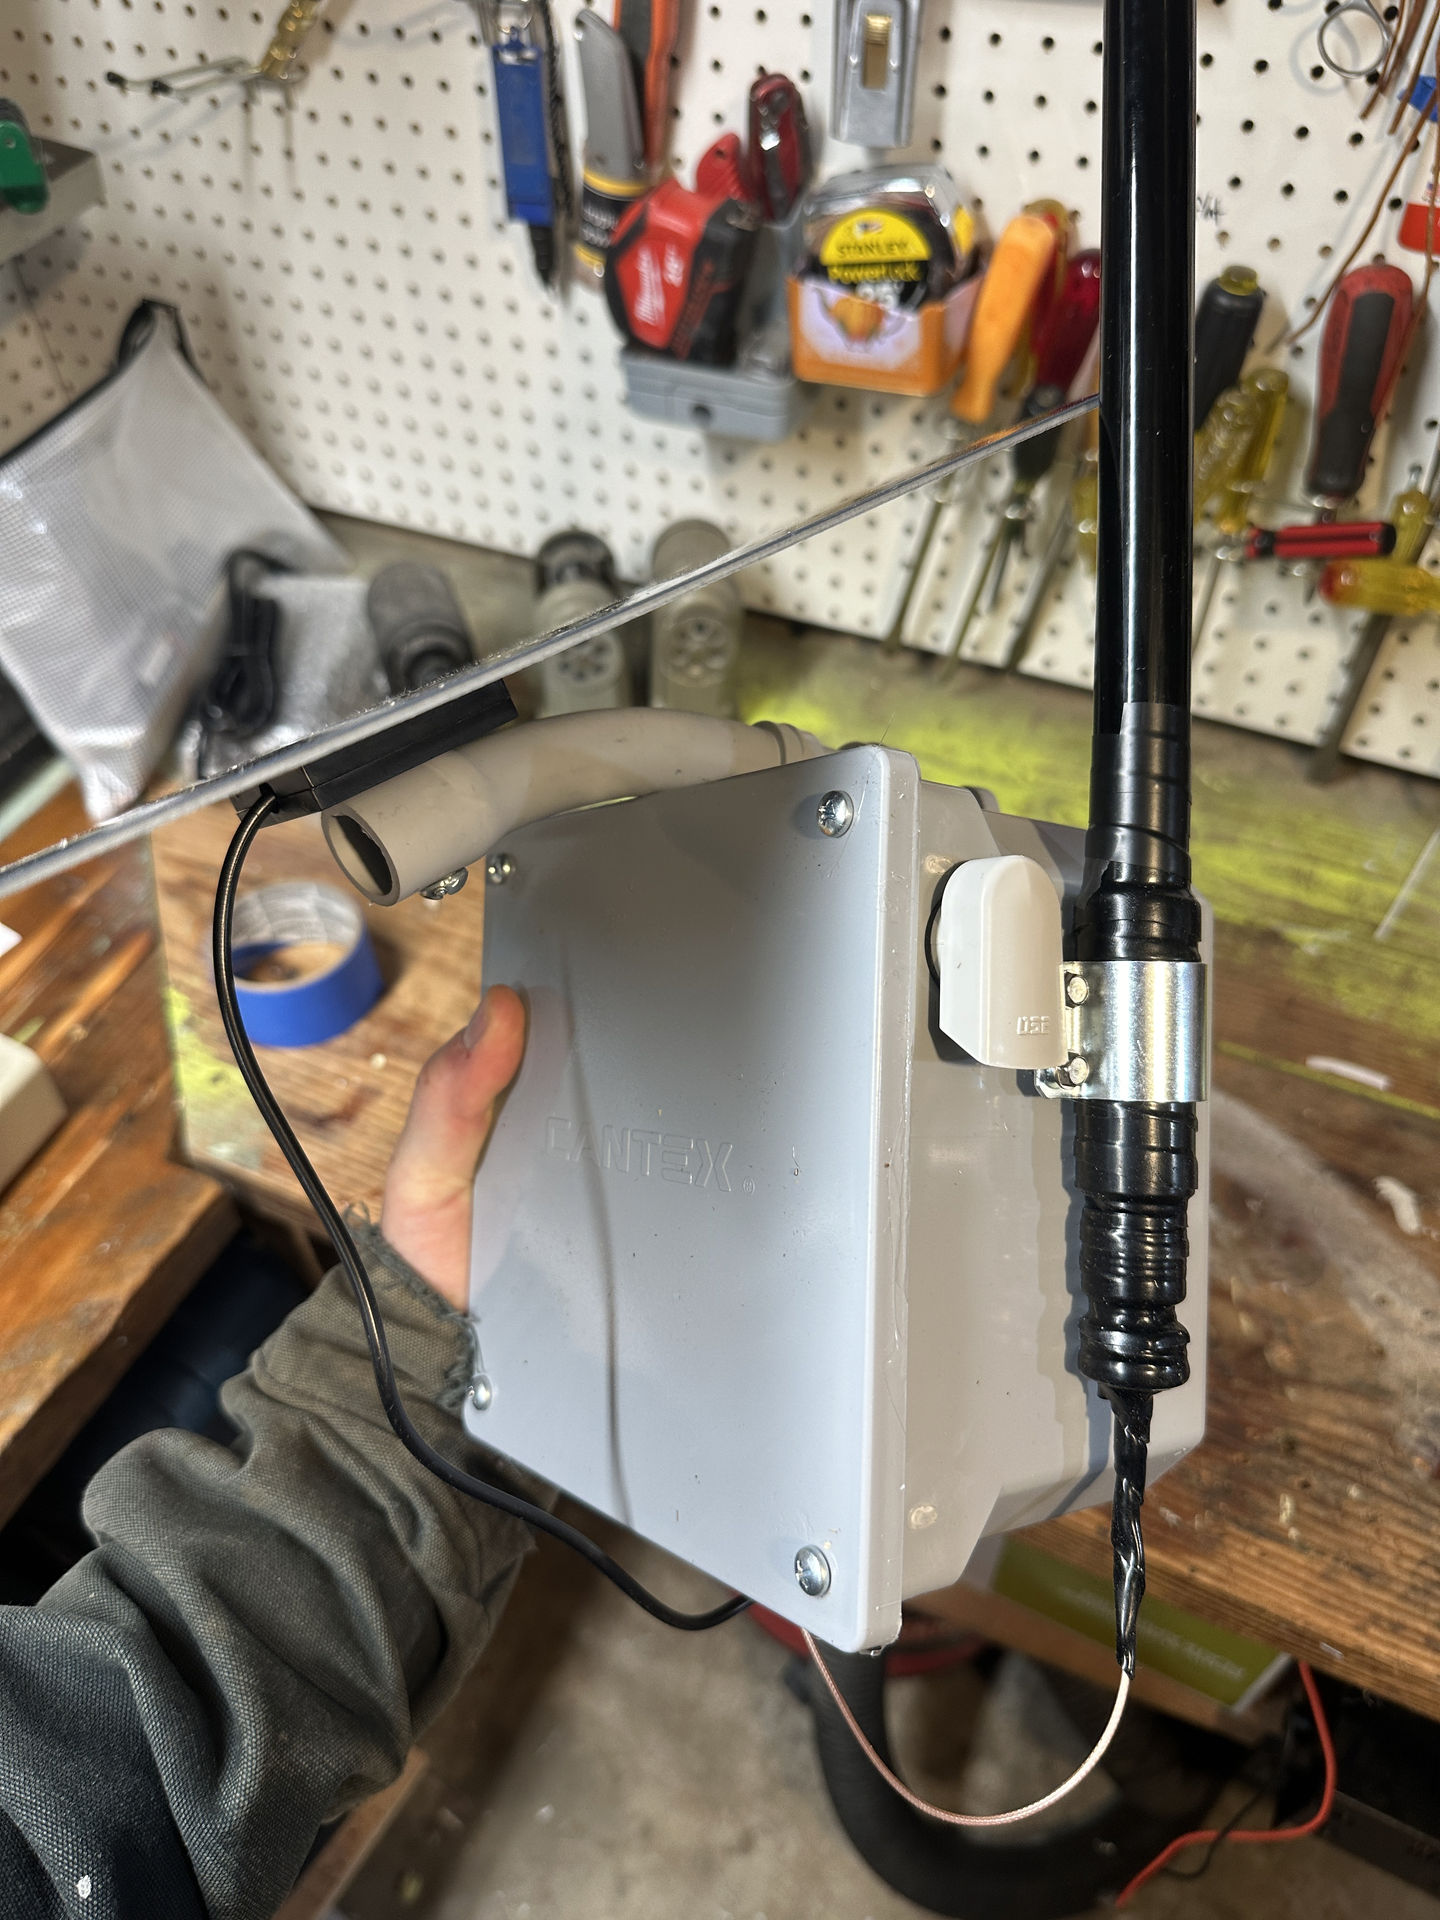
I got this cable gland, also too expensive, $8 amazon, that would accommodate 6 real small wires. I found out immediately the heavy plastic enclosure I snapped up at Home Depot (too expensive), was too thick for the threaded part on the gland. So I had to get creative, and very careful, with some of my wood forstner bits to make it work.
After that I promptly drilled holes in both the side and the top! Damn it. I used roofing screws on the top, scooted their rubber washer plus some hot glue to be in immediate contact with the plastic case. On the side, I just left those stainless screws alone <shrug>.
I chose a long pigtail off amazon so there were minimal connections between the RAK radio and the exterior antenna. I’m sure that little 0.6mm wire isn’t rated for outdoor use. It may have been better to use one of these short ones, pass that through the plastic case, slam that down with the metal washer, then point the antenna down. Box on top. The idea of putting a hole in the top of your box so you can mount the antenna upwards and gain 1.5ft more from where ever you’re at seems a bit silly. So I used a drip loop type where my poorly guarded holes were on the bottom: the gland nut.
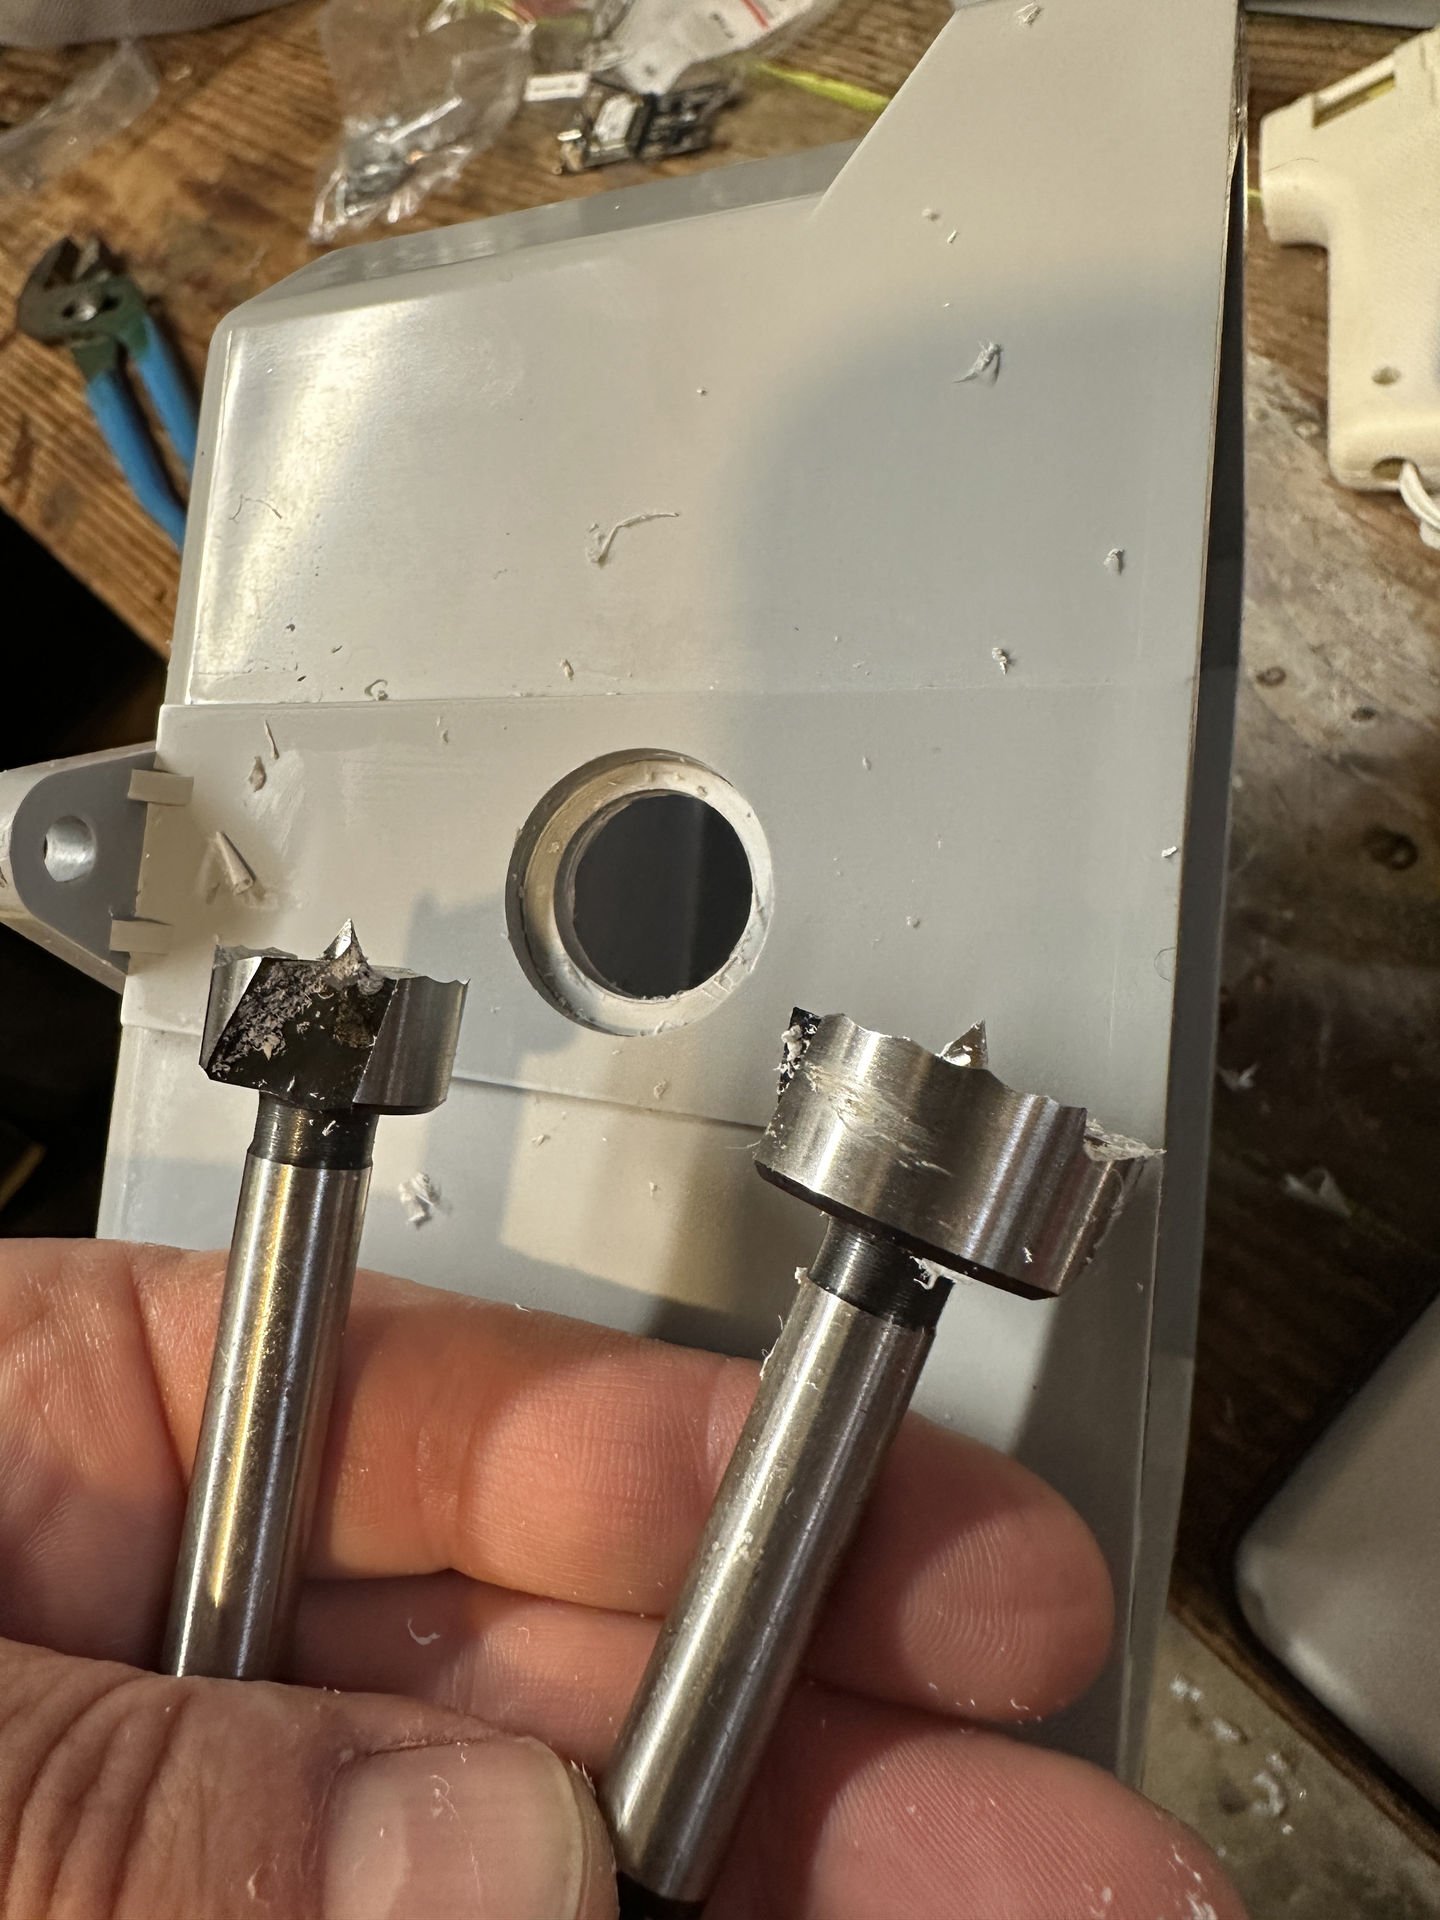
Of course the full USB head from the solar panel wouldn’t fit through a glad nut that can accommodate 0.6mm wires. So I cut the usb wire, passed the four wires through two of the available gland nut openings, and re-soldered the connections with shrink wrap on the inside. The recent freestyle drone hobby really came through there with soldering and shrink wrapping stuff.
The mounting hardware that came with the solar panel seemed decent, but also dissimilar metals, generally as cheap as possible. I used this 45 deg pvc pipe and a bolt. I had read that these boxes can get hot, and that kind of stuff will kill a battery. So I wanted the solar panel to shade the box when the sun was directly overhead: the most solar-hot part of the day (seems like it’s actually hottest around here in the afternoon evening).
The battery barely fit in the enclosure. I’ve seen many people with that issue. Now that I know the general dimensions of solar node #2 I can be a little pickier with the enclosure dimensions and see if I can realize my dreams of only a hole or two, all on the bottom.
I think those are about all the note I have for this one. Hope some of this helps inform you for your build and reminds you to check for compatibility.
I found these funny little radio things called Meshtastic. There’s no real … like actual daily usage for them, except they are fun, and do neat stuff. In My Opinion.
Here’s what they do: the devices have two sides. One side is a radio that send (Tx transmit) and receive (Rx receive) on the 902-928MHz range. The other side will be Bluetooth or wifi for you to connect with your phone and communicate with the radio. That’s really all there is at the most basic level.
Why is it called “LoRa?” Apparently it’s Long Range, but I’m not sure what makes 928MHz any longer than say other stuff (all frequency allocations USA pdf). T-mobile cell phones also talk over radio transmissions. A couple of frequencies they use are 600MHz, 1900MHz, 2.5GHz. I think, generally, the higher the frequency: more data, less distance. Apparently cell phones will vary their Tx power between 0.6 watts, up to 3 watts if you’re deep in the country. I think meshtastic tops out at 0.6 watts. But: we can put big fun antennas on them!
The software that’s becoming popular (source needed) is called Meshtastic. They’ve chosen to make a slick app, offer their firmware for free, use encrypted text messages, and mesh the radios. This has some really cool side effects.
Slick app. You generally use your phone and a Bluetooth or wifi connection to connect to a radio that’s withing 30 feet or so. We’re all used to phones. We have them with us most of the time, and this software and hardware ecosystem doesn’t discount that.
Free firmware. The folks at meshtastic.org are volunteers. I don’t know why they do what they do, but I appreciate those that know how to do it, do it. There aren’t too many hardware radios that use this stuff, so it isn’t too complicated yet.
Encrypted messages. Similar to other encrypted messaging apps (signal) no body can read your messages; only you and the person you’re sending to. This is cool, but also makes for a few more authentication steps when trying to send messages from several devices at once (phone, work computer, laptop).
Meshing. I saved the best for last. For you to send someone a message, your little radio doesn’t have to be able to hit them directly. Other devices around will forward your messages. I’m able to send a message past Seattle. Here’s a map that I had after leaving a radio in a window at work for a couple of days. My radio could only reach one other guy across the water, MSHT. That radio, however, was able to get all the way to Seattle.
So right, kinda neat. Kinda nerdy.
What you really need is a use case; a real world scenario where you can use this stuff. Here are a few:
ATAK “Android Team Awareness Kit.” Developed by the feds for military stuff. It’s been released to the public, and folks are using it. Here’s wilderness firefighters using it. The radios simply broadcast their position over LoRa. Those pings of GPS coords mesh together, and each person gets a full picture of where other people are at. The coolest hardware version I’ve seen of these are the (difficult to find) Lilygo T-echos. The information and connectivity really shines when there is no cell service around. These little things send their own signal and don’t depend on the number of Verizon bars to function.
See how it’s also a little covert, anarchist, and subversive?: Cool!
I used the Find My app on our Apple phones while we were at Disneyland. It was so great to be able to find friends with live dots on a map. It also depended on cell service for each person. Same thing with Tiles, or Airtags: they’re only Bluetooth. They talk to any iphone within reach of Bluetooth. Then the iphone sends that to the cloud: so-and-so airtag was within 30 feet of that location at that time. Works great when many people have: iPhones, data service, and a paid up plan.
What if loads of phones had this tech? It is free. It is low power. Phones could text one another without cell towers. It could be a “disaster proof” technology.
So ya, it’s more than a little quirky. But that’s never stopped me before.
Save your playlists incase your preferred music service folds, or you wanna switch and copy playlists over https://soundiiz.com/
Roon is some spendy software ($14/mo or $800 lifetime), but it does a great job of cataloging and streaming all your music files at home, your digital music library: all those mp3 and flac. https://roon.app/en/
If you have a home collection, Media Monkey does a great job of picking up where iTunes got stupid https://www.mediamonkey.com/
If you don’t want to shell out the $800 above, but still want to stream your music, Subsonic is a long time no brainer: it just works http://www.subsonic.org/pages/index.jsp
Slightly more expensive than $0, Plex also is worth a look. I dabble with its music features from time to time, it’s pretty, but just doesn’t scratch my itch quite right. $5/mo or $120 lifetime https://www.plex.tv/
Plex came from a for-profit splinter off home theater software XBMC, now MLK own as Kodi. https://kodi.tv/
Most platforms offer Family Plans. If you can find a couple buddies to split a plan with you, it’s the cheapest way to get ad free. I’ve spent time with Pandora, Spotify, YouTube Music, Apple Music, Tidal. Only a short dabble with Amazon Music, they offer many tracks free, but it doesn’t take long to find something you want that’s behind that paywall.
Lossless is becoming a thing. If you have expensive gear ($1000+ home system, $500+ headphones) you’ll want to learn about it. Big dollar amounts! It works out nice because if you aren’t in audio at that level, you probably won’t notice an appreciable difference between “high-def” vs lossless music quality. Lossless streamers, at this moment are: Tidal, Apple Music, Amazon Music Unlimited. If you have Bluetooth anywhere in your audio stream, it’s not lossless.
Birthday world is saved, should we ever want to revisit it… but we’re going to create a new world moving forward. And it shall be called … NEVERLAND. Players shall be knows as THE LOST. The world will be difficult, and unforgiving. Great riches and adventure await the bold.
Use the tools at your disposal. Want to make an automatic farm?: It’s been done, check youtube, and build it. Want diamond armor? Check out mining pointers on Google. Want to enchant stuff? You’ll need level 30 experience, and there’s no easier way to get that than a Spider Spawner. Youtube that, and see what you come up with.
Please continue to chat in our Discord! I’m not cutting anyone off from some help here and there. However, I will NOT SULLY NEVERLAND with teleportation, or save game roll-backs without serious merit.
NEVERLAND details
Server address:
asdf.net (xxx.xxx.xxx.xxx) *
Gamemode:
Survival
Difficulty:
Normal
Force Gamemode:
true
PvP:
false
Hell world:
true
Allow Nether:
true
Allow Flying:
false
Keep Inventory:
false
* As before, the server will be compatible with both Java and Bedrock Minecraft versions. Let me know if you have issues connecting. Whitelist has been enabled to combat griefing. It’s like an enforced guest list for the server. If you get an error message about a whitelist, shoot me a note, and I’ll get your Minecraft username added.
For THE LOST players, I recommend a headset with microphone. This improves quality, and irritating echoes. You can get an upgrade mic for headphones you already have for $35, or a whole new pair of headphones for $40. Reputable article for gaming headsets 2021 at Tomsguide.com.
Alison said she was interested in hearing what was going on as well. Put Discord on your phone, connect (lurk) the channel the kiddos are in, and leave the phone on speaker where ever you happen to be.
Some general times in PST:
Monday-Friday 3-5PM Saturday and Sunday 10AM-2PM
There are many ways to make Minecraft easy. But, take it from your parents: easy things aren’t worth much. Trying failing, trying again and succeeding is the sweetest feeling.
For the adventurous, for the persistent, for the brave: your adventure awaits in NEVERLAND!
Getting Minecraft for iPhone was about $7. Bear with me for this setup.
The process is a combination of signing out and back into your Microsoft Account via the Minecraft app – and changing a couple of settings on your iPhone. Let’s start with those settings.
Add DNS server to iPhone. You need to be in wifi for this piece to work. This youtube video outlines this process, as well as my words and pic here.
iPhone > Settings > Wi-Fi > blue “i” next to the wifi you’re connected to
scroll down to DNS: Configure DNS. Check Manual. Add:
8.8.8.8, and 8.8.4.4
Save.
Next, add the custom birthday server. Open Minecraft on your phone.
Play > Servers > (scroll down on left) Add Server
server name: <anything is OK> Server Address: minecraft.kerlee.com (or 51.81.182.31) Port: 19132
That should do it! If that doesn’t work: try signing in and out of your Microsoft Account via Minecraft app > Settings > Profile > “Sign out of your Microsoft Account.” Then sign back in and see if that helps.
As another test, you should be able to connect to other servers that show up under that Server tab. CubeCraft should work fine.
I am an audio enthusiast, but I don’t have words like the youtube audio reviewers that I’ve seen. I think this thing sounds great, and after I complete these upgrades and turn it on, I’m sure it will also sound great. I just don’t have enough practice with words, or critical listening, to nail down what kind of changes I experience because of these upgrades. I love to tinker! And rather than buying an Ortofon 2M Bronze for $400, I thought I’d throw $100 and a tinker project at it.
Bill Of Materials
2x Mundorf Supreme 0.47µF 600VDC film capacitors $16ea, matched. soniccraft.com
2x Mundor MCap EVO Oil 0.47µF 450VDC film capacitor $9ea. soniccraft.com
(To type a “mu” google “ascii code mu” and you’ll find #230. Hold down alt, then hit 2-3-0, let up alt, boom: mu µ)
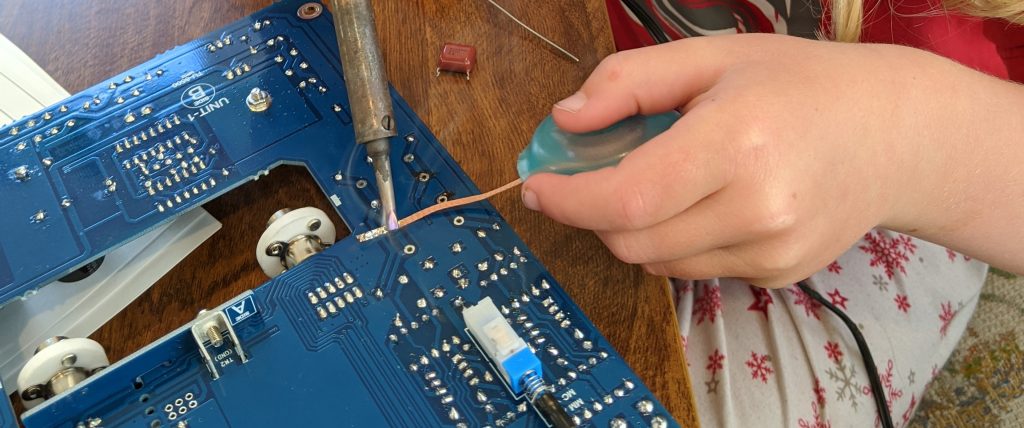
First thing you’re going to do is take apart the pre-amp. I followed the directions backwards, leaving out a few steps. All you need to do is get the board out of the chassis. Using a solder wick, or something similar, remove the solder from the underside of the capacitors. Give them a wiggle and they should fall out.
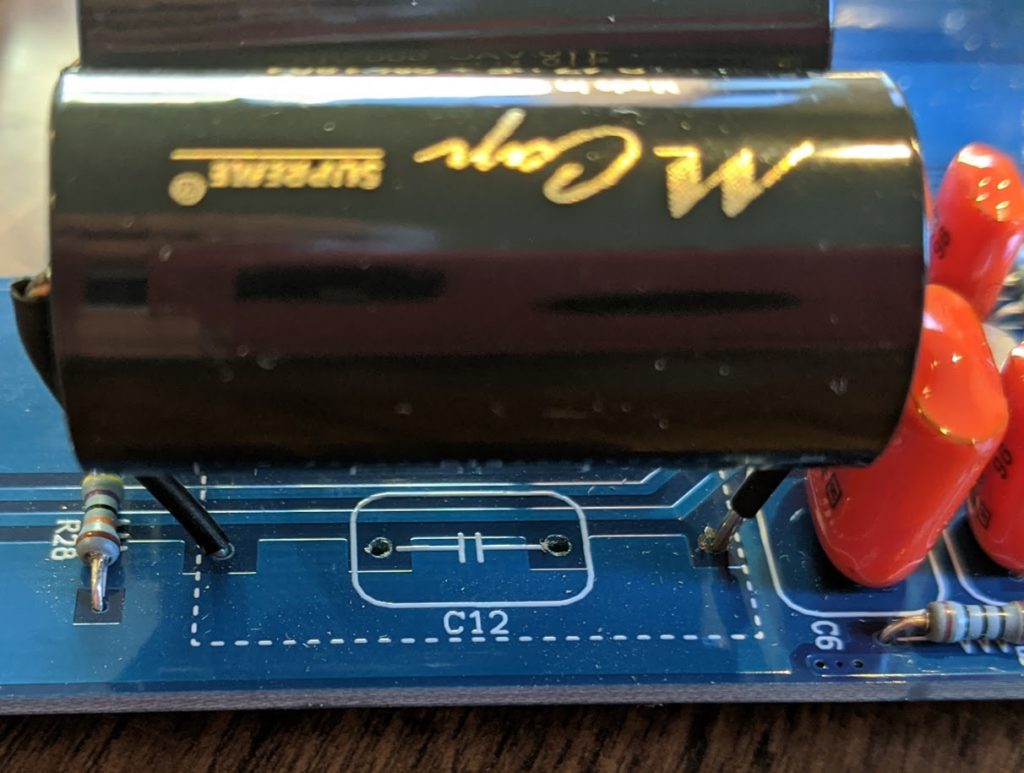
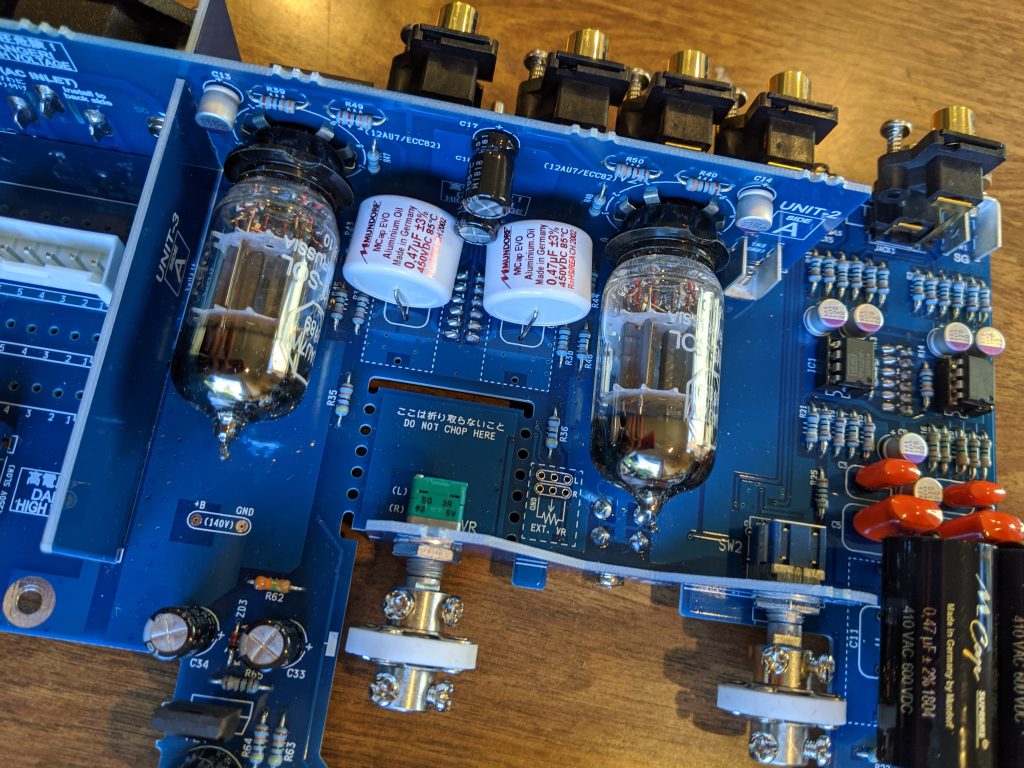
I was happy to find Elekit had included larger holes for this upgrade right into the board: so thoughtful. Even these capacitors I was using are larger than the bigger holes. Bend them about a bit and stick ’em in there. I added some shrink wrap to the exposed leads, but it probably isn’t necessary. The white EVO Oil caps fit in perfectly no fuss no muss.
Upgrade is complete, plugged back in, works great. I feel like it has a larger dynamic range? I was hearing some thumps on this album that I don’t think I’d ever heard before. Getting up close to the speaker, nothing was lost in the high end either. So?: success.
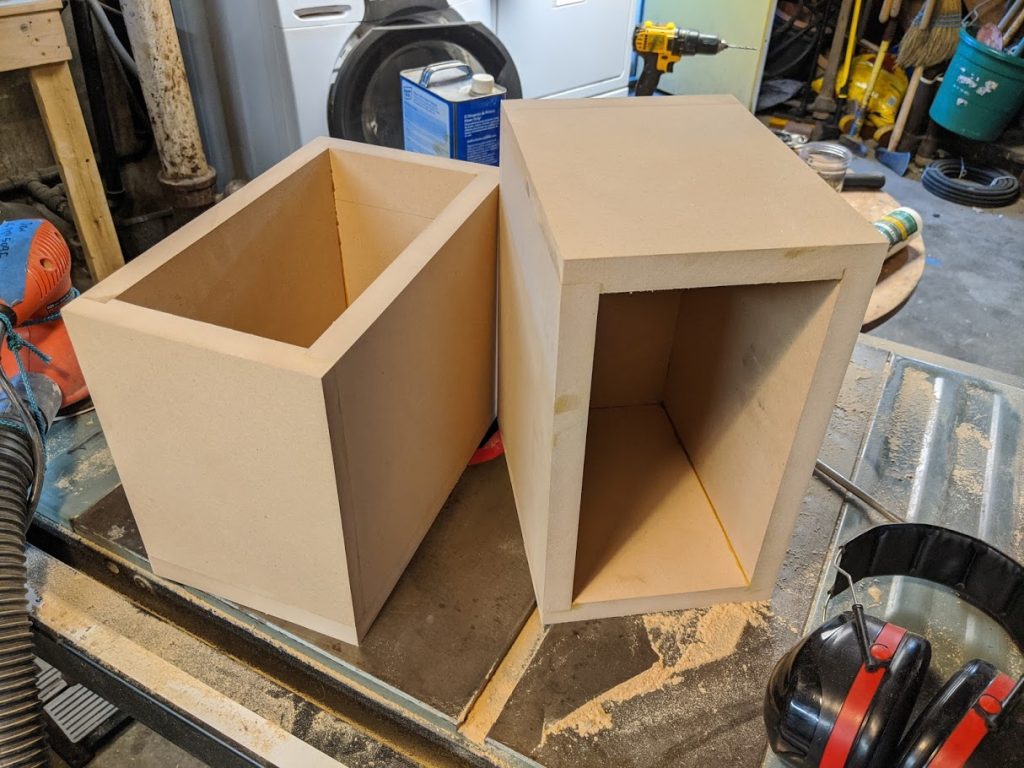
I’ve made several speakers through my little DIY career. This is the first pair of speakers that I’m making entirely from someone else’s actual plans – rather than only shooting for an internal sealed volume.
I chose “Speedsters,” a design by speaker DIYer Paul Carmody. From all the reviews I’ve read, people have loved them; and are surprised with their sound despite small size.
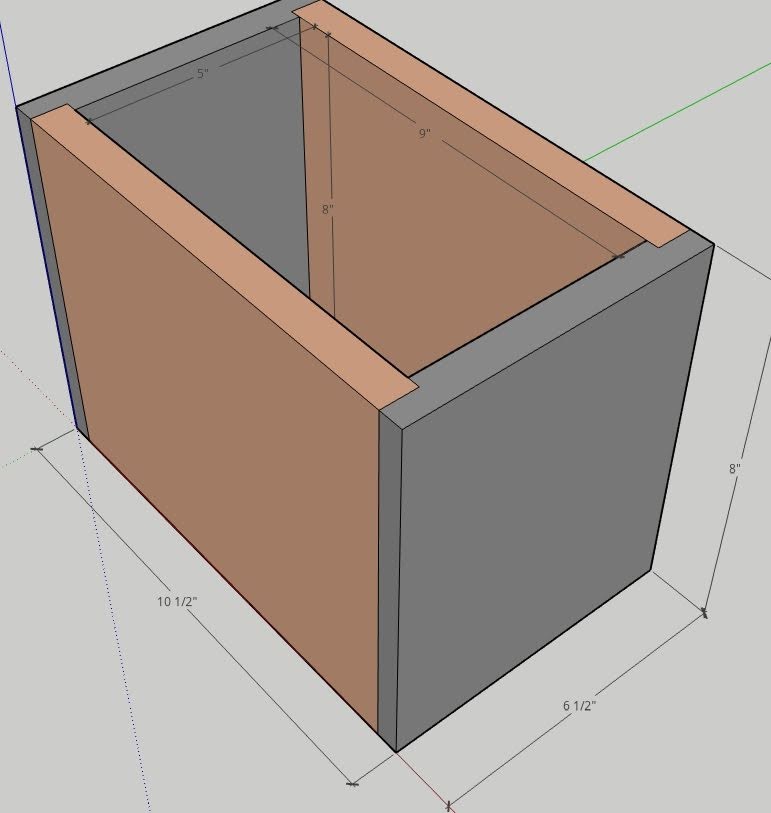
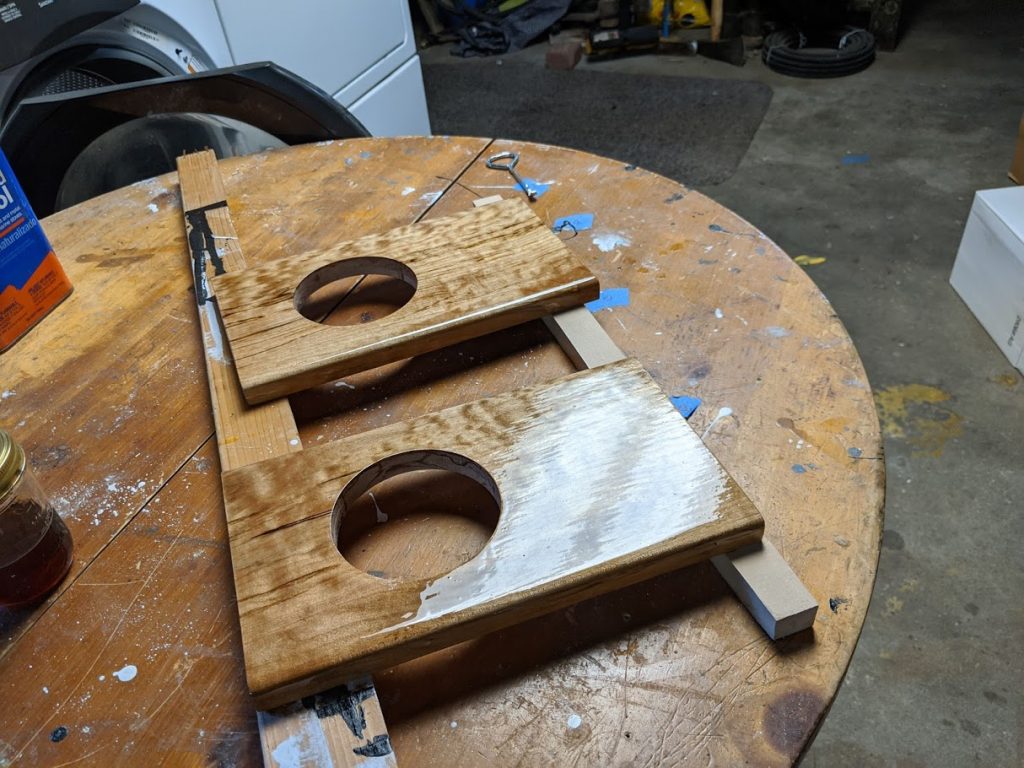
I’ve been starting out projects with a Sketchup drawing, and these Speedsters are no exception. I’ve been getting much better at it, and I think it falls squarely under the Measure Twice Cut Once dogma.
The built up boxes. I used 3/4in MDF, and managed to put some dado counter sinks in the side. Pro-tip here: leave the outside edge just a little proud (hanging over a bit). Then you can come by with a flush-cut router bit and make them perfect.
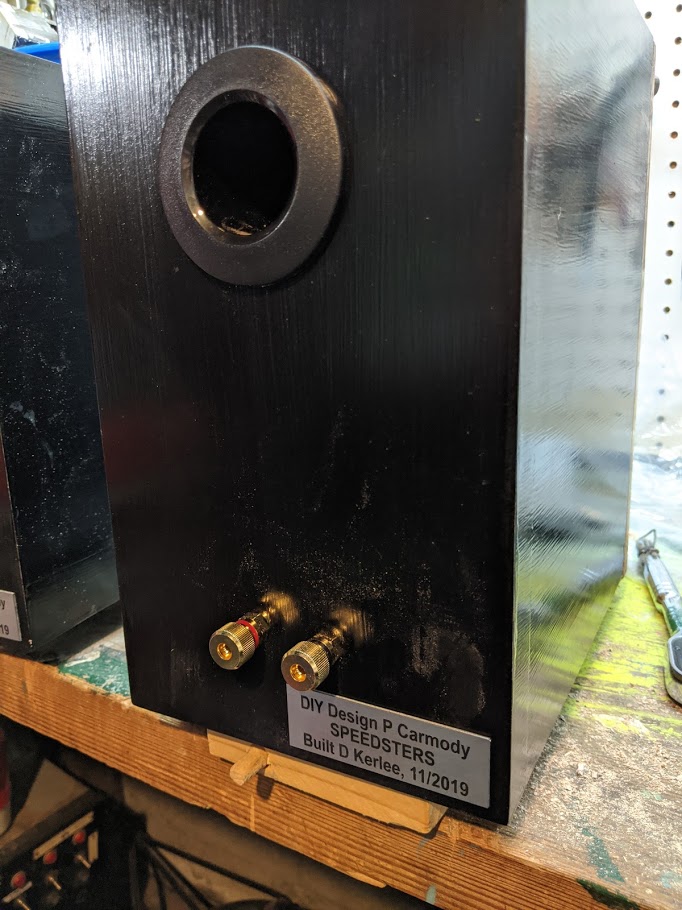
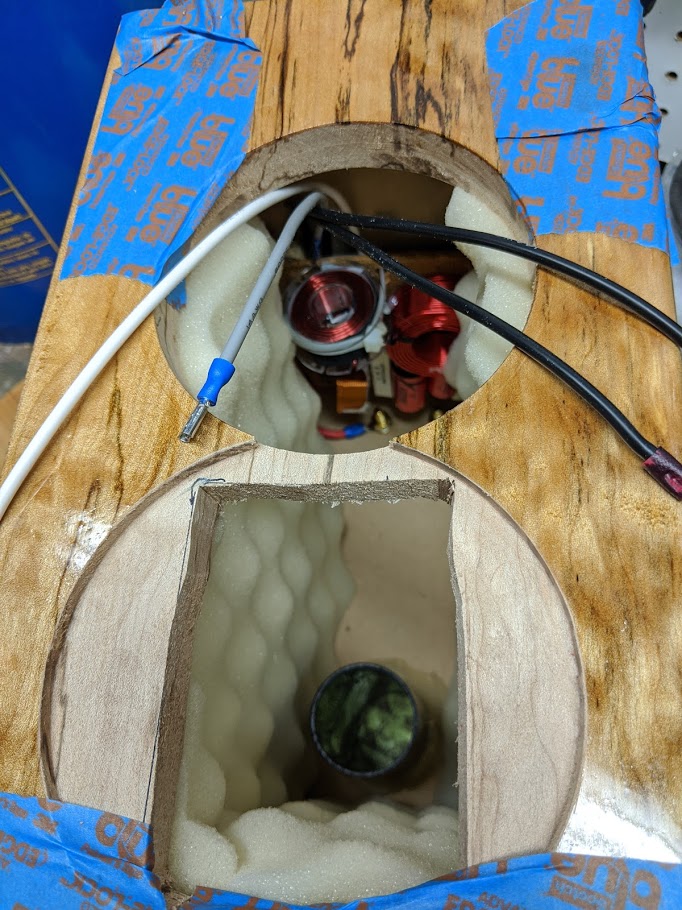
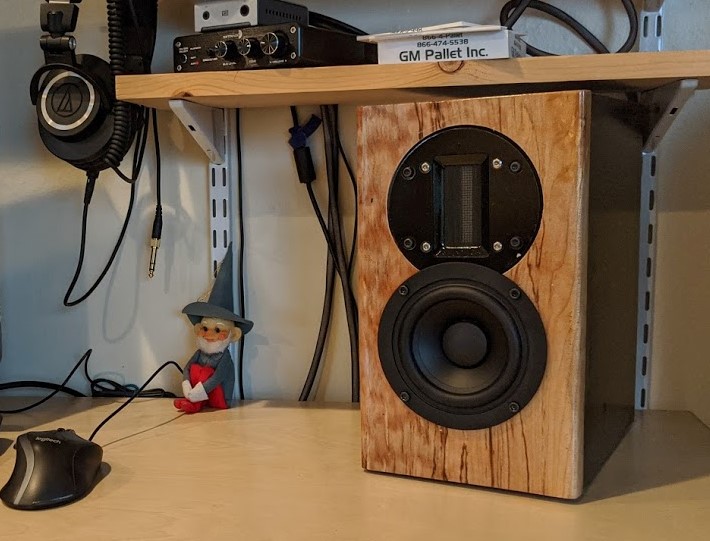
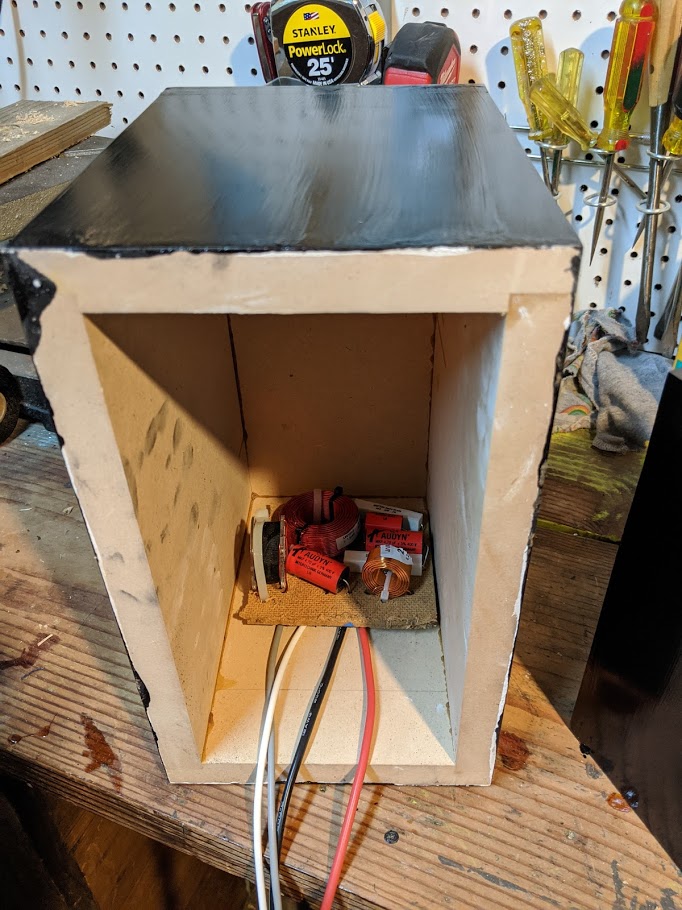
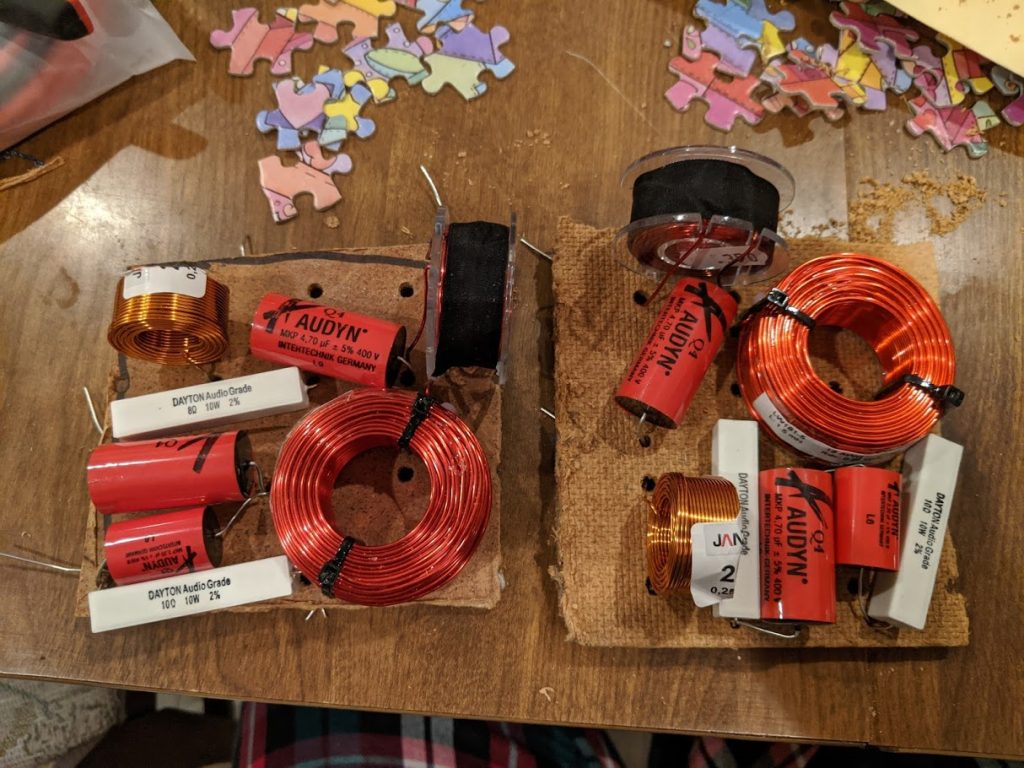
Above you can see the rest of the gallery pics. Cross-over, the varnish job, and final product. I had some little name plates made from some outfit on Etsy, they turned out great. I used 1/4 cut wine corks to screw the cross-overs down to the enclosure and hold them off a bit. And you can see the padding I put in there too.
Overall I’m super impressed with these little guys. They’re sitting on my desk at the moment as near-field computer speakers. I had a woofer hooked up earlier, but turns out they don’t need it. The tweeter is amazing, and I’m hearing new levels of depth in all my music that I hadn’t heard before. While they were a bit spendy to build, I gotta say, I’m really impressed with the quality they crank out.
I’ve heard these $90 isolation stands make a noticeable difference. So a pair of those, and upgrading the amp/dac to a PS Audio Sprout 100 is next on my list!
*** You’re going to need about 12 hours to make this rocket *** I’ve seen (and done) hot-glue slap-dash rocket builds, and it ain’t pretty. But do what you can!
A note from Robin to her friends: I don’t want to say anything. fffffdfththth what does that say? what did you say? Why did you do that? ffffththththt hehehhhheeee hahaha why are you doing that Drew?!?! kkkkkkkkthththhththt you farted! kkkkheheheh what did that say Drew? WHat are you writing? what did you say drew? Why are you saying?? If it’s too loud, you should bring some headphones. Like these: amazon $13. Robin says the rockets aren’t too loud to me, but some kids might think so. And, by the way, there’s a Geocaching Headquarters in Seattle. I had a great time there! Here’s a pic.
The Facebook event for RSVPing. If you’re not on Facebook, no problem. Message myself or Alison using whatever method you’d like.
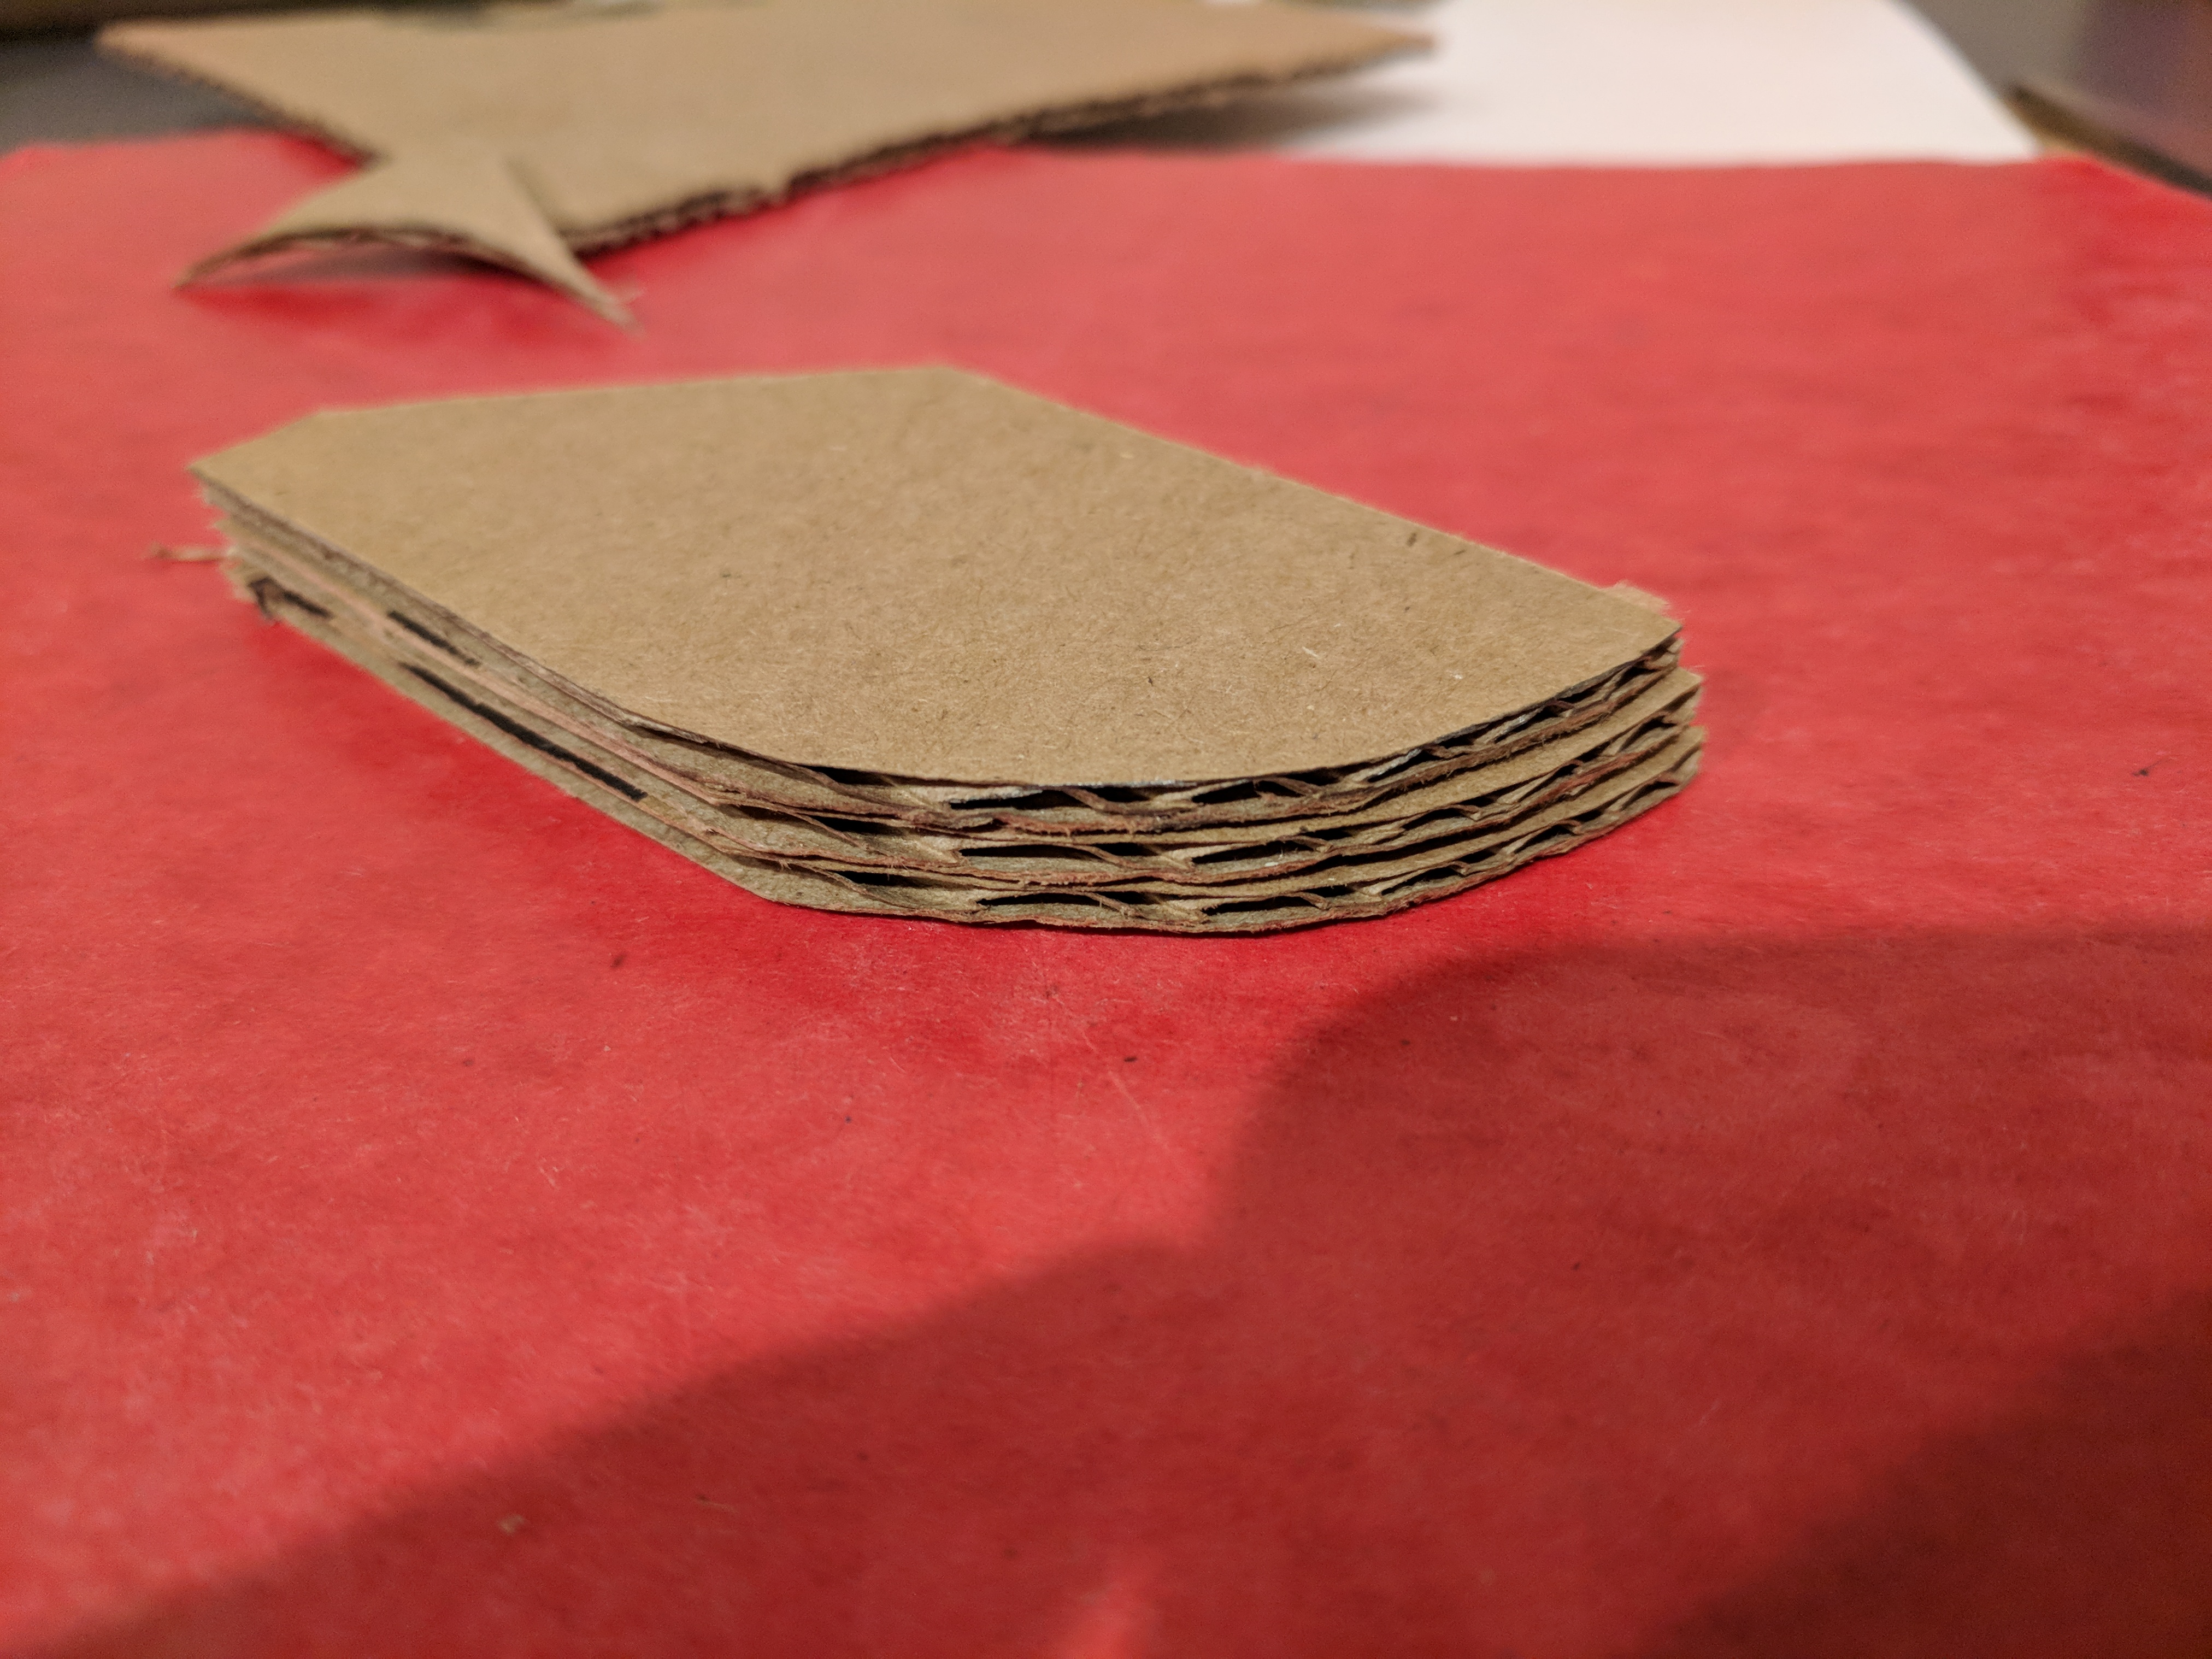
You should have one of two kits, the Fiesta (three fins, streamer recovery), or Tristar (two two-part fins, parachute recovery). You’ll make this in a few rounds of glue-drying, which is why it takes 12-24 hours.
Each rocket has it’s own instructions. These instructions and videos are additional tips, pics, and videos for helping things go a little smoother.
First round gluing and assembly
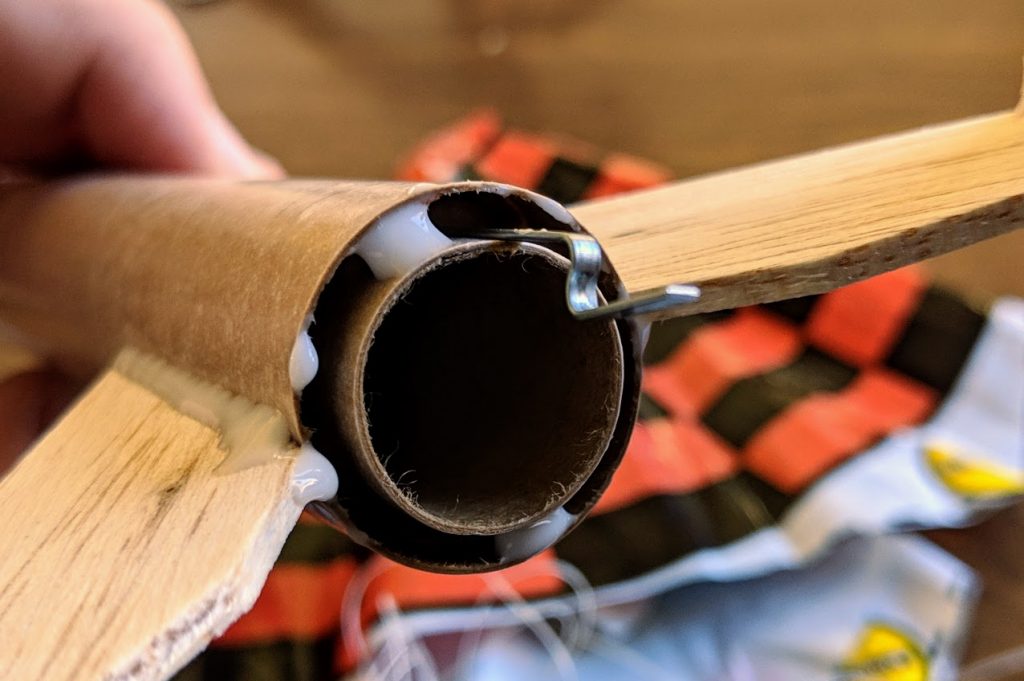
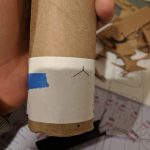
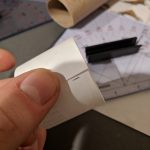
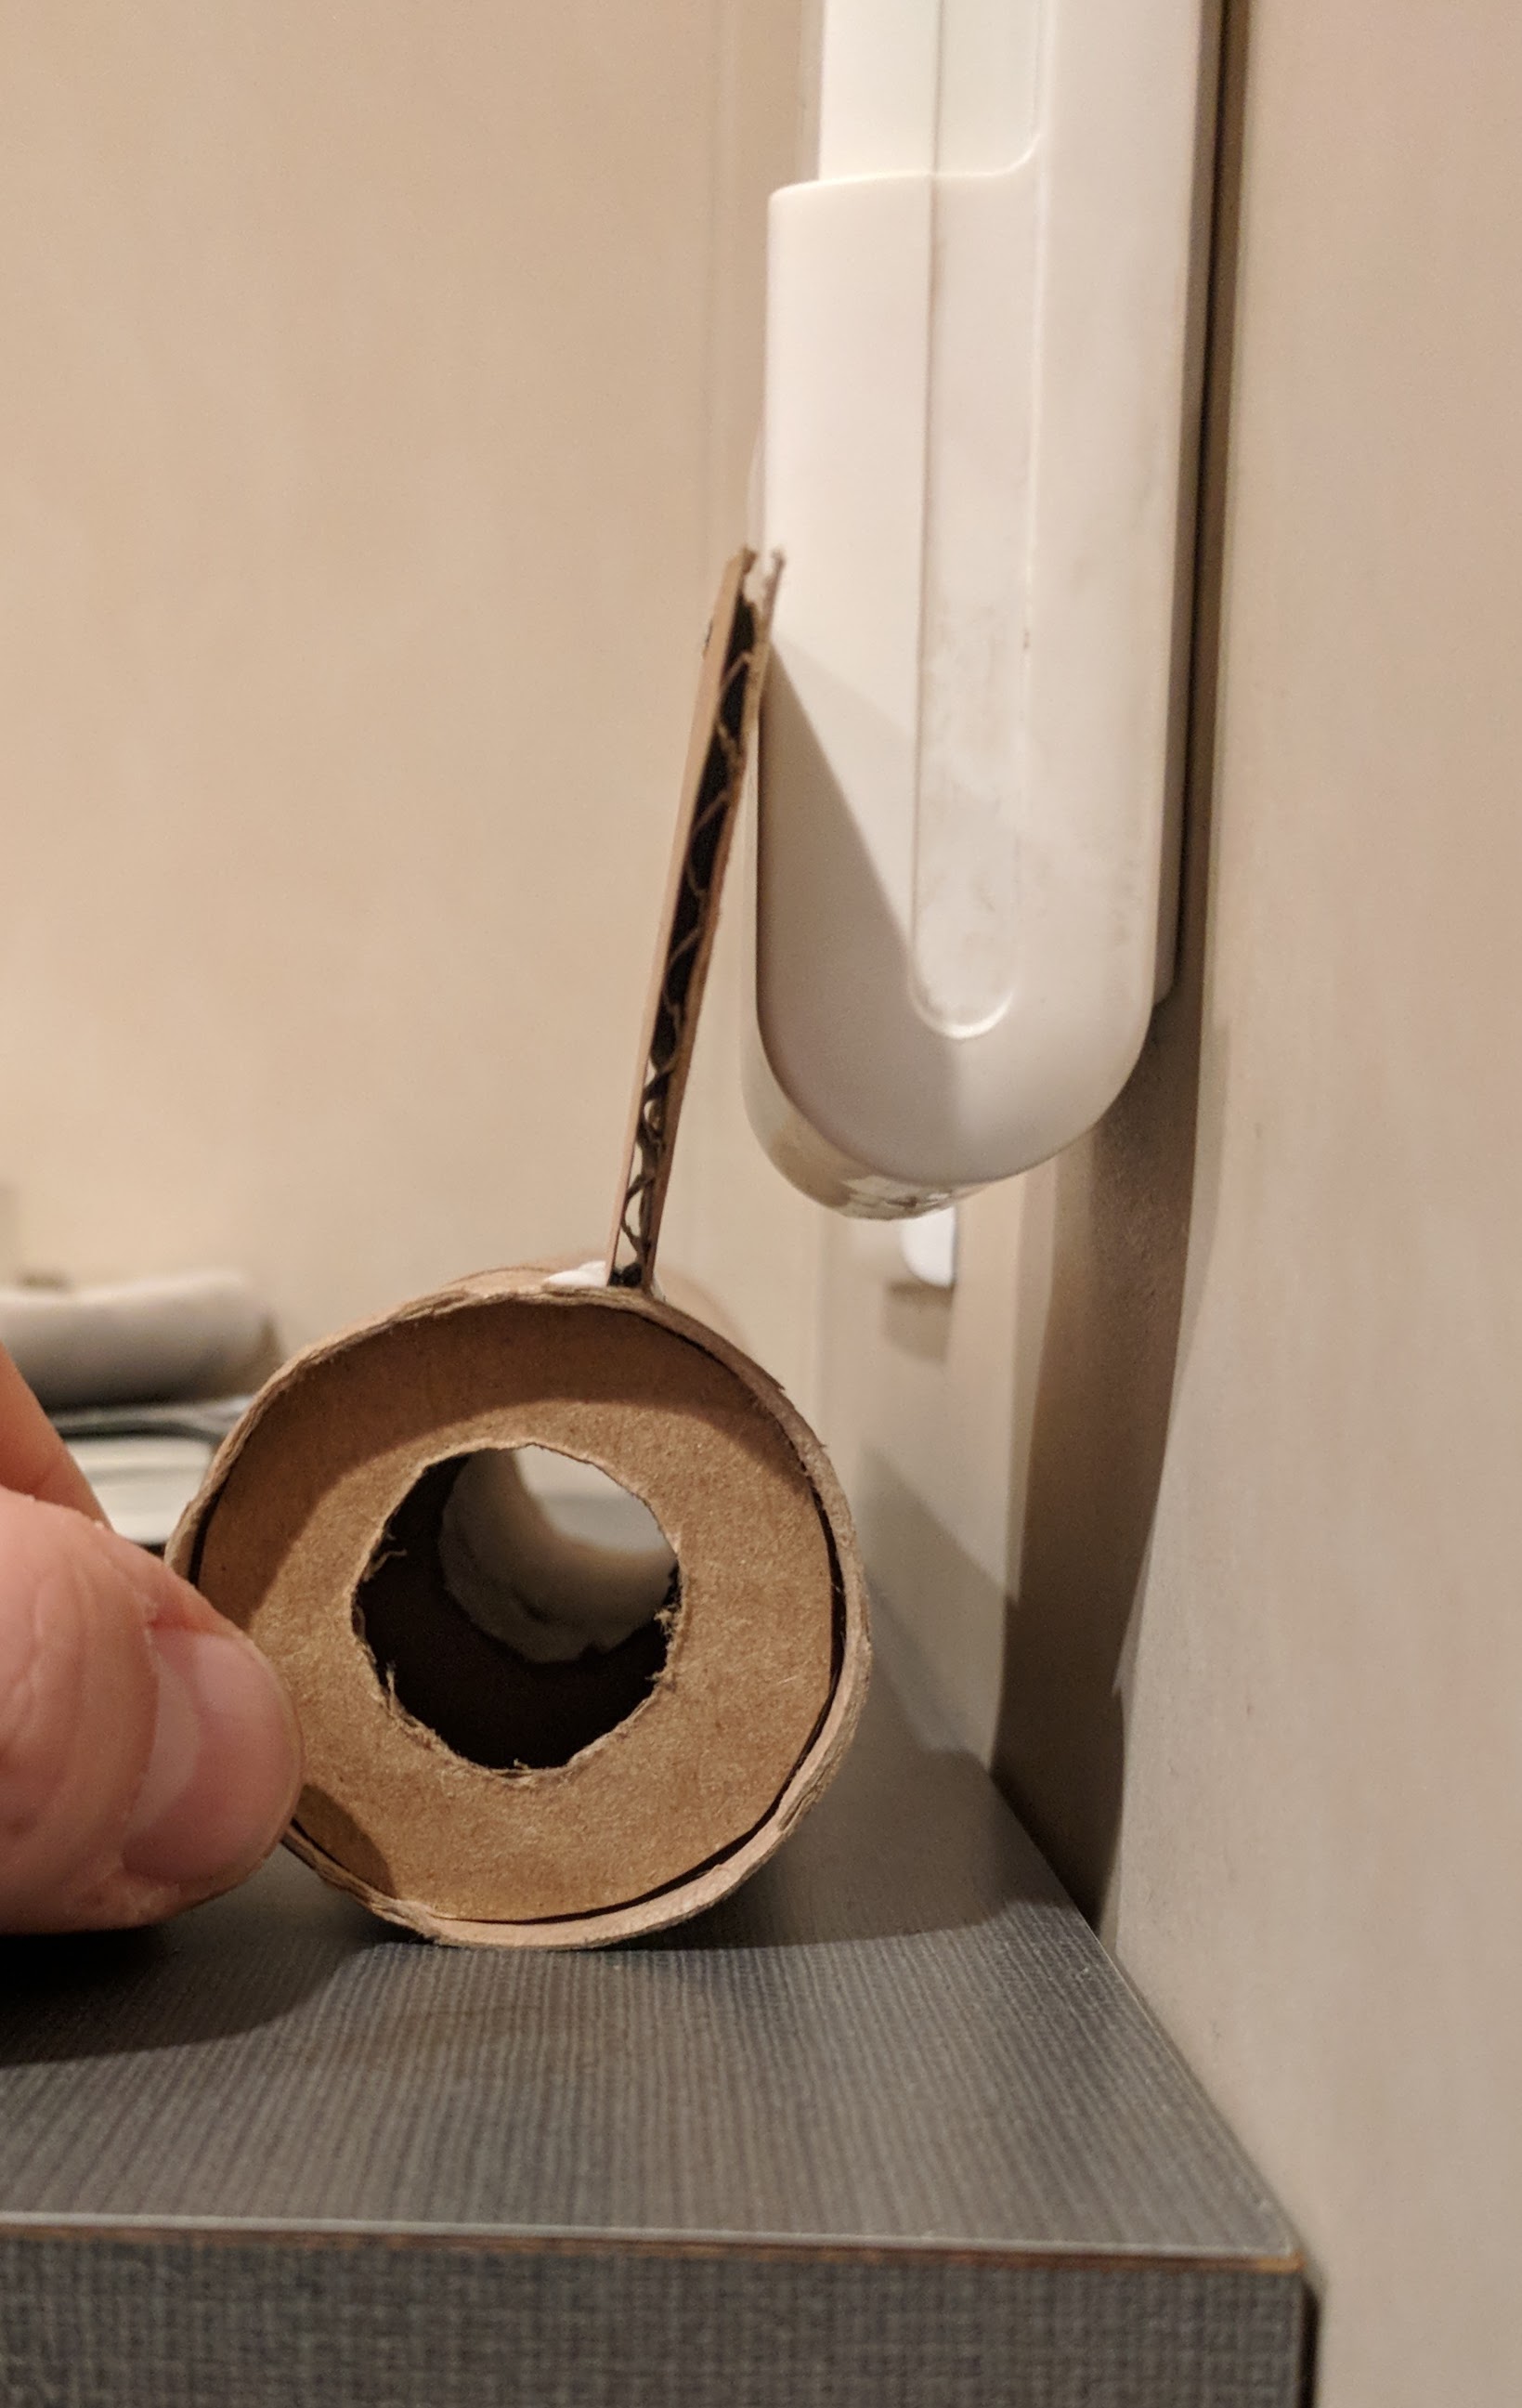
Engine mount – for the engine mount, you’re going to measure a length and make a small incision in the tube that one end of the motor clip will go into. The other doughnut looking things will hold that metal clip in place. Put a light bead of Elmer’s glue along the top and bottom sides of both doughnuts, so four beads total. There’s a single smaller doughnut that is going to go inside the top end of the tube. Put a light bead of glue in the engine tube, and twist slide that guy into place. It should butt up against the piece of the metal clip that’s protruding into the engine tube.
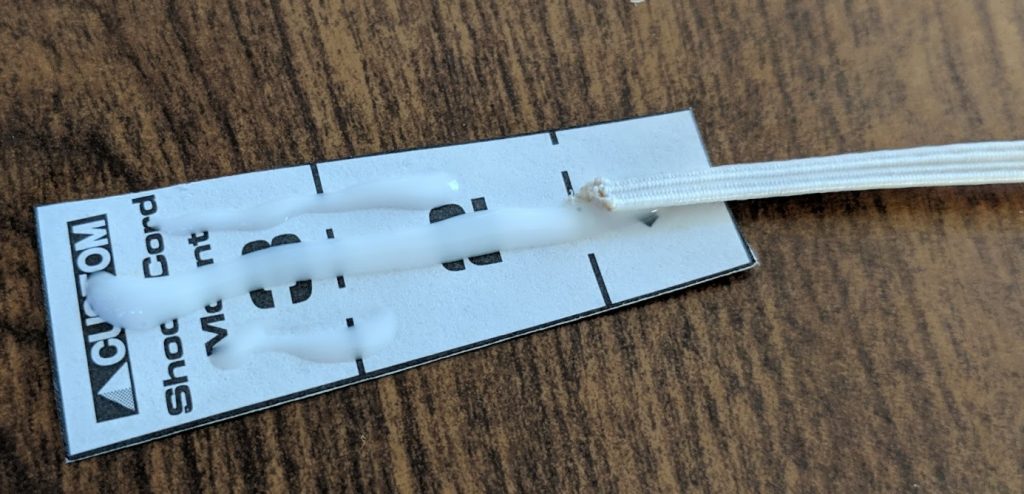
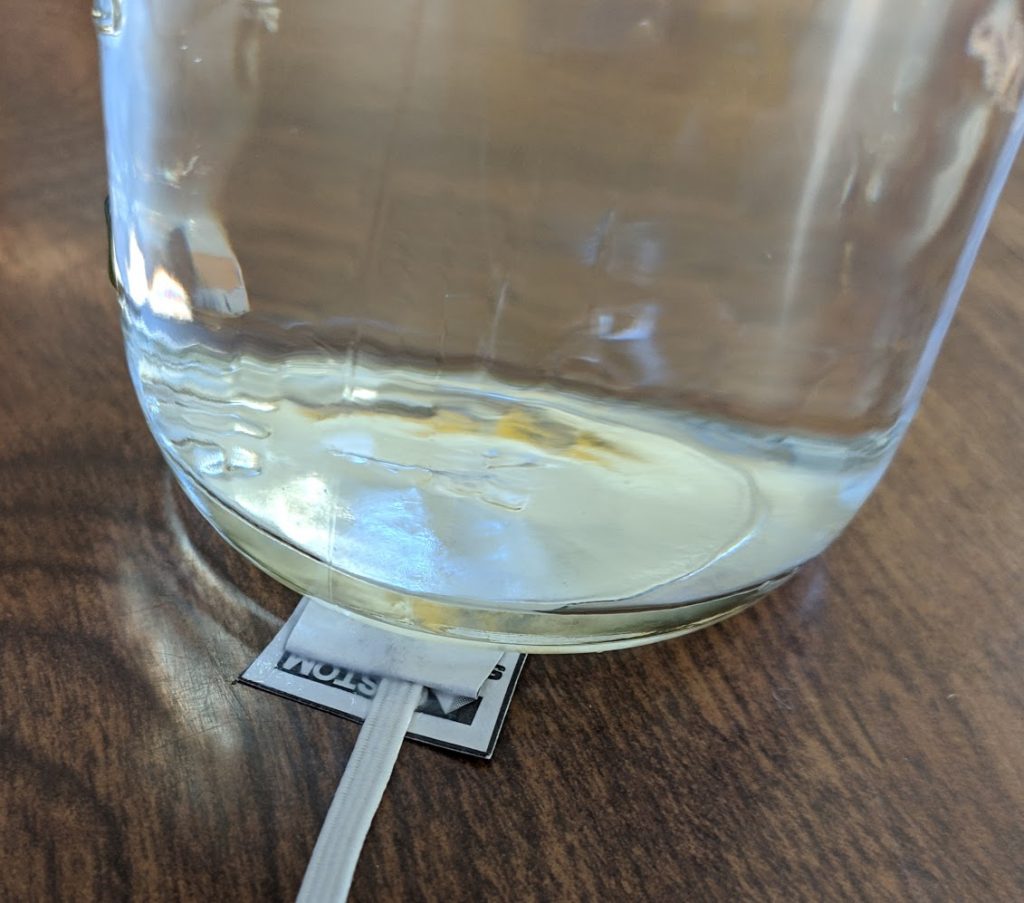
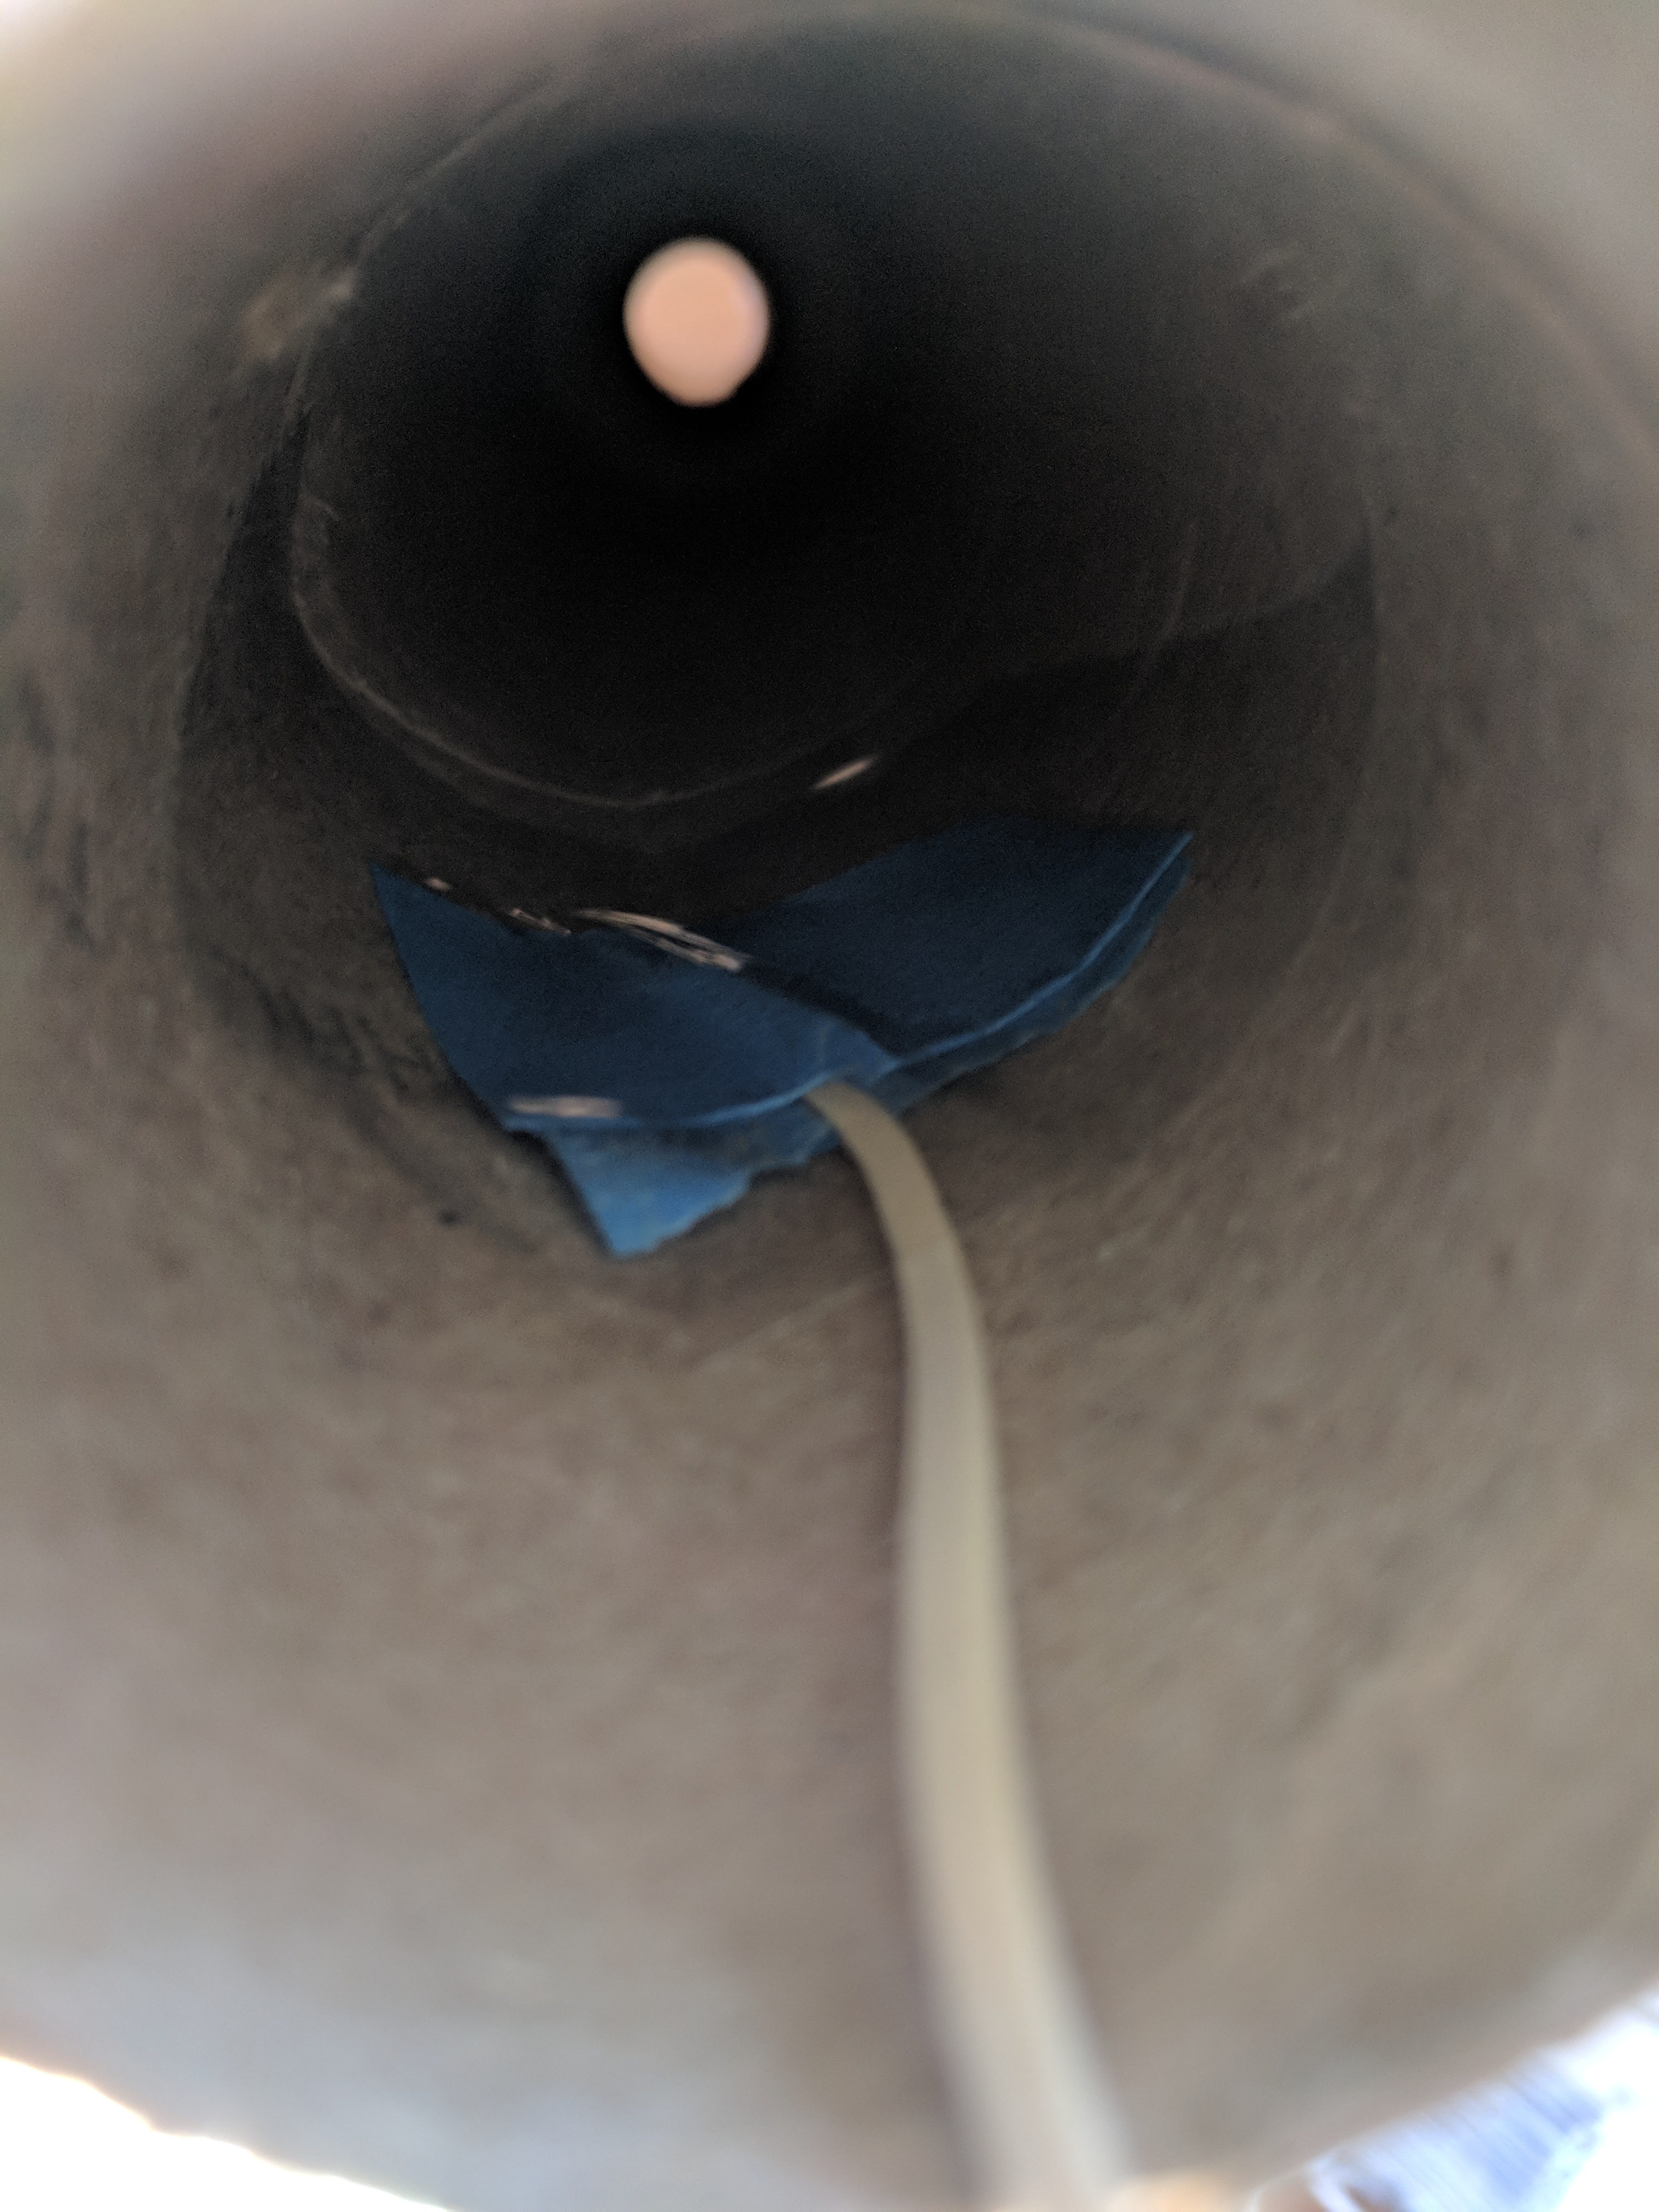
Recovery system – both versions of rockets will have a small polygon cutout. Use plenty of glue to wrap the shock-cord up into the tri-fold of that paper polygon. Once you squish it together, glue will be coming out, that’s good. Put a small weight on top to hold it while it dries. You can attach the parachute to nose-cone, or streamer to shock-cord at this point also.
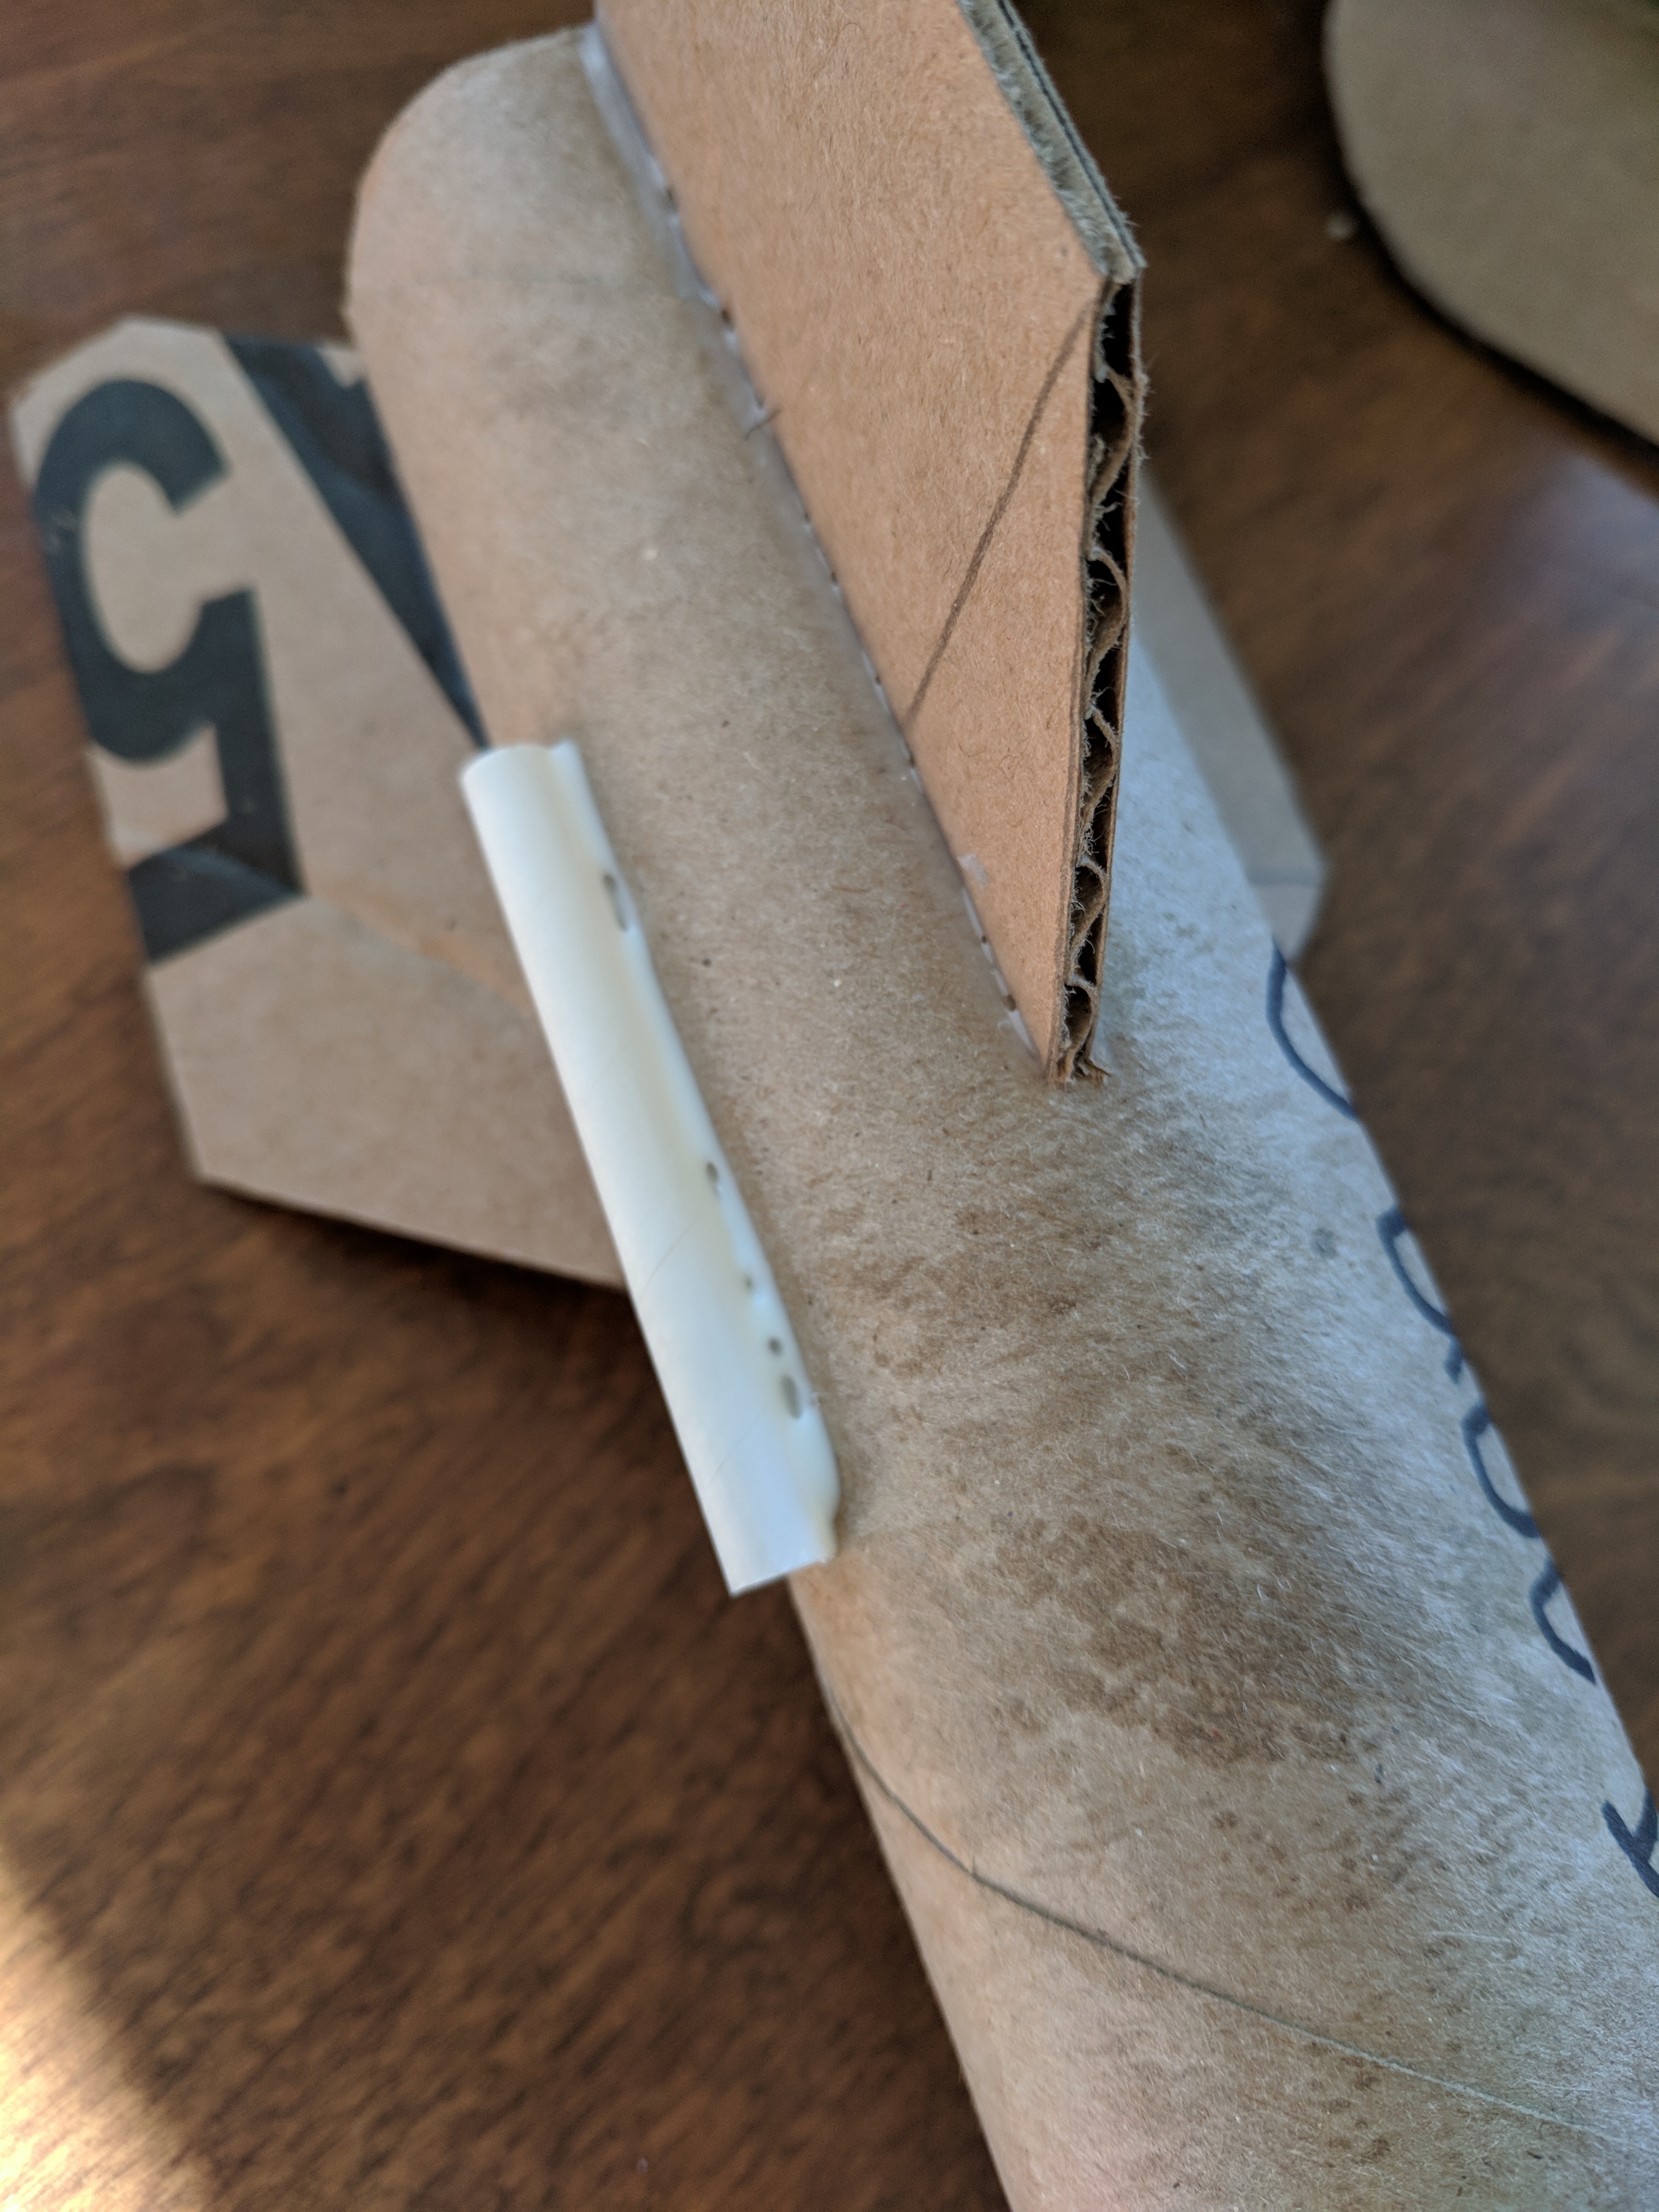
Launch lug – This is what holds the rocket prior to lift off, and gives it it’s initial direction from the launch rod. It doesn’t have to be perfect (none of this does!)
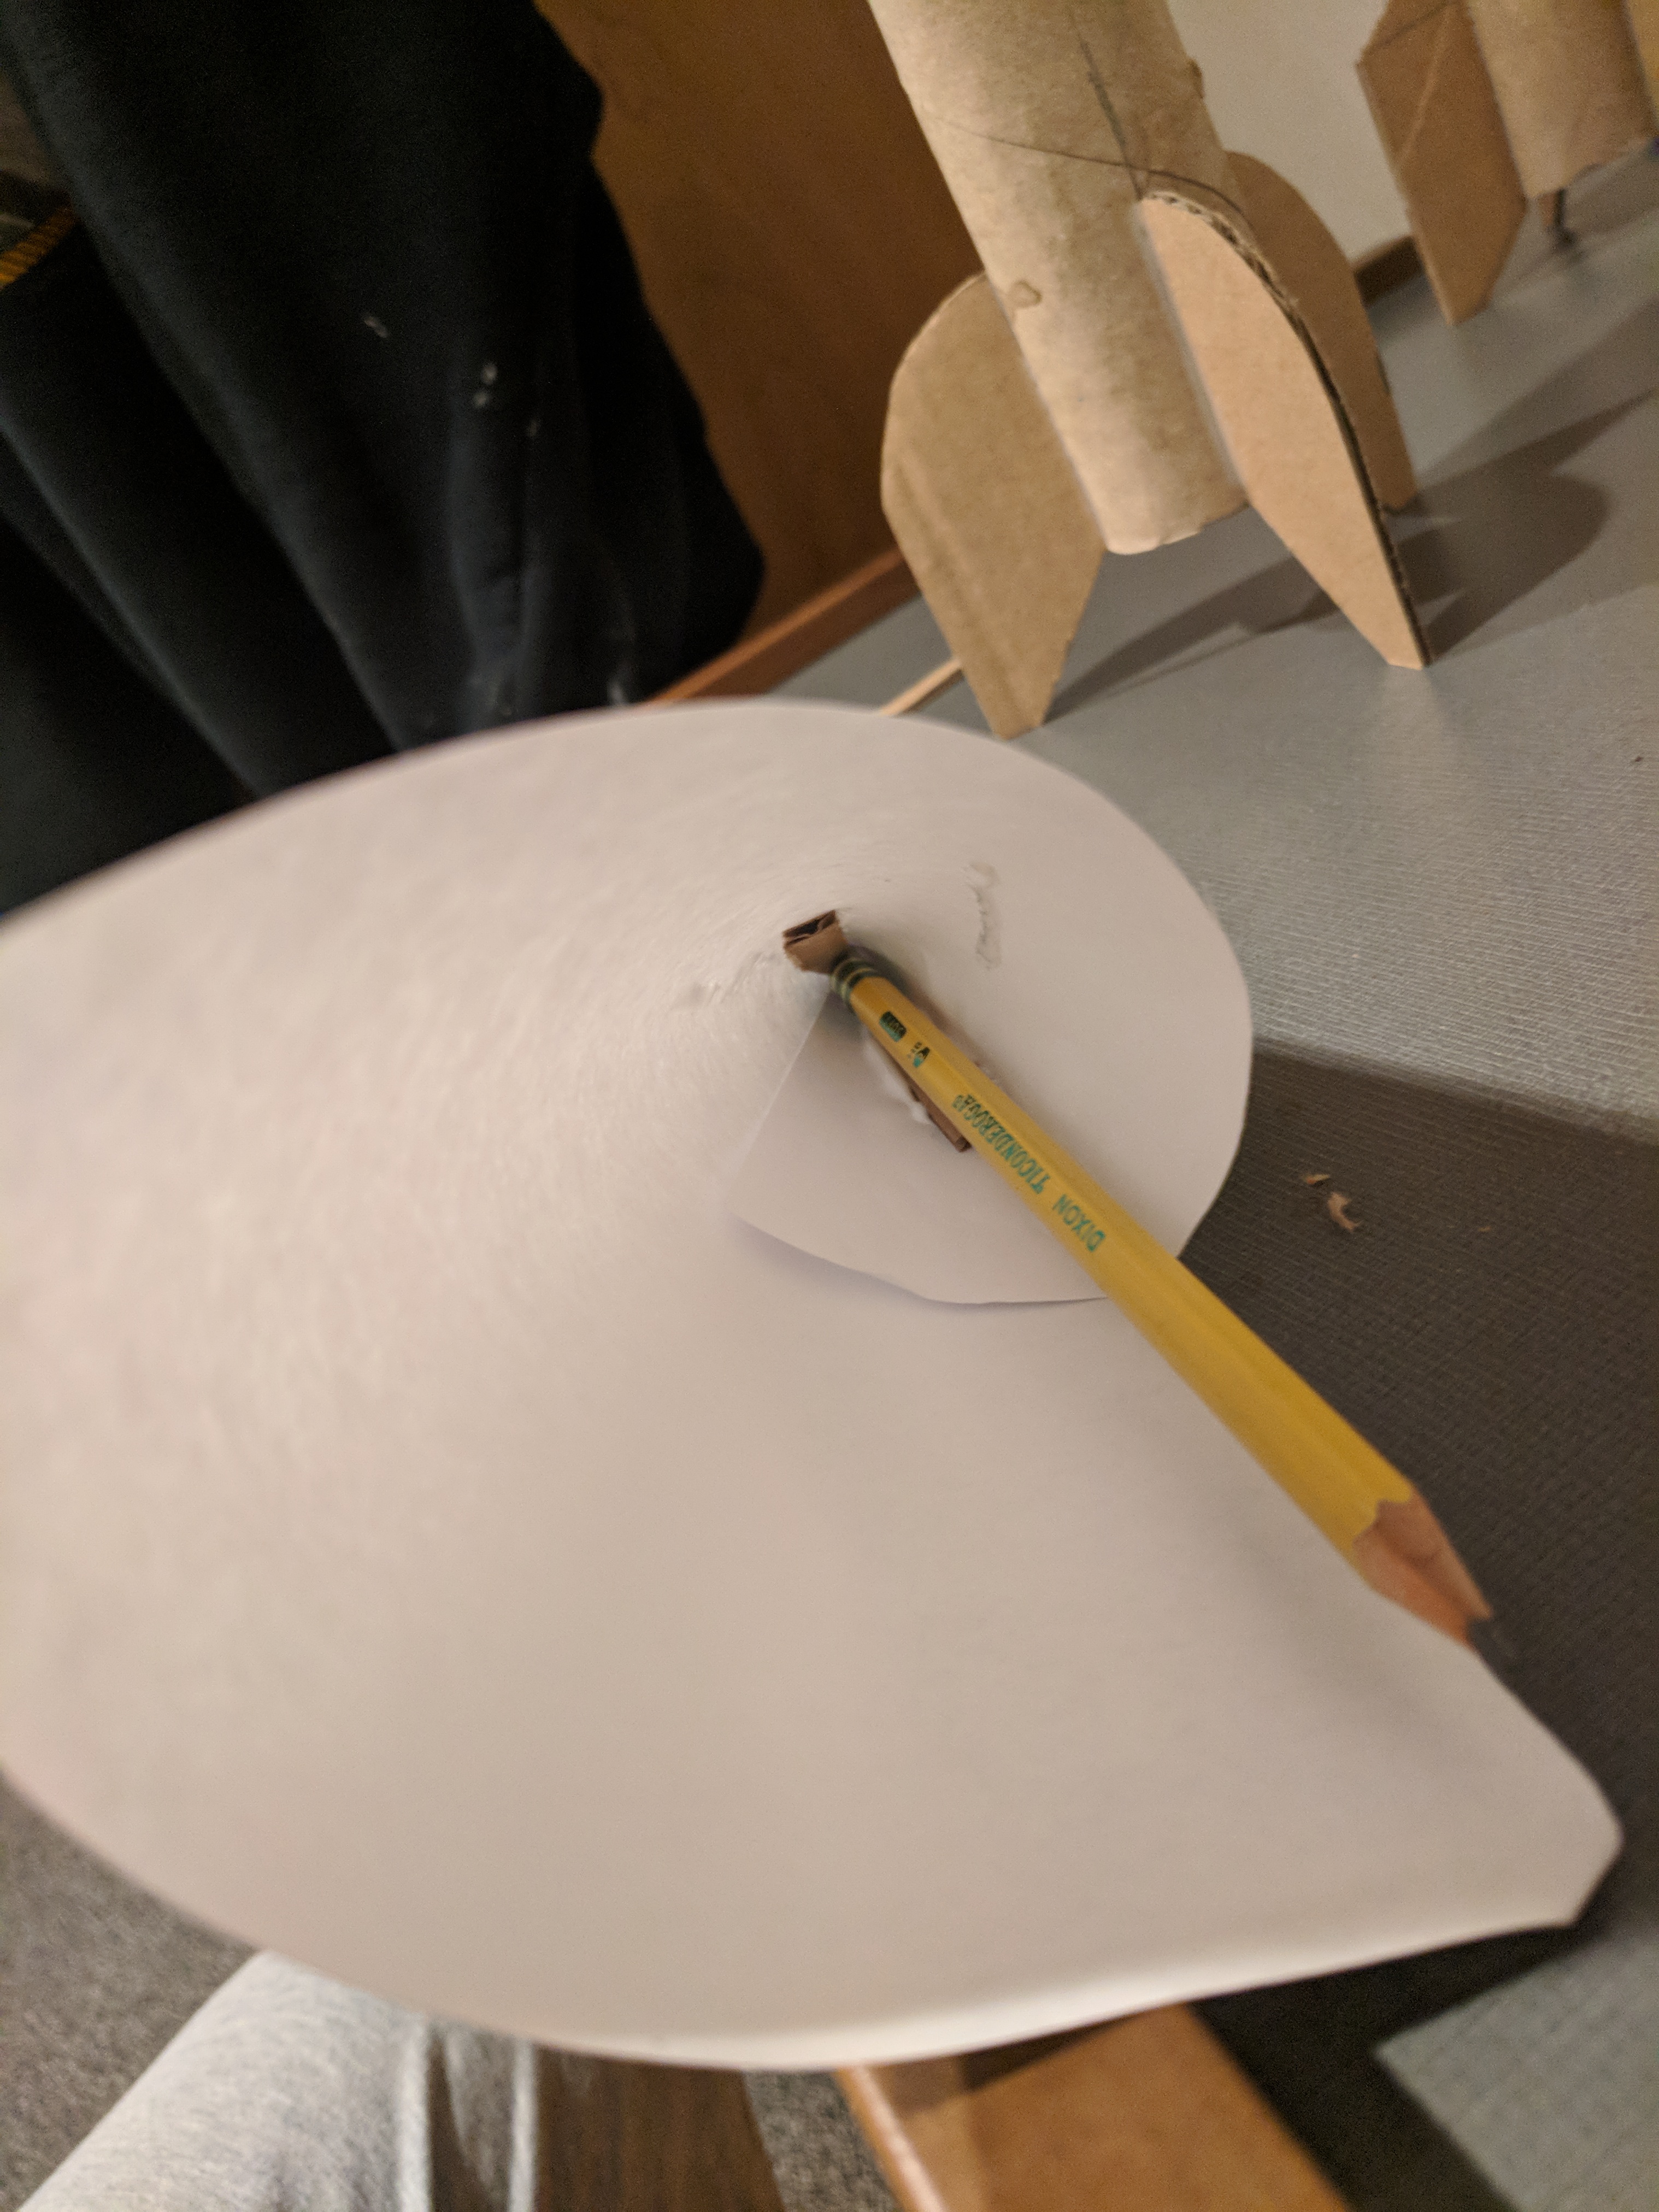
Fins – one of the more tricky parts of construction. There are two main tips here for fin: use a door jam with the tube and pencil to make your lines. And second once you get the fin on, lean it against something to sit basically correct while the glue kicks. Between those things, just eye-ball it, you should be close enough. Each fin requires one round of glue and wait. A video of course
Engine mount – you should use a leftover piece of balsa wood as a glue paint brush. Make a couple marks on the tube with the engine mount, so you can visualize where the mount rings will be inside the body tube. Hold the piece of balsa wood up there where you should wipe the glue on the upper engine mount ring. While the piece is on the outside, it’s easy to see how far you should put it in there. When you put some glue on the stick, you can stick it up there to your mark, and start wiping it around the inside of the tube. Stick the engine mount up in there, before the second ring goes in, cover that with glue all the way around. Up we go, and bob’s your uncle. A video of what I’m talking about.
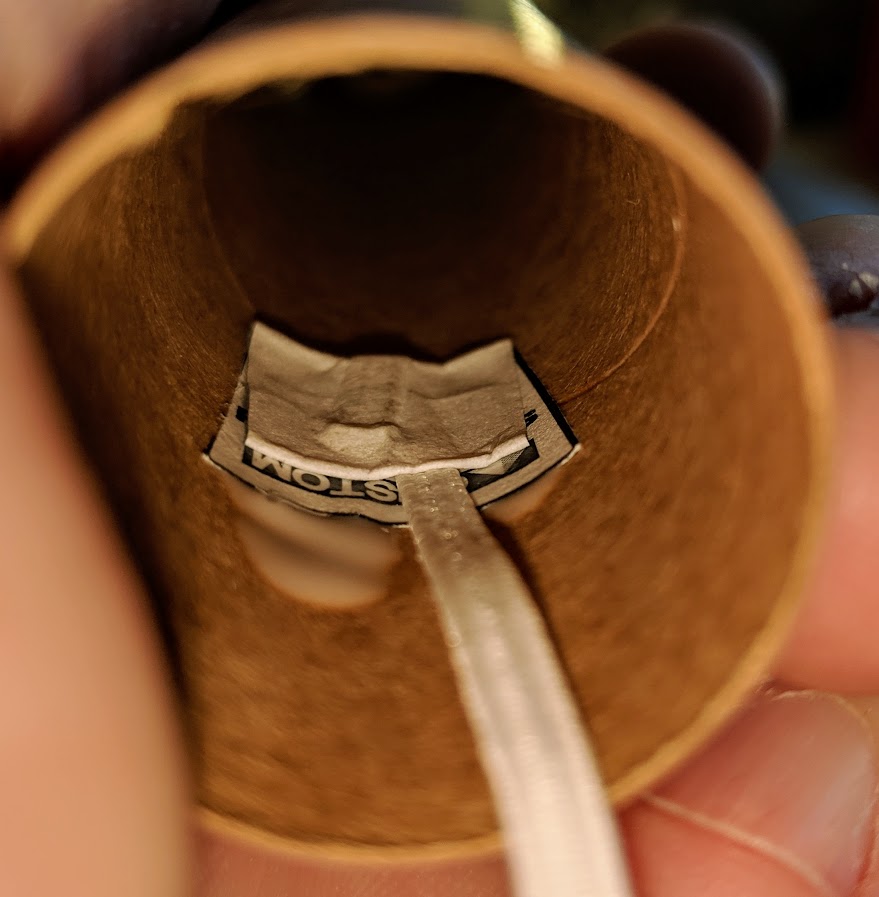
Shock-cord and nose cone to the body tube. The folded-paper end of the shock cord has to be at least far enough into the body tube so the nose cone can slide cleanly into the body tube. Be careful not to get any glue on the part of the tube the nose cone will be in contact with. Ideally, the nose cone would fall out of the rocket if you turn it upside down. Bend that tri-folded piece of paper so it pretty much holds the shape of the inside of the body tube. Put some glue on the outside of the paper, and give it five minutes to set up. Carefully put the paper into the tube, and pinch it against the inside of the body tube. Once you release it, it should stay right where it’s at. If it bends away from the inside of the tube, just keep holding it. Mounting video
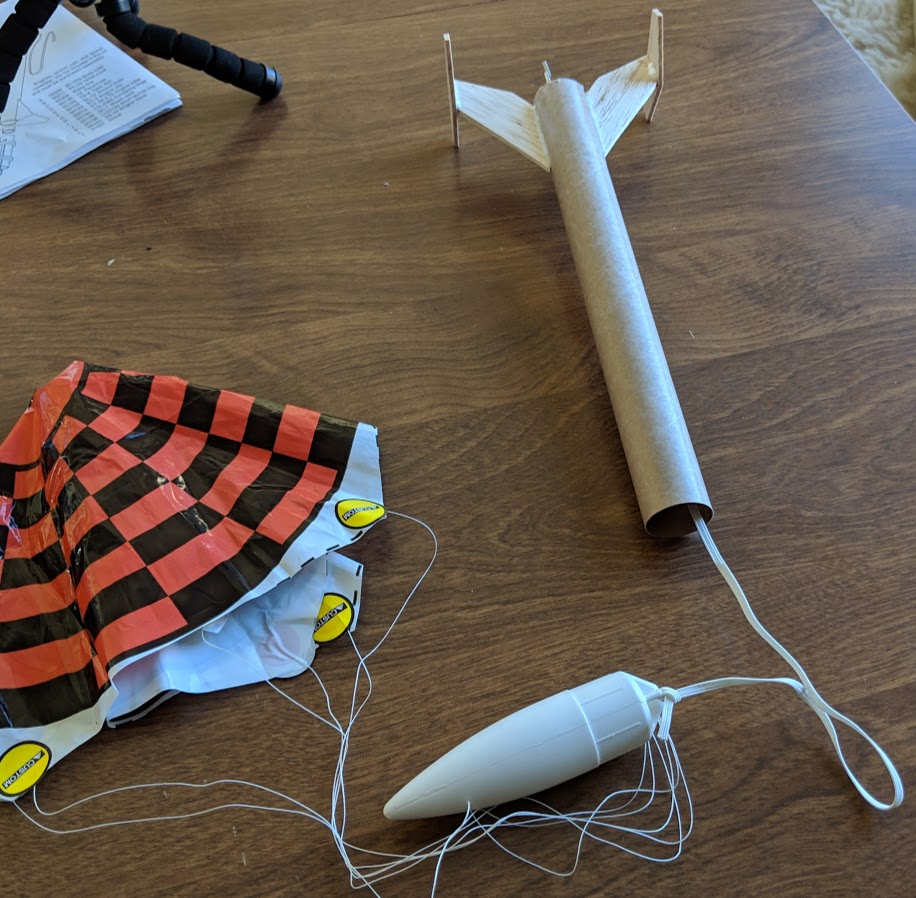
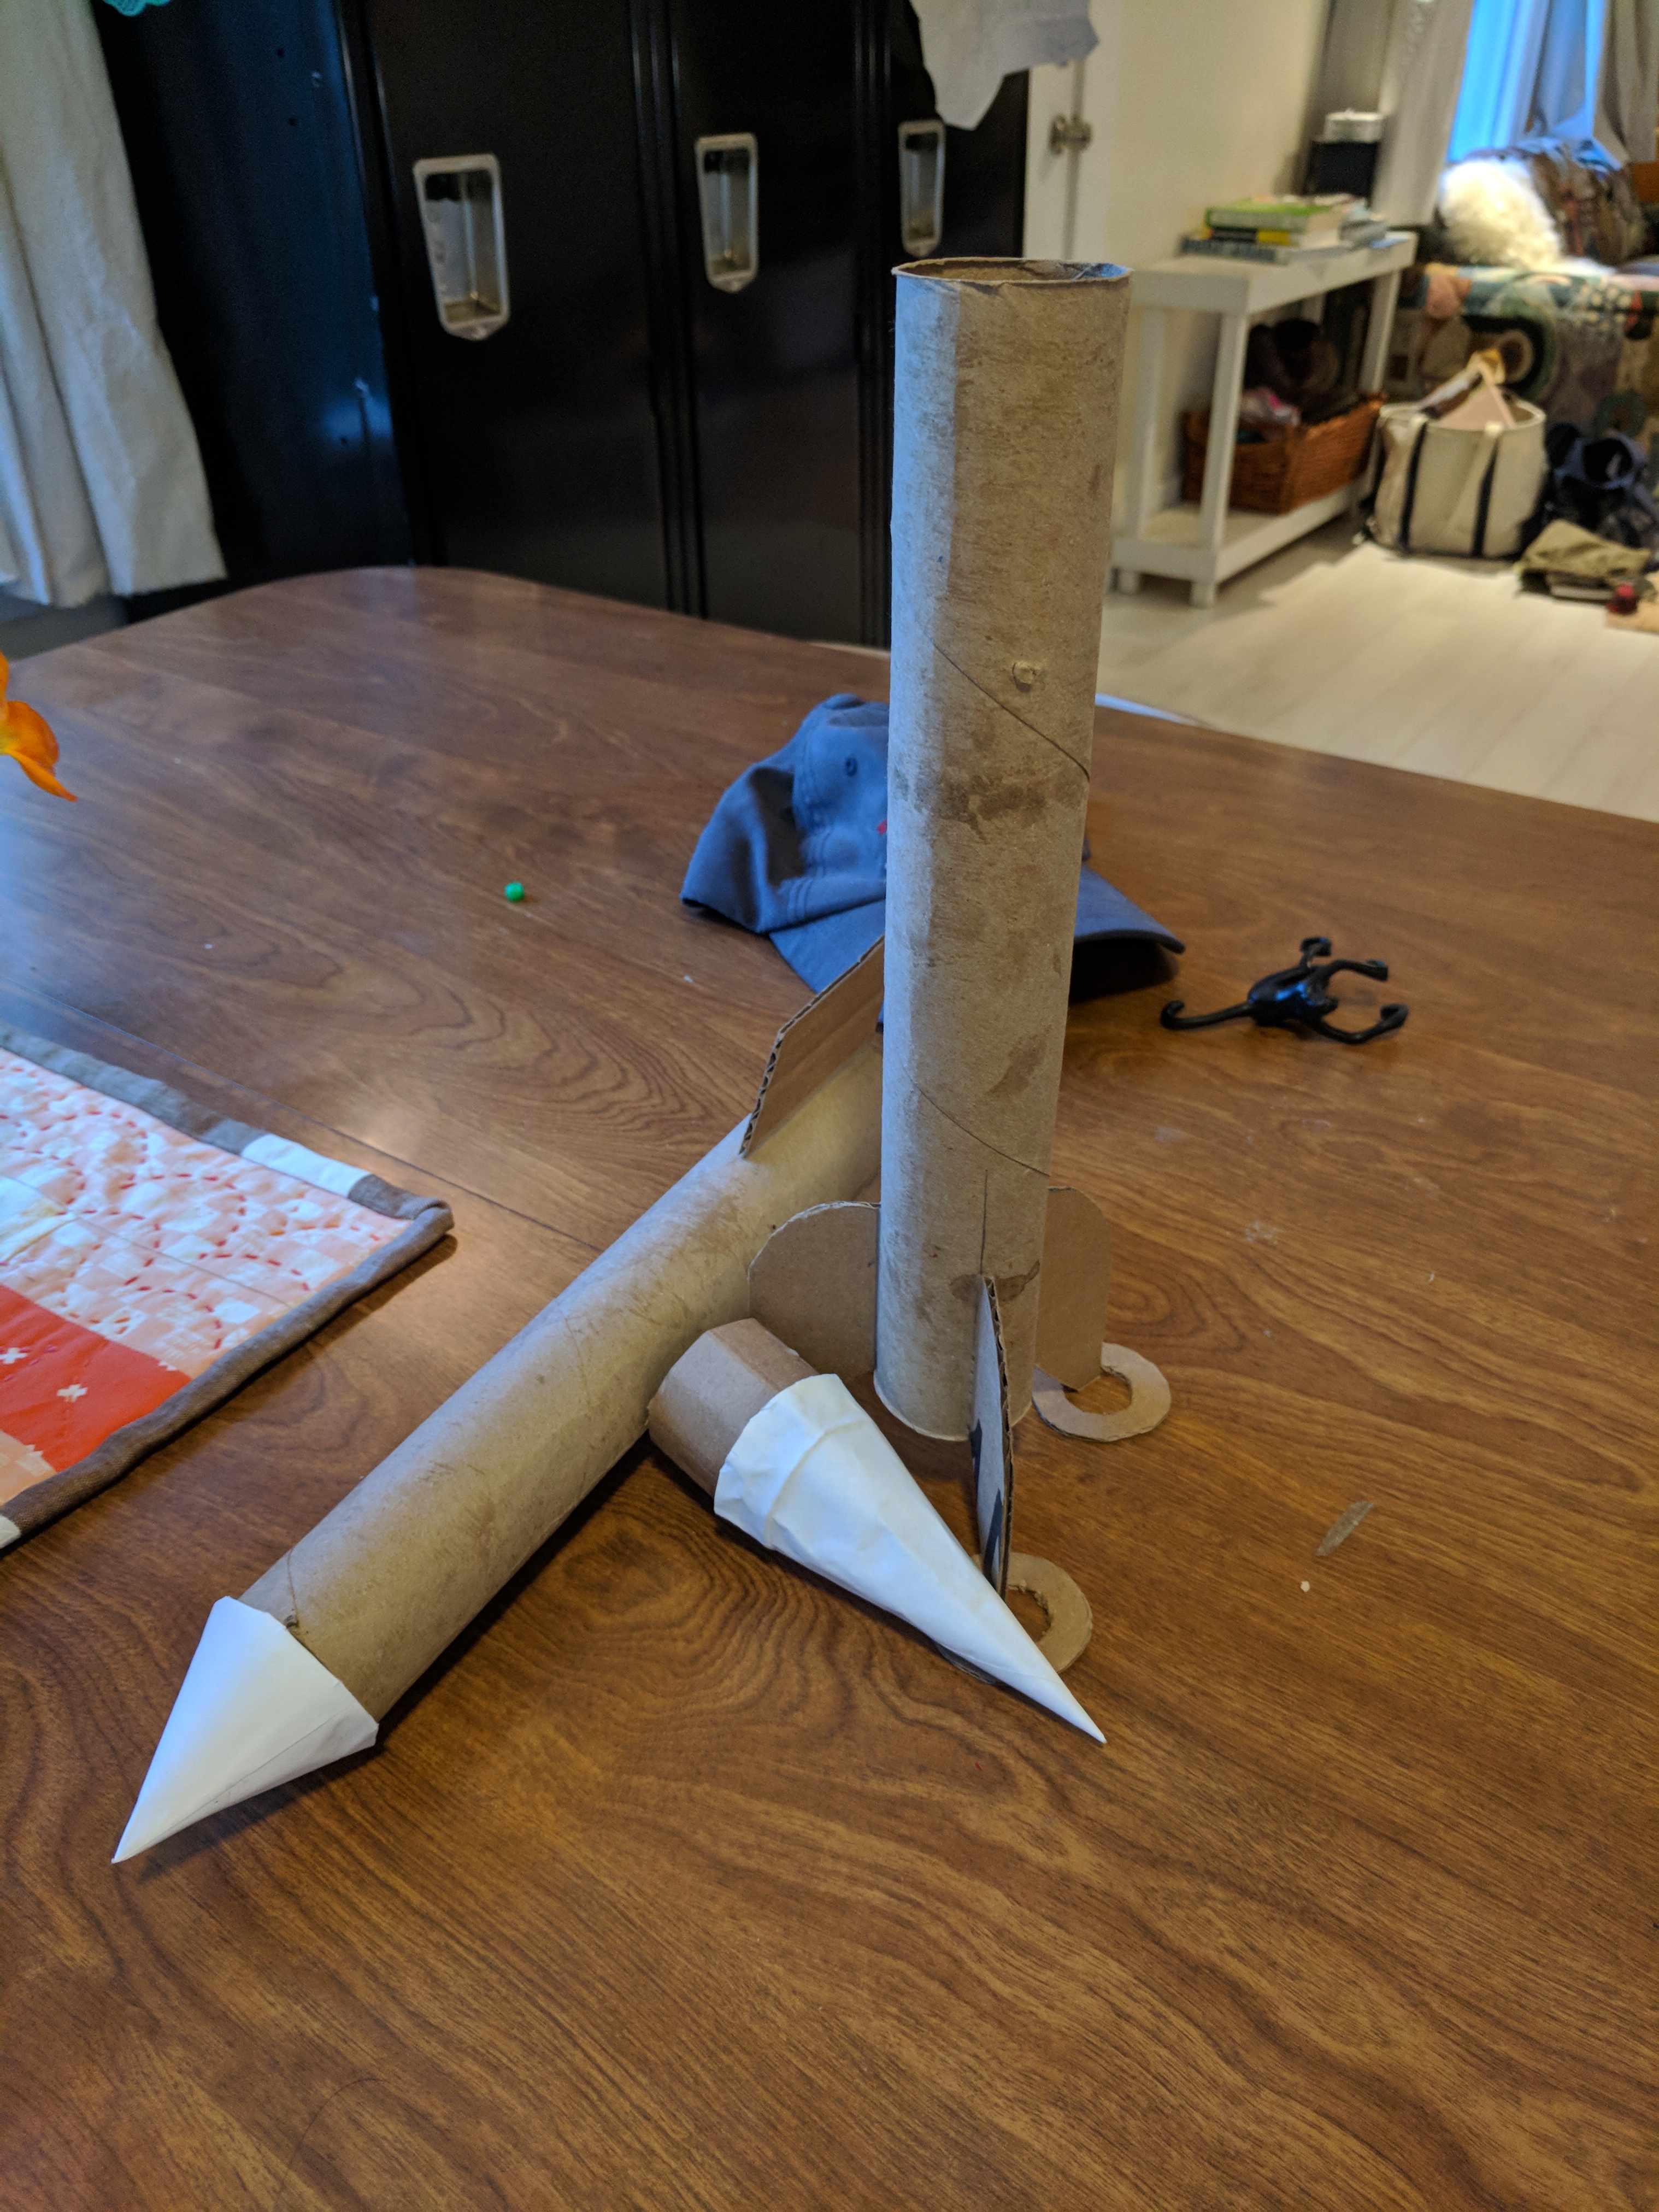
the finished rocket
Engines, velocities, and other fun facts
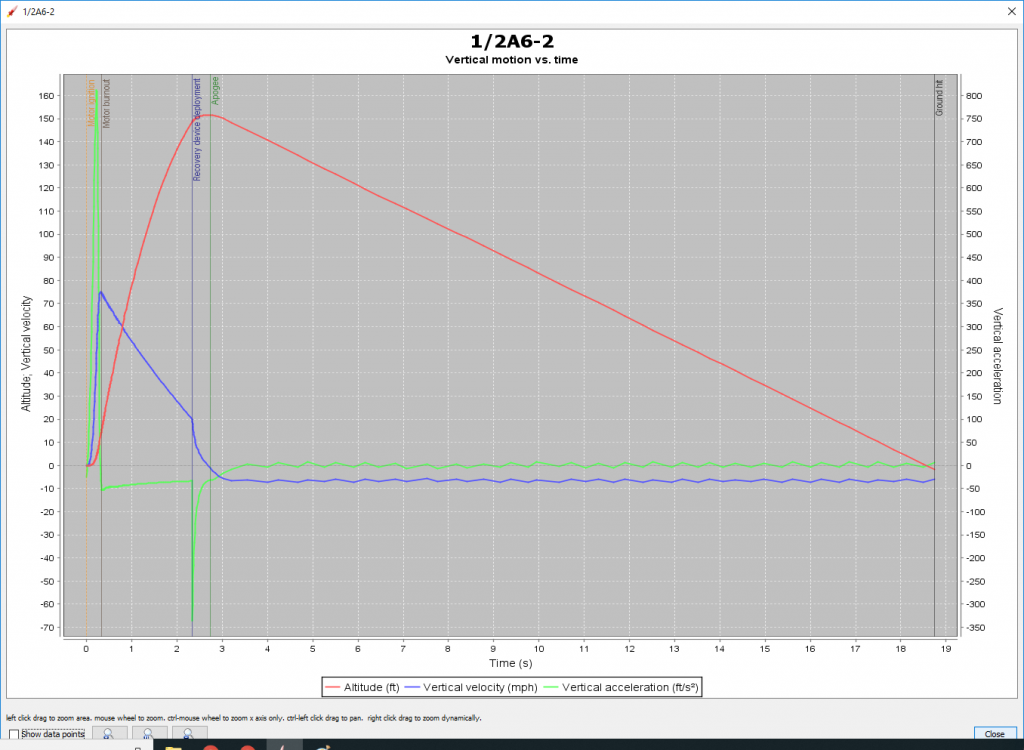
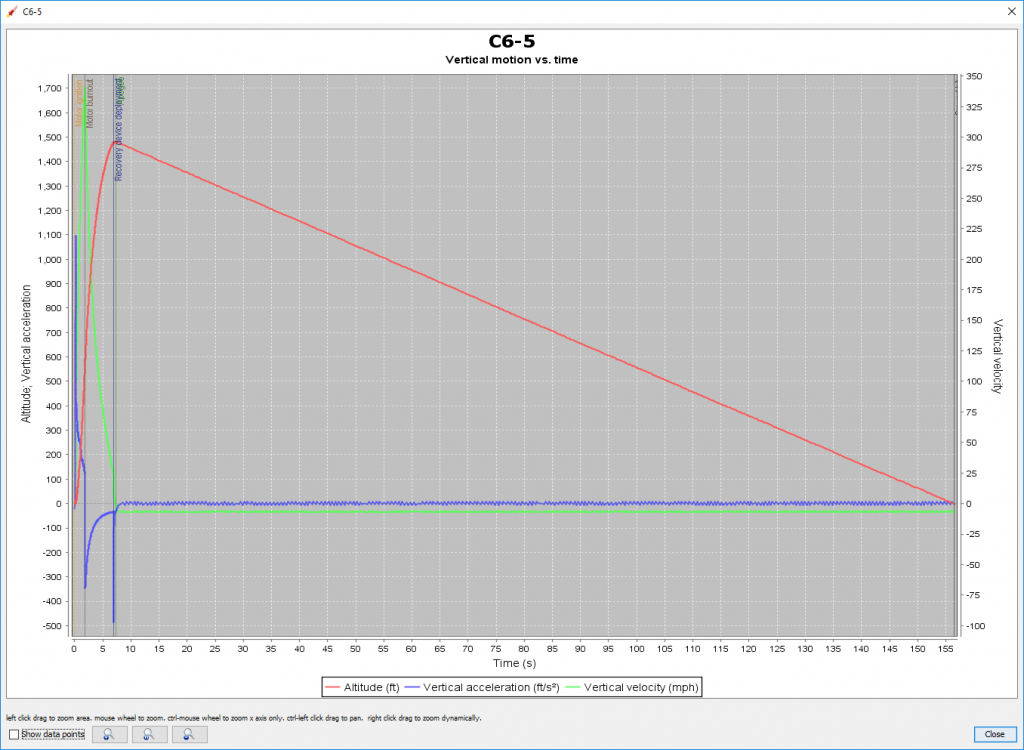
I’ve got this neat rocket simulation program. It will give me a good idea of what to expect from various rockets, if everything else is nominal (normal).
Estes black powder rocket engines have been around for years. They are divided up by both diameter and impulse. Impulse is how much a thing pushes. The first part of the designation is a letter then a number (B4, B6, 1/2A6) signifying the impulse. Then it’s followed by a dash, then another number. The second number is the delay between engine burnout and the parachute charge blowing out. Ideally you want the parachute to pop out right at 0MPH, after the engine burns out, the rocket finishes coasting and the “nose over” point happens as it starts to head back towards Earth.
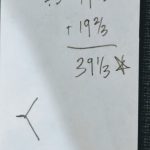
1/2A6-2: apogee 152ft, velocity at deployment 20MPH, max velocity 75MPH, max acceleration 812 ft/s^2, time to apogee 2.7 seconds, flight time 19 seconds
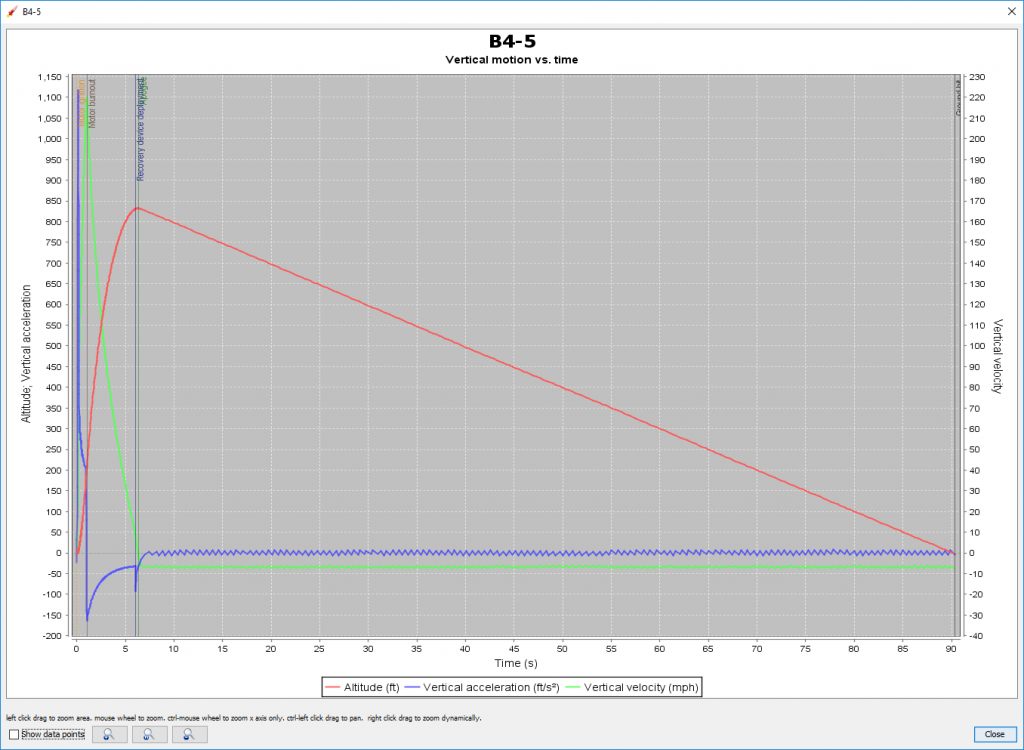
B4-5: apogee 832ft, velocity at deployment 9MPH, max velocity 220MPH, max acceleration 1116 ft/s^2, time to apogee 6.3 seconds, flight time 90 seconds
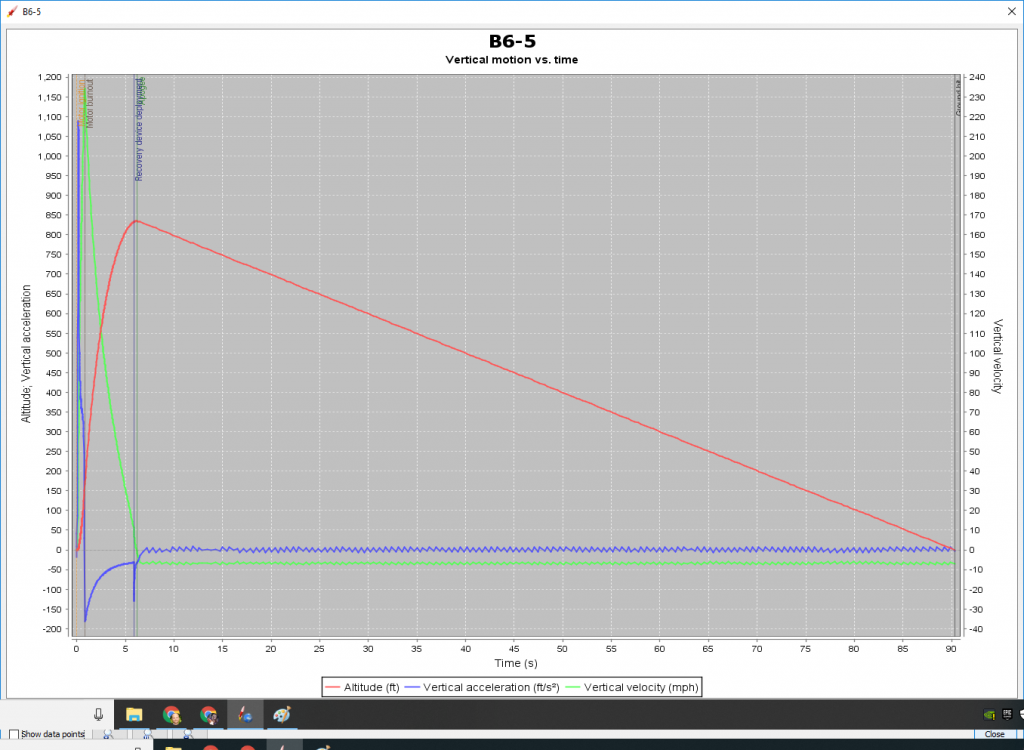
B6-5: apogee 834ft, velocity at deployment 11MPH, max velocity 234MPH, max acceleration 1088 ft/s^2, time to apogee 6 seconds, flight time 90 seconds
C6-5: apogee 1480ft, velocity at deployment 11MPH, max velocity 341MPH, max acceleration 1095 ft/s^2, time to apogee 7.5 seconds, flight time 156 seconds
apogee: highest point, velocity: speed, ft/s^2 a measure of acceleration “feet per second squared” or “feet per second per second” aka positive number gas pedal, negative number brake pedal
The thing you can notice here is how LONG some of these rockets spend on their parachutes. All of that time they are susceptible to sideways winds, only going where the wind pushes them. The longer they spend on their chutes, the more likely we’ll lose the rocket. So, depending on the day, we may not get out the bigger engines. And it’s ALWAYS a good idea to acknowledge that every rocket flight is saying goodbye, and we’re lucky if we get to fly again 😉
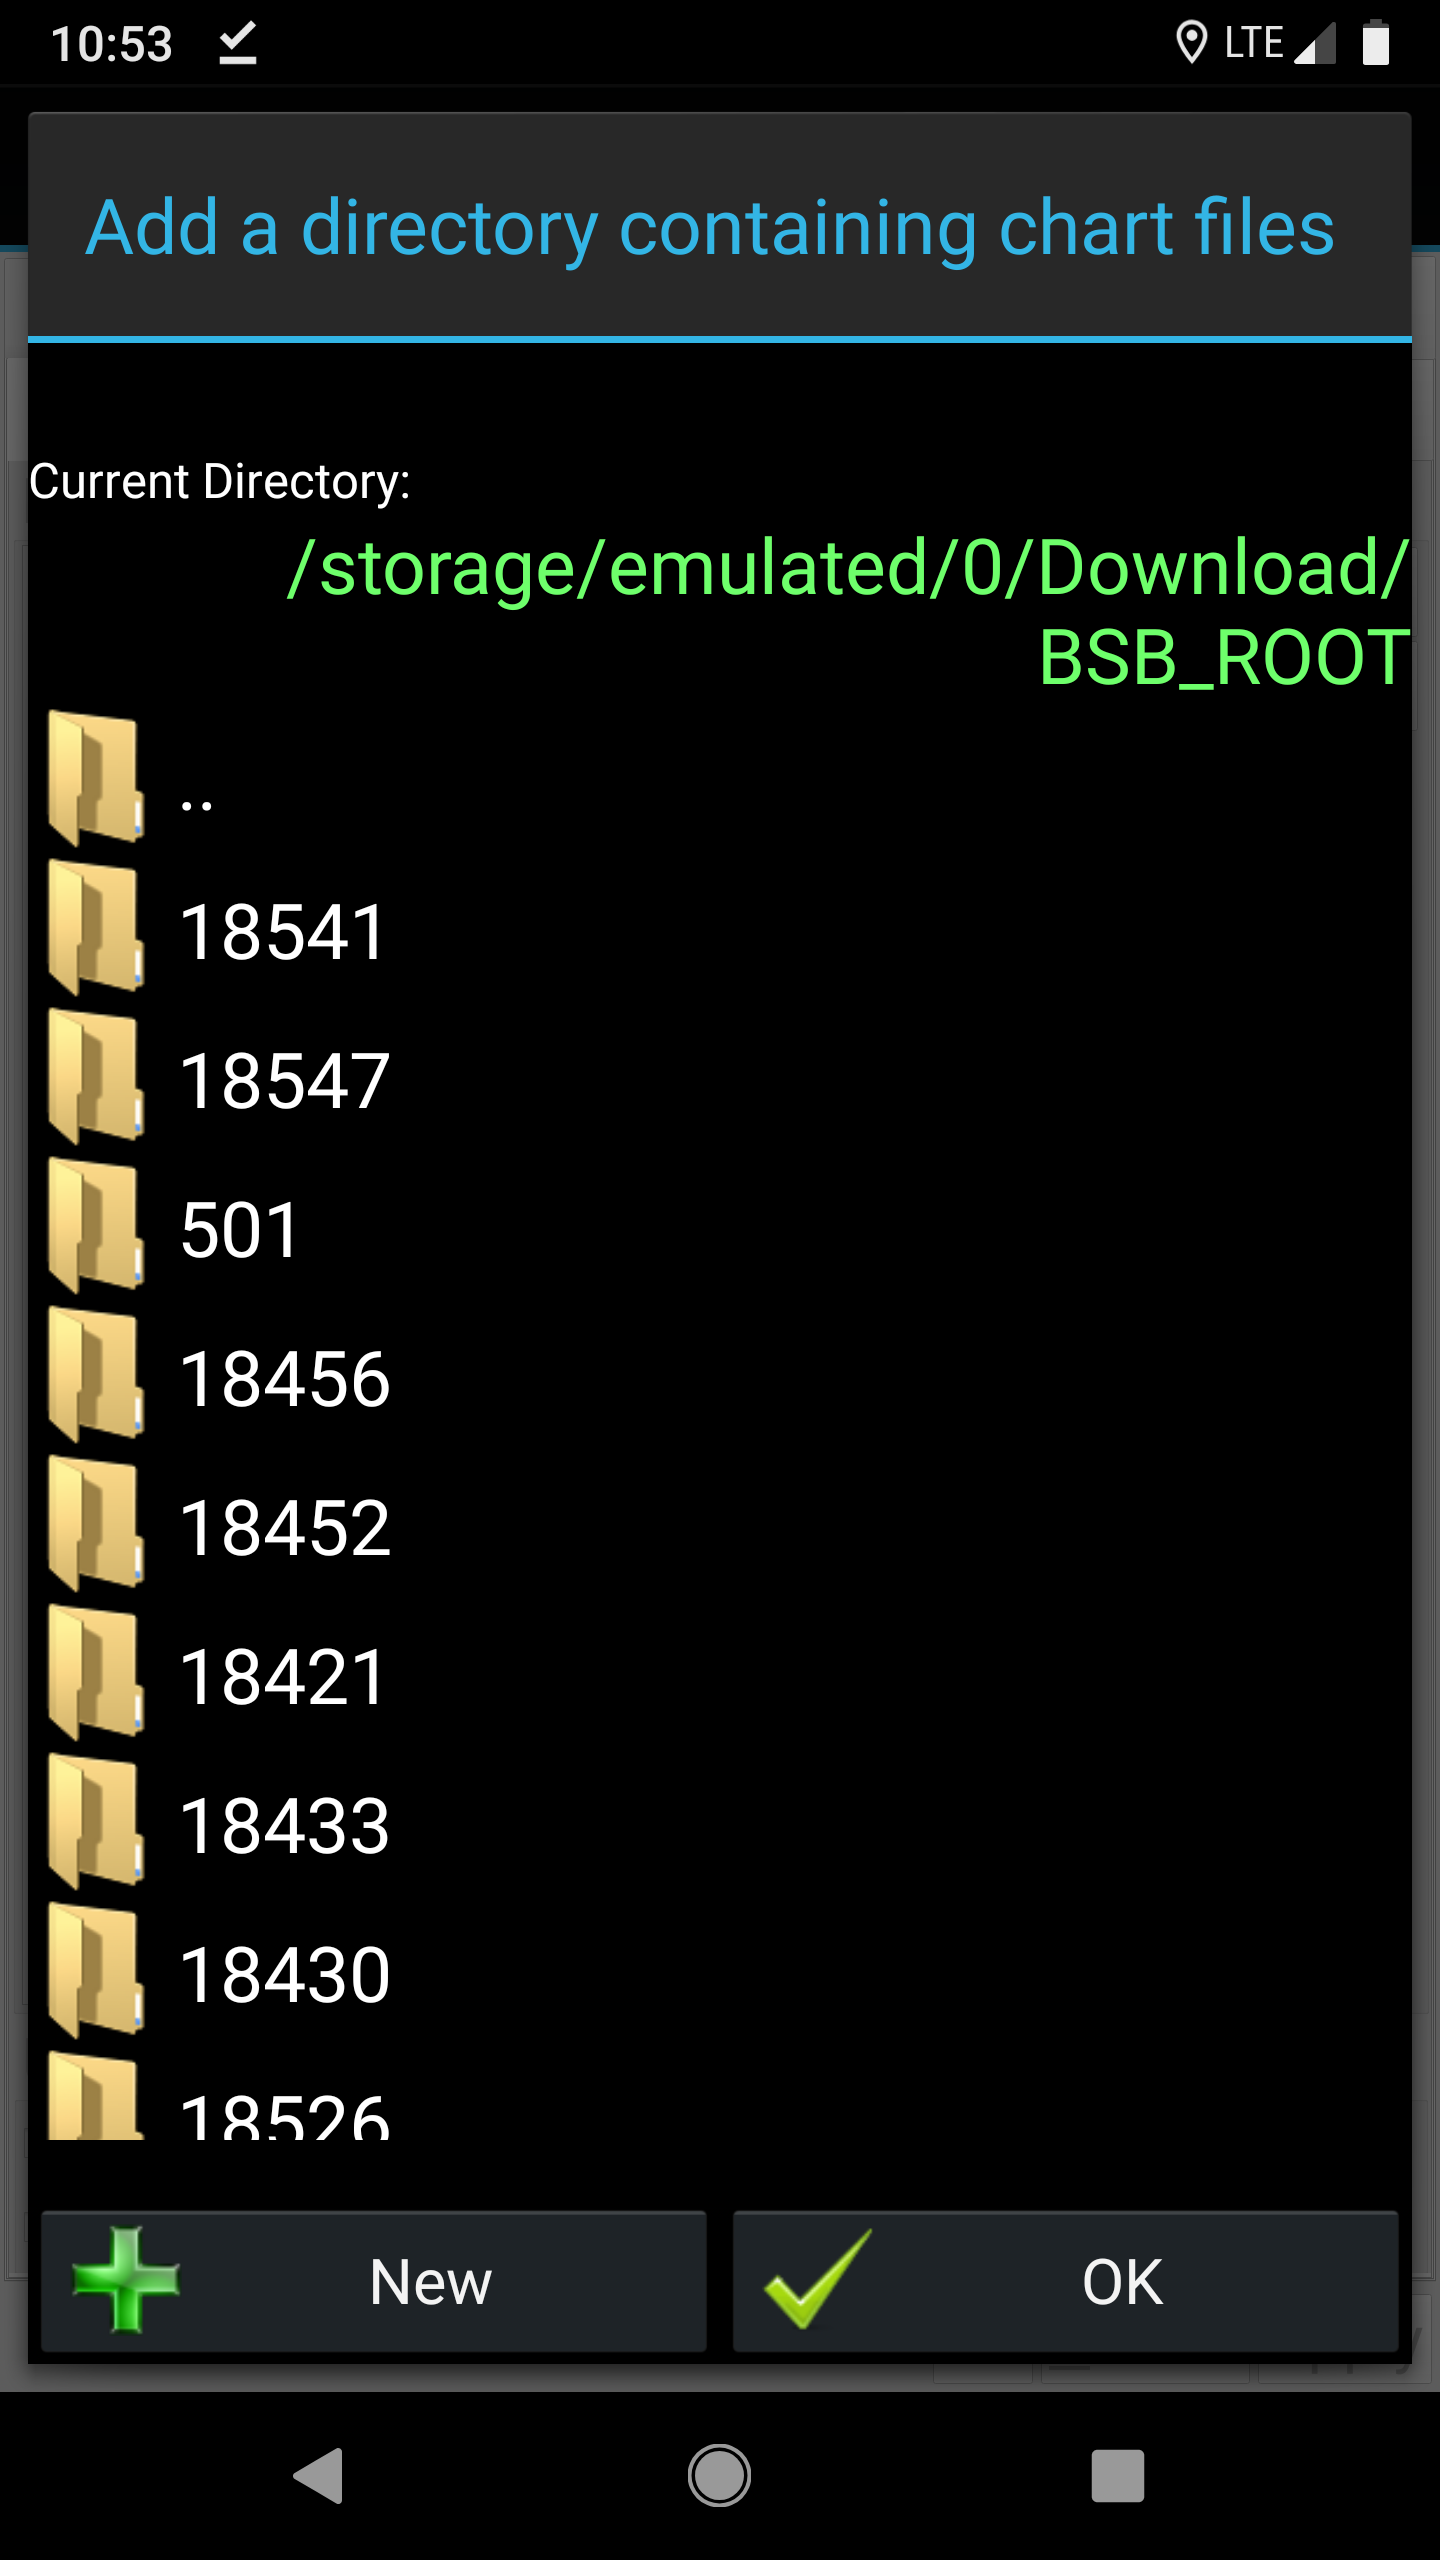
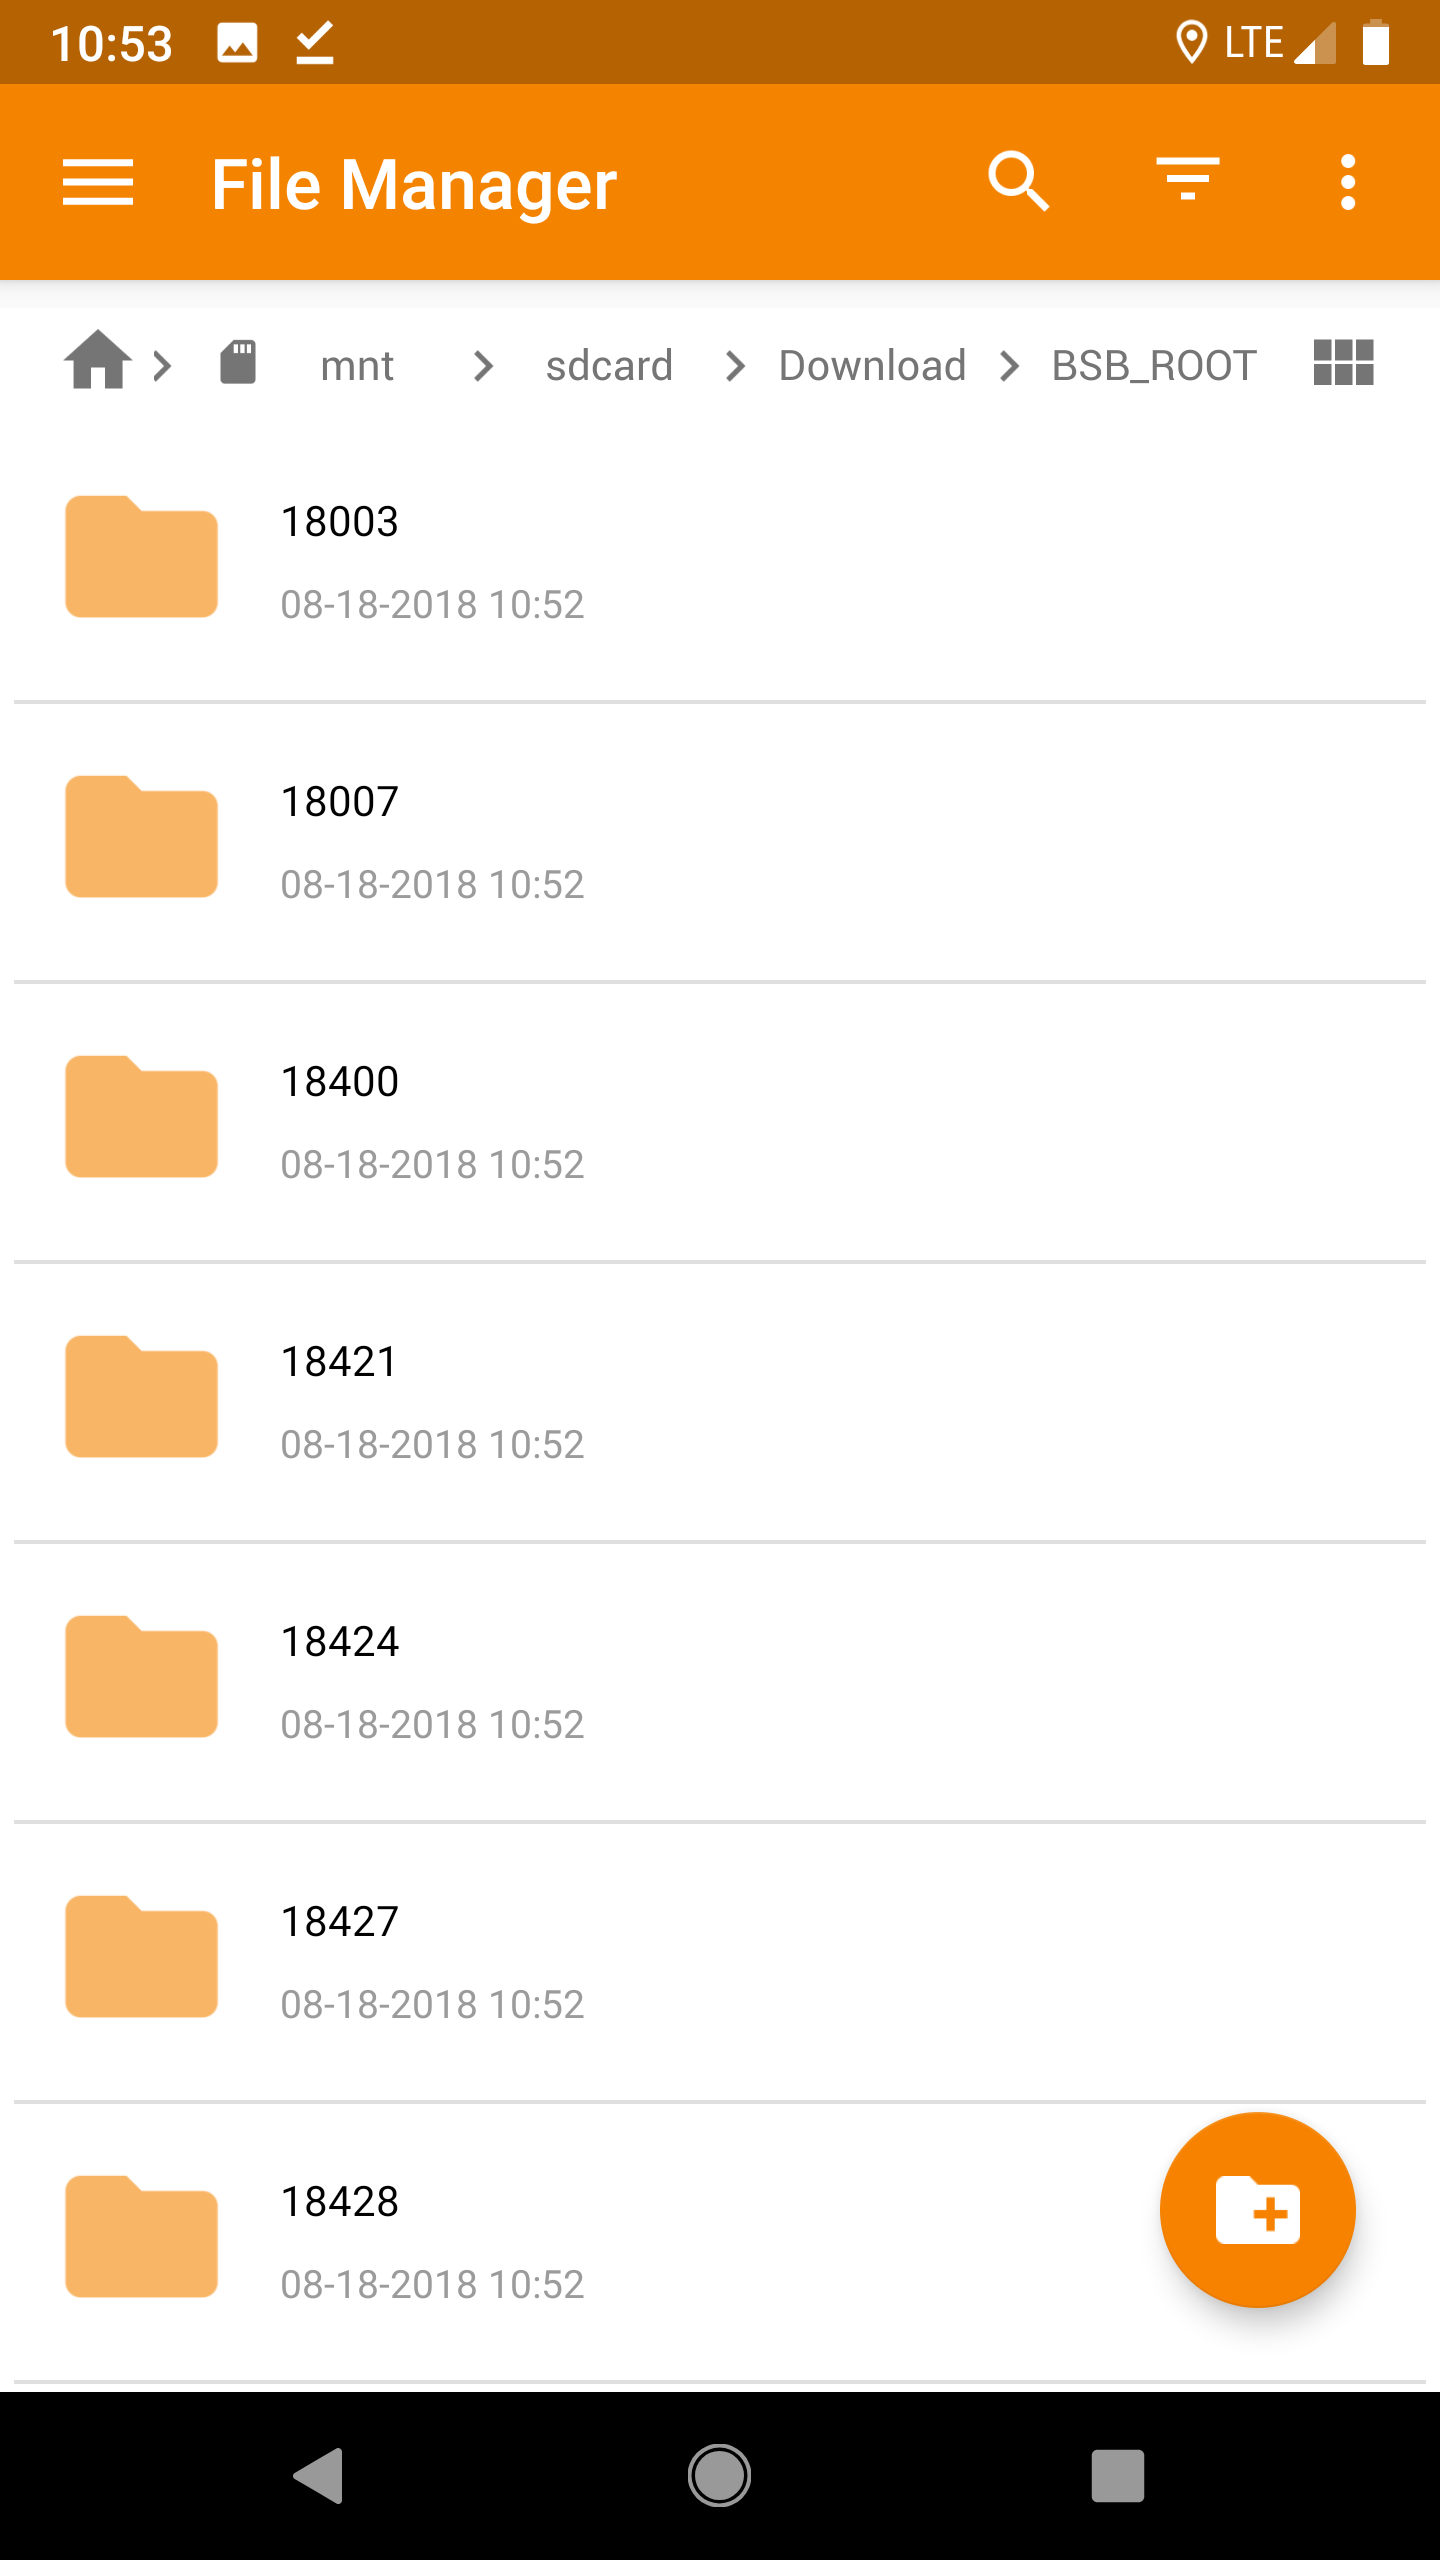
Download and unzip chart files to some spot on your phone. Raster – pictures of traditional charts, Vector – electronic version. If either of the links break, search “chart downloader noaa rnc” or “chart downloader noaa enc.”
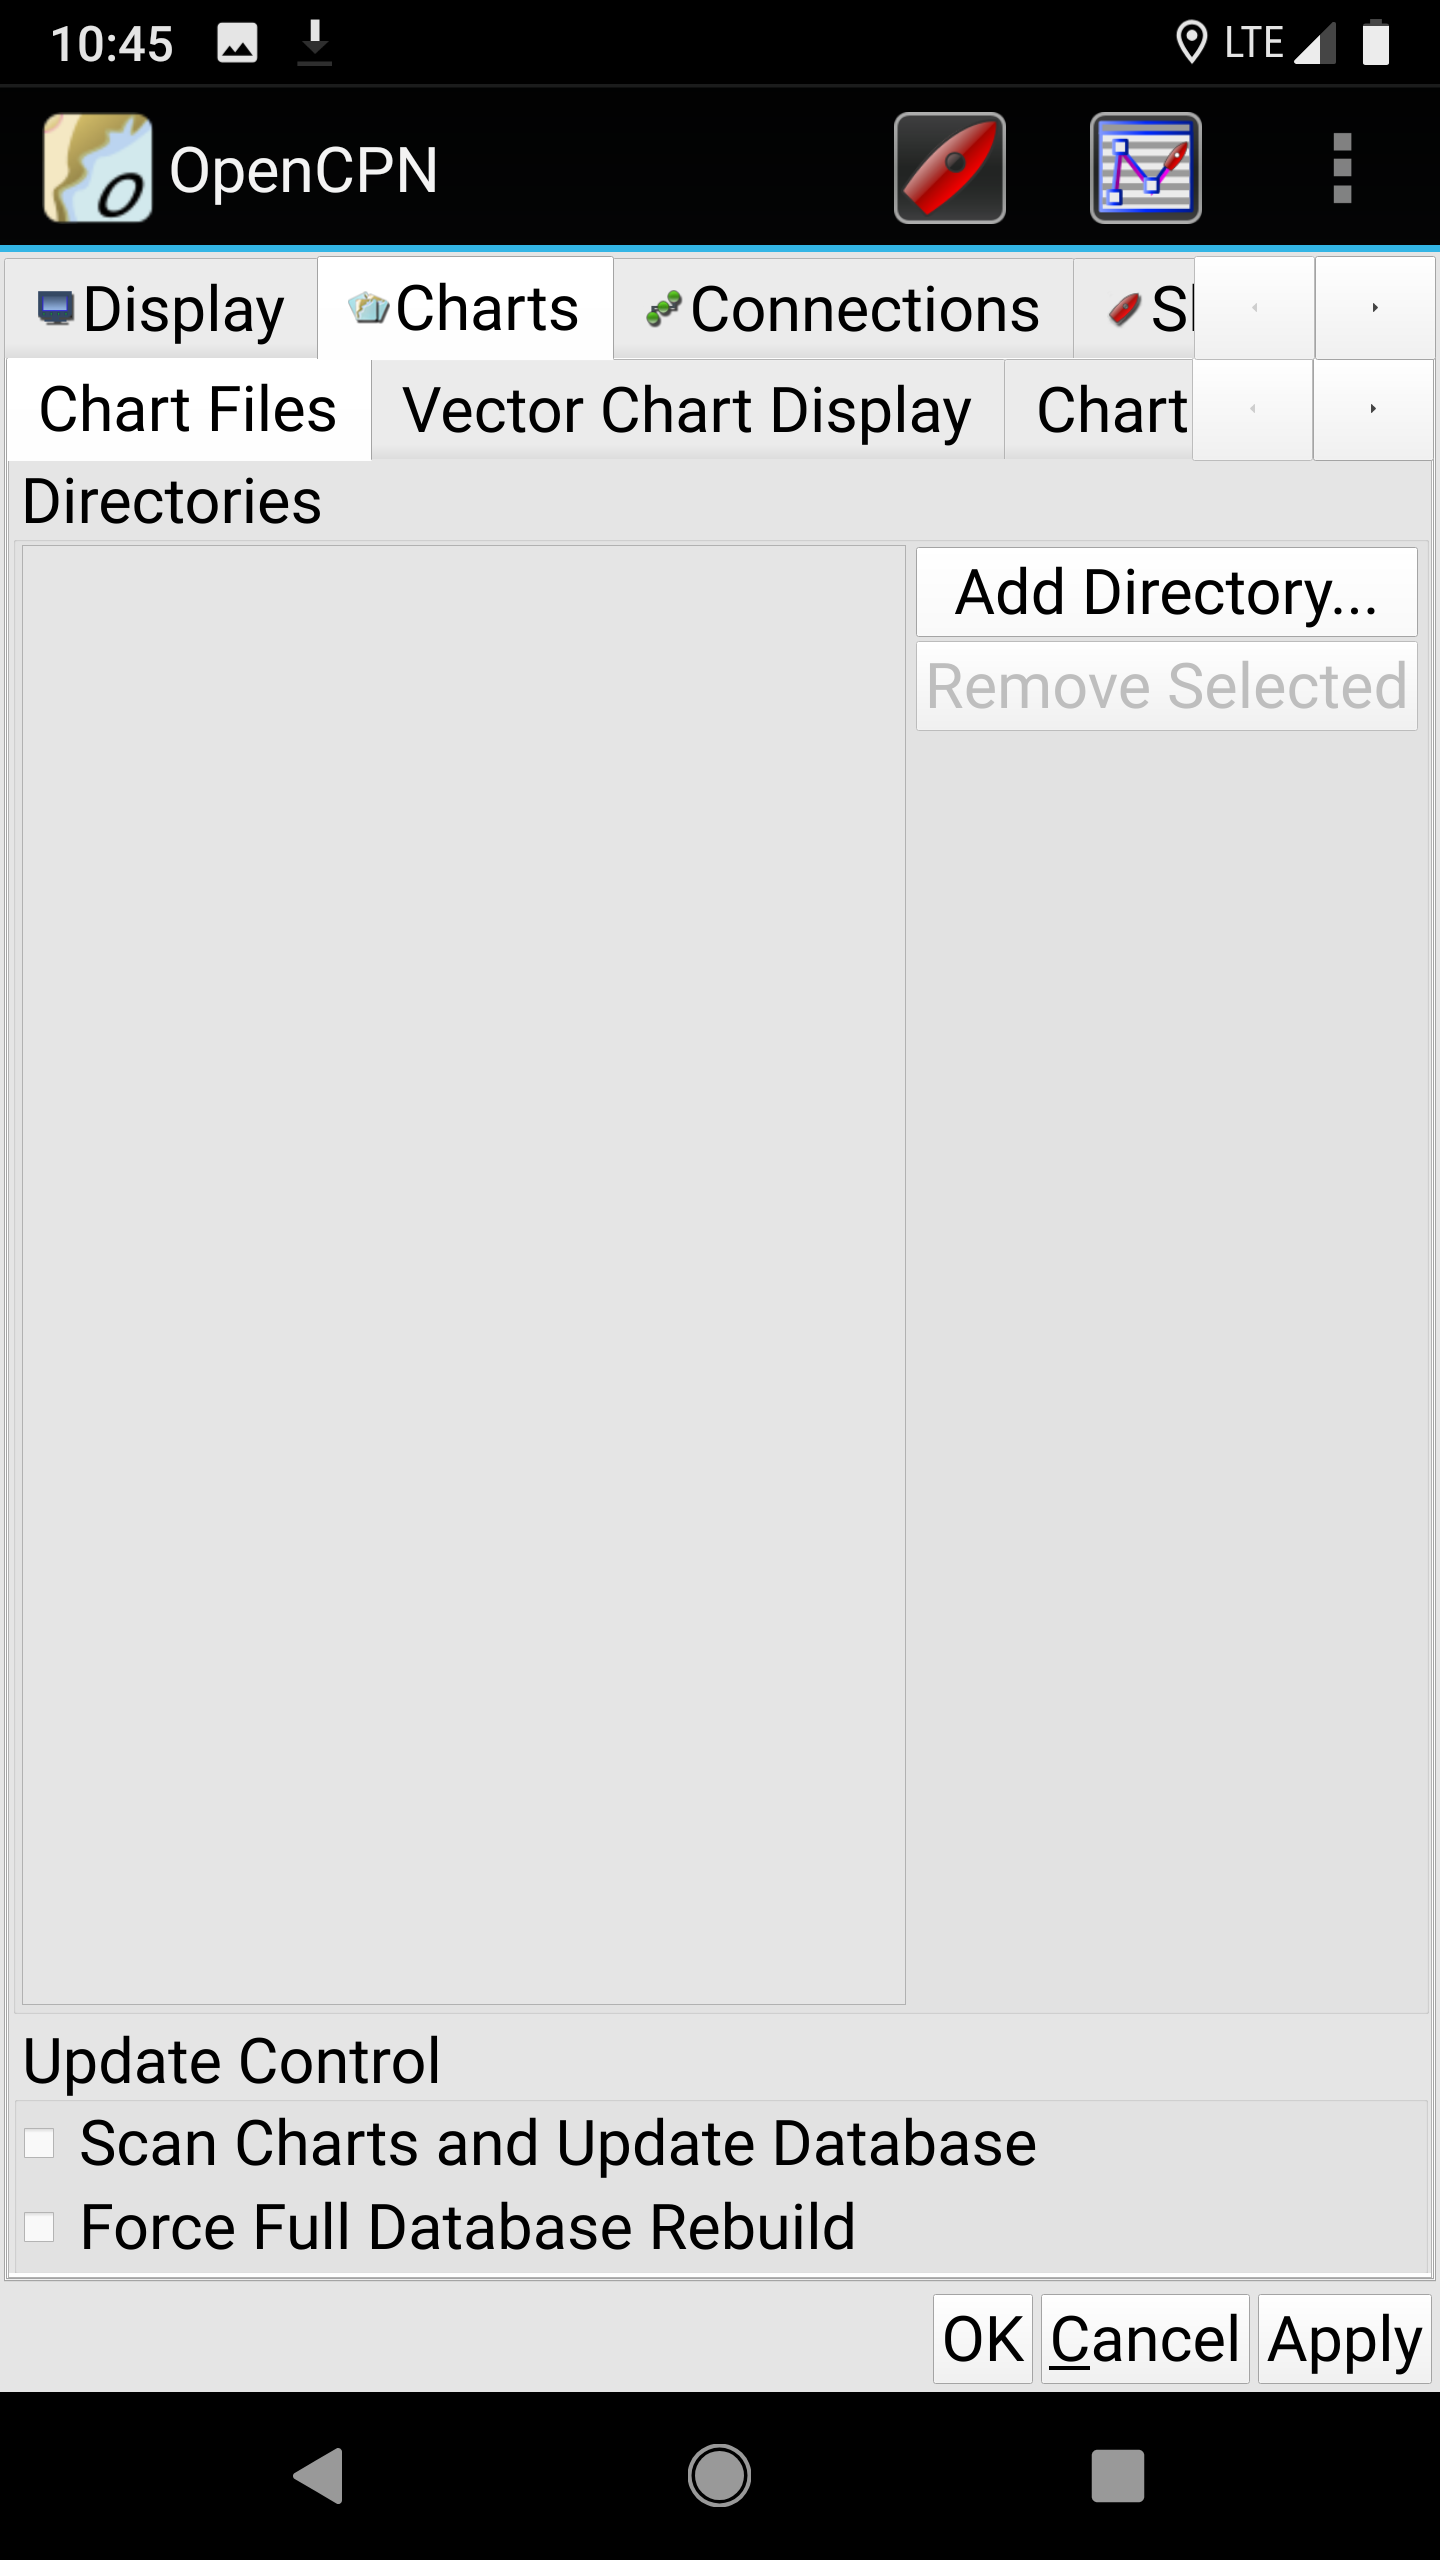
Open the app, go to settings (wrench in top left) > Charts > Chart Files. Add Directory. Point it to the location you unzipped the chart files.
Click the button on the bottom, “Force Full Database Rebuild” and Bob’s your uncle.
Other reference for TRANSAS on Android, but since that article 4/2017, TRANSAS android app has been up and down. The accompanying chart store has been hit or miss. While their raster charts are superior to NOAA, it just hasn’t been worth the hassle or expense (about $15 per area) they charge for the charts.
PSA: NOAA charts are free. Enter OpenCPN. When I was initially trying out this app, it was wonky. As of the current version (4.1.1028) has been worth the switch.
There isn’t an official OpenCPN app for iPhone, looks like SEAiq is the equivalent version. But as I recall, TRANSAS iSailor app, was geared towards iPhones, and that would be your best bet.
This rocket is awesome because you build it out of junk you probably have around your house, and DIY rockets vary wildly in quality. Be ready for an exciting time!
If you’re totally new to rockets, here’s the minimum to get started:
old plastic bread bag, or similar weight plastic bag
hole puch
drinking straw
TOTAL $37 (or $47 with additional larger engines)
I want you to get both a kit rocket, and build build your own. You absolutely have to get a launch pad and launch controller. The kits are cheap enough, you may as well get a Ready-To-Fly RTF rocket with it too. This will give you both the fun of building your own rocket, and a more predictable experience of a kit rocket. Even kit rockets have their own challenges. Doing this Paper-Towel-Tube-Rocket PTTR, will give you the tips to assemble any RTF rocket as well.
Building PTTR isn’t a slam bang and done project. There are a few steps, where you need to let that ol’ Elmers Glue dry. I’ve never tried building PTTR using a hot-glue gun, or quick-drying epoxy, though I’m sure it could be done. The steps would be the same, just faster.
There are a bunch of “drink breaks” in here. You can take that drink break, or you can jump to the other steps. Drink break simply means glue will need to dry, and you’ll have to revisit that part later.
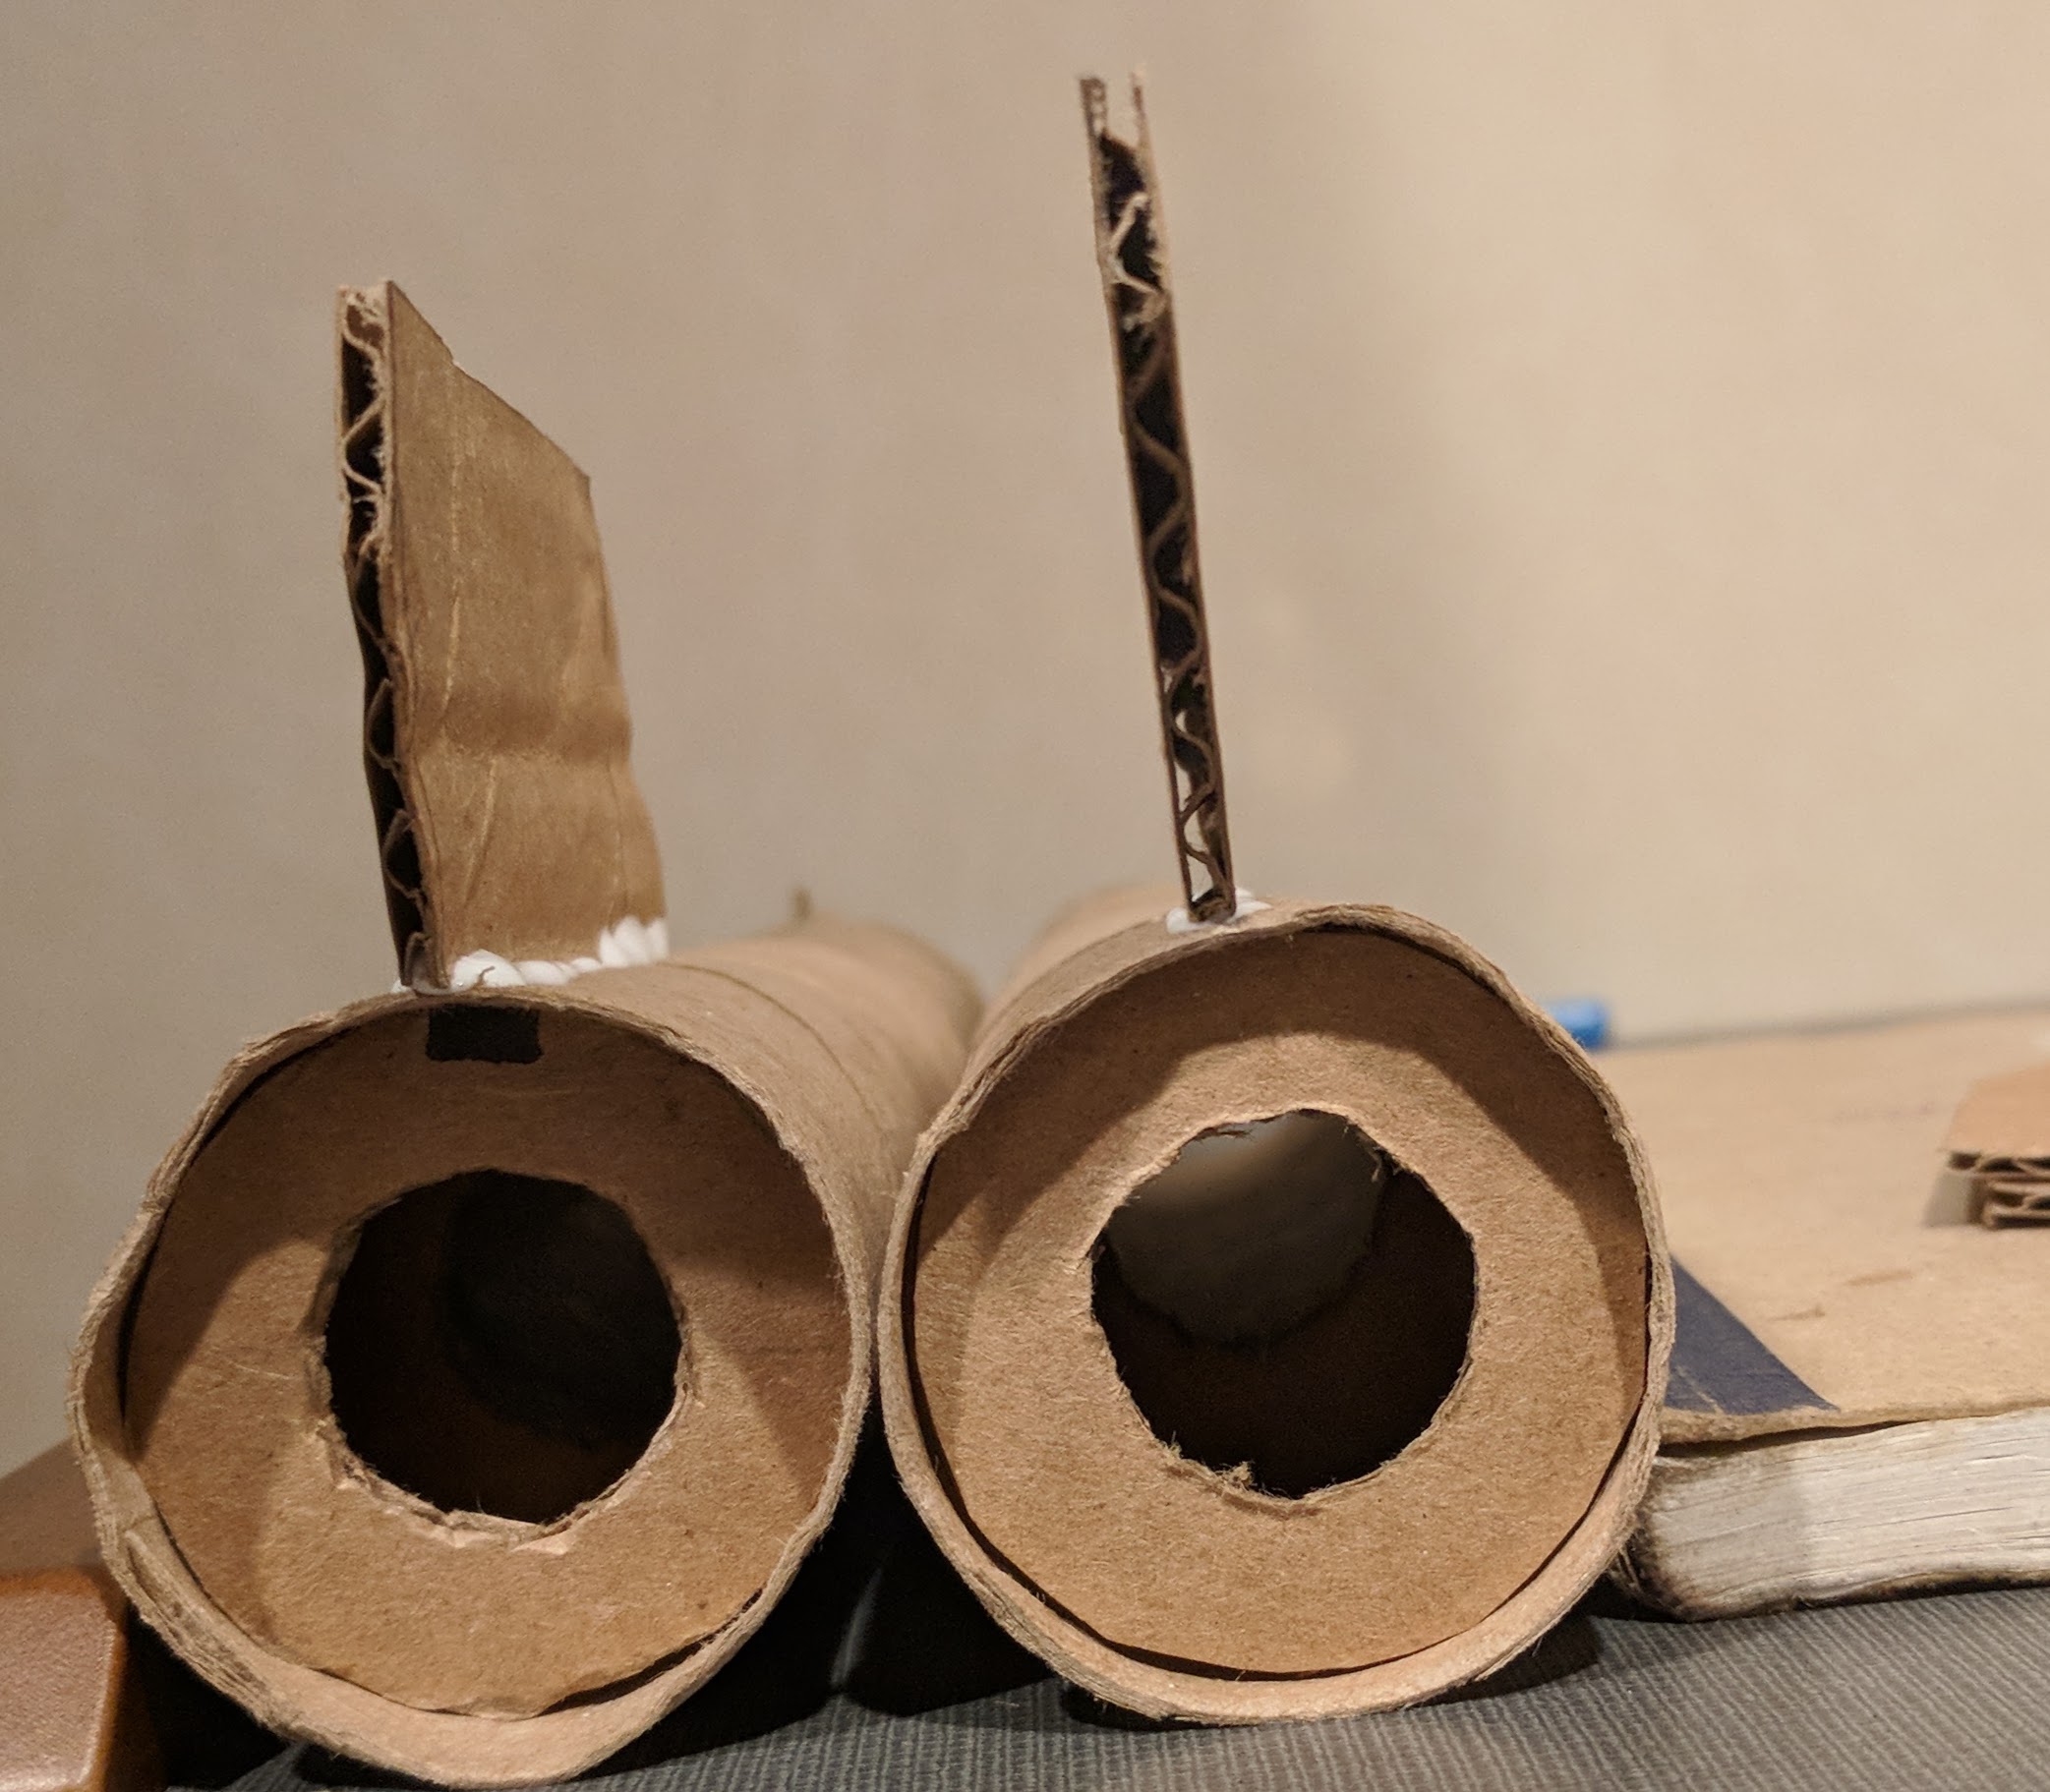
Engine mounts
Cut doughnut shaped engine mount rings. Both inside and outside diameters need to be pretty darn close, +/- 3mm I’d say. That sweet sweet Elmers glue can make up for imperfections. Double and triple check the outside diameter of your engine mount rings against the inside diameter of your paper towel tube. Also double check the inside against the engine mount tube from the next step.
Use existing engine and roll some card-stock weight paper around an engine. The tube should be the same length as the engine. Put glue on there, secure with some tape until it dries.
drink break
Pull the tape off the engine mount tube, and glue both engine mount rings to the engine mount tube. You should leave about a half inch at either end.
Cut a narrow strip of card stock, a 1/4″ or so. It should be long enough to go around the inside of the engine mount tube twice. Put a very light coating of glue all over this strip, and put it into, what will be the forward end of the engine mount tube. Expand this strip as much as it will go. This piece is going to be the engine stopper. It will keep the engine from shooting through your rocket, but still let the parachute charge blow out the top.
drink break
double check that the rocket engine you have can slide into the engine mount tube, while being stoppered at the end by that strip we installed in step 5. It should be snug.
put another bead of glue on one side of the engine mount rings > engine mount tube
drink break
flip it over, put another bead of glue around that side of the engine mount rings > engine mount tube.
drink break
Fins
You can get creative with the shape of your fins. I’d like to point out one design detail here, and that’s some taper on the trailing edge. With swept fins like this, your rocket will stand on it’s 3 or 4 points on the launch pad, while holding the aft end of the engine, and igniter off the launch pad: very convenient!
cut three or four fins, dealer choice
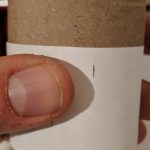
get a small, long piece of paper and wrap it around the whole tube. Mark the paper on both the top wrap and bottom wrap, so you know the exact circumference. Use scissors and cut the strip so there’s about a 1/4″ longer than the circumference.
If you’ve got three fins, as I’ve chosen in my example, play around with folding the paper in exactly two spots so you have three, equal length sections. The mark, the first fold, and the second fold will be where your three fins go.
four fins is easier, you fold it in half twice. The mark, and three folds makes for your four fins.
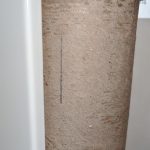
Tape that piece of paper to the tube. Get a pencil, the tube, and head to any door jam. Hold the tube into a corner of the door jam, and run the pencil along the tube, so the line hits above the paper, the fold, and below the paper. Do this with all three or four fins. Pull that paper off, then, using the door jam for a straight edge, connect the two lines.
between two of your fins, strike another line that is above the forward most fin, this will be for the launch lug
Glue the first fin. Two tricks here. You can put the tube between some stuff on your desk so it doesn’t roll around, and balance that fin up there. If you cut it with a sharp knife, it might be square enough it will just sit there. If it falls over in a few minutes, don’t worry about it. The glue will be slowly getting tackier and tackier, and eventually it’ll stay close enough. Other trick is to slide the tube next to a wall, with the fin leaning against the wall – or whatever. As you slide the tube closer or further from the object, you’ll see the angle of the fin change. You want it to be pretty much perpendicular from the tube (perpendicular to a tangent. Oh God geometry)
drink break
Glue second fin. For this one, I put the paper towel tube near the edge of a small book. This raises the tube up, so while the first fin is on the table, the second fin is straight up. Or, you can do that lean it-against-something trick.
drink break
Glue third fin. This one should be easy because as the rocket is resting on the first two fins, the third should be top and center. If you also chose to put a swept-angle fin on, you can maneuver the bottle of glue in there so it will just hold the after tip of the fin while it’s drying.
drink break
find that launch lug line between two of your fins, cut the drinking straw so it’s about an inch long. If you have sandpaper handy, scuff up the outside, then glue it, as straight as you can, to that line. It should sit a little above the fins.
put an additional bead of glue on all fin seams you can see
drink break
flip rotate it, and put more glue on all seams
drink break
rotate it a little more, and you guessed it: another bead of glue on all the seams.
put more beads of glue on the launch lug straw. Put LOADS on it. Straws hate sticking to Elmers glue for some lame reason. But don’t let a fat drop of glue sit at either end of the straw, that will keep the launch rod from running freely.
fins are done.
launch lug is done.
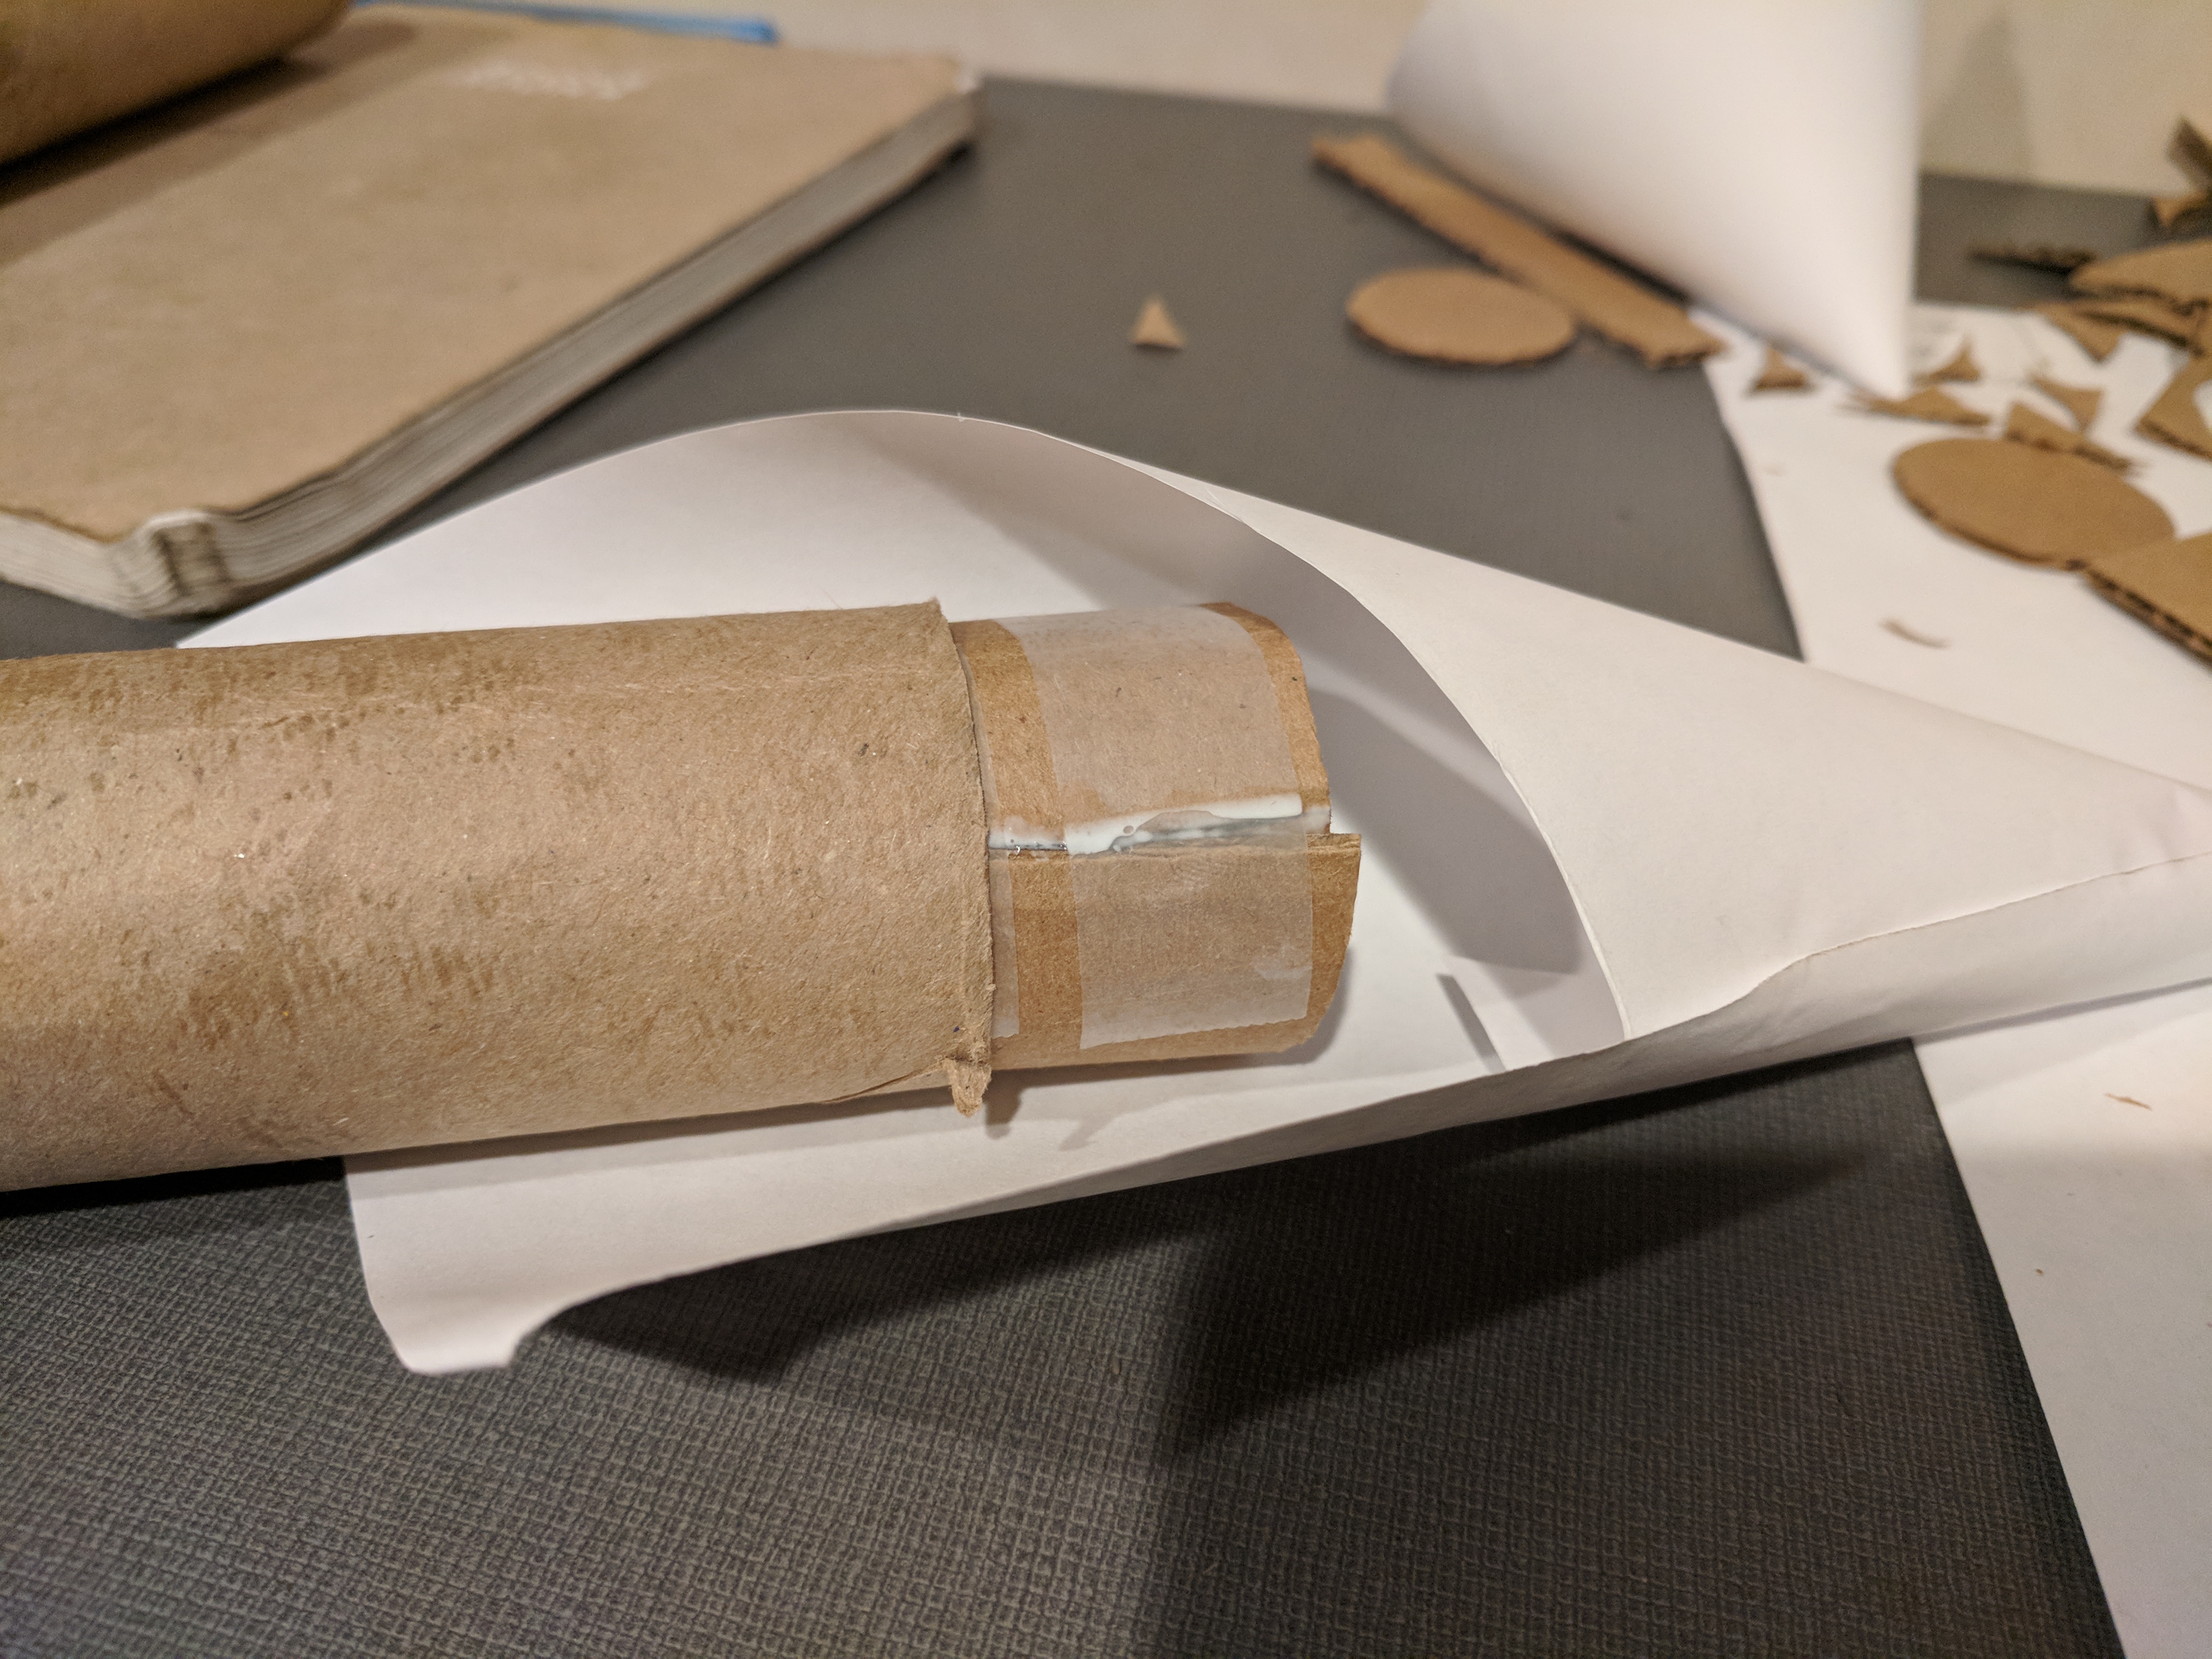
Nose cone
You can decide how pointy you want your nose cone. I was making two rockets, so I went with a stubby one, and a sharp one.
Cut a rainbow looking shape out of the card-stock. Or don’t, doesn’t matter too much here.
Roll into a cone. The large end of the cone needs to be at least as big as the end of the paper towel tube. The other end should be a point.
cut off any extra pieces to make life a little easier
apply glue, and tape it in place to dry
cut a rectangle of card-stock and roll it up. Stick it in the end of the paper towel tube. Using your thumb, force it larger until it’s pushing against the inside of the tube. Hold it tight, and put it in and out of the tube a few times. It should slide in and out easily. Err on the side of too small. Mark it, glue it, and tape it to dry. I’ll call this thing the nose cone base.
drink break
pull off the tape from both nose cone base, and the nose cone.
dry fit that nose cone base into the nose cone. Your nose cone should extend past the circumference the nose cone base touches, like a witches hat brim.
put a fat bead of glue on the nose cone base, and put it into the nose cone.
look at it from many angles, and get it adjusted so it’s pretty much square. It’s tricky, but not too big a deal if you get it a little off.
a nice place to put the nose cone while it’s drying is in the end of a paper towel tube. If your only tube is indisposed because of the fins, grab a roll of toilet paper, and use the inside of that.
drink break
using scissors cut the brim of the hat off. This thing should really start to look like a nose cone now!
smear more glue on the inside circumference of where the base meets the cone. More glue=better
drink break
Shock cord
cut your three rubber bands so they are strings.
tie them all together using a square knot. Try to make the ends as short as possible so you get as much length as possible out of the whole shock cord.
if your long piece is shorter than say 12″, tie in a piece of string to either end bringing the total length to at least 20″ or so. For that knot, you should use a sheet bend where the bight part (blue part in the animation I linked) is the rubber band.
cut a rectangle shape piece of paper, that tapers a little towards one end about 2″ x 3/4″. This is going to be folded twice, so into thirds. Go ahead and fold it now.
put a light glue on one entire side
put the end of the rubber band or string on the paper, with the tip at the first fold.
now fold the paper over your two folds so the rubber band or string bends one time
do that to both ends, then put the wet foldy mess under the leg of a chair, or with some weight on it so it will dry
drink break
Assemble: nose cone to rocket
You need both the completed nose cone, and the shock cord
put glue inside the nose cone base and press either end of the shock cord into the nosecone base. You may have to hold it there to get it to stay until the glue dries. You can also try pre-bending the paper so it will happily sit in there.
Depending on how far the nose cone base goes into the rocket tube, you’ll have to glue the other end of the shock cord at least that deep. If this becomes a pain in the ass, you can always cut that nose cone base shorter. I’d leave at least 3/4″.
done!
Assemble: engine mount and rocket
This part is pretty nifty, we’ll use a standard rocket trick of putting a bead of glue way up into the rocket body only where it’s needed. video
hold the engine mount assembly next to your rocket. Probably between a couple of fins. You want the tail end of the engine mount tube to be either flush, or stick out a little from the aft end of the rocket tube.
with a pencil make a mark where each of your engine mount rings will be, once the engine mount assembly is inside the tube
get a piece of cardboard, or small stick, and hold it next to the rocket tube so that the end is slightly overlapping the upper/forward end engine mount ring.
put a big glob of glue on a piece of scrap, and scoop and smear glue on the inside of the rocket tube, using where you’re holding that piece of scrap for reference. LOTS of GLUE here. put it all around the inside of the tube
slide the engine mount assembly into the tail end of the rocket tube, and you should feel the engine mount ring squish into the glue. Give it a little twisty twist action to get the glue on all the parts
flip the rocket upside down, apply liberal bead of glue to the lower, after engine mount ring
leave the rocket upside down to dry
drink break
apply another bead of glue to the only engine mount ring you can see
Done with rocket assembly!
Parachute
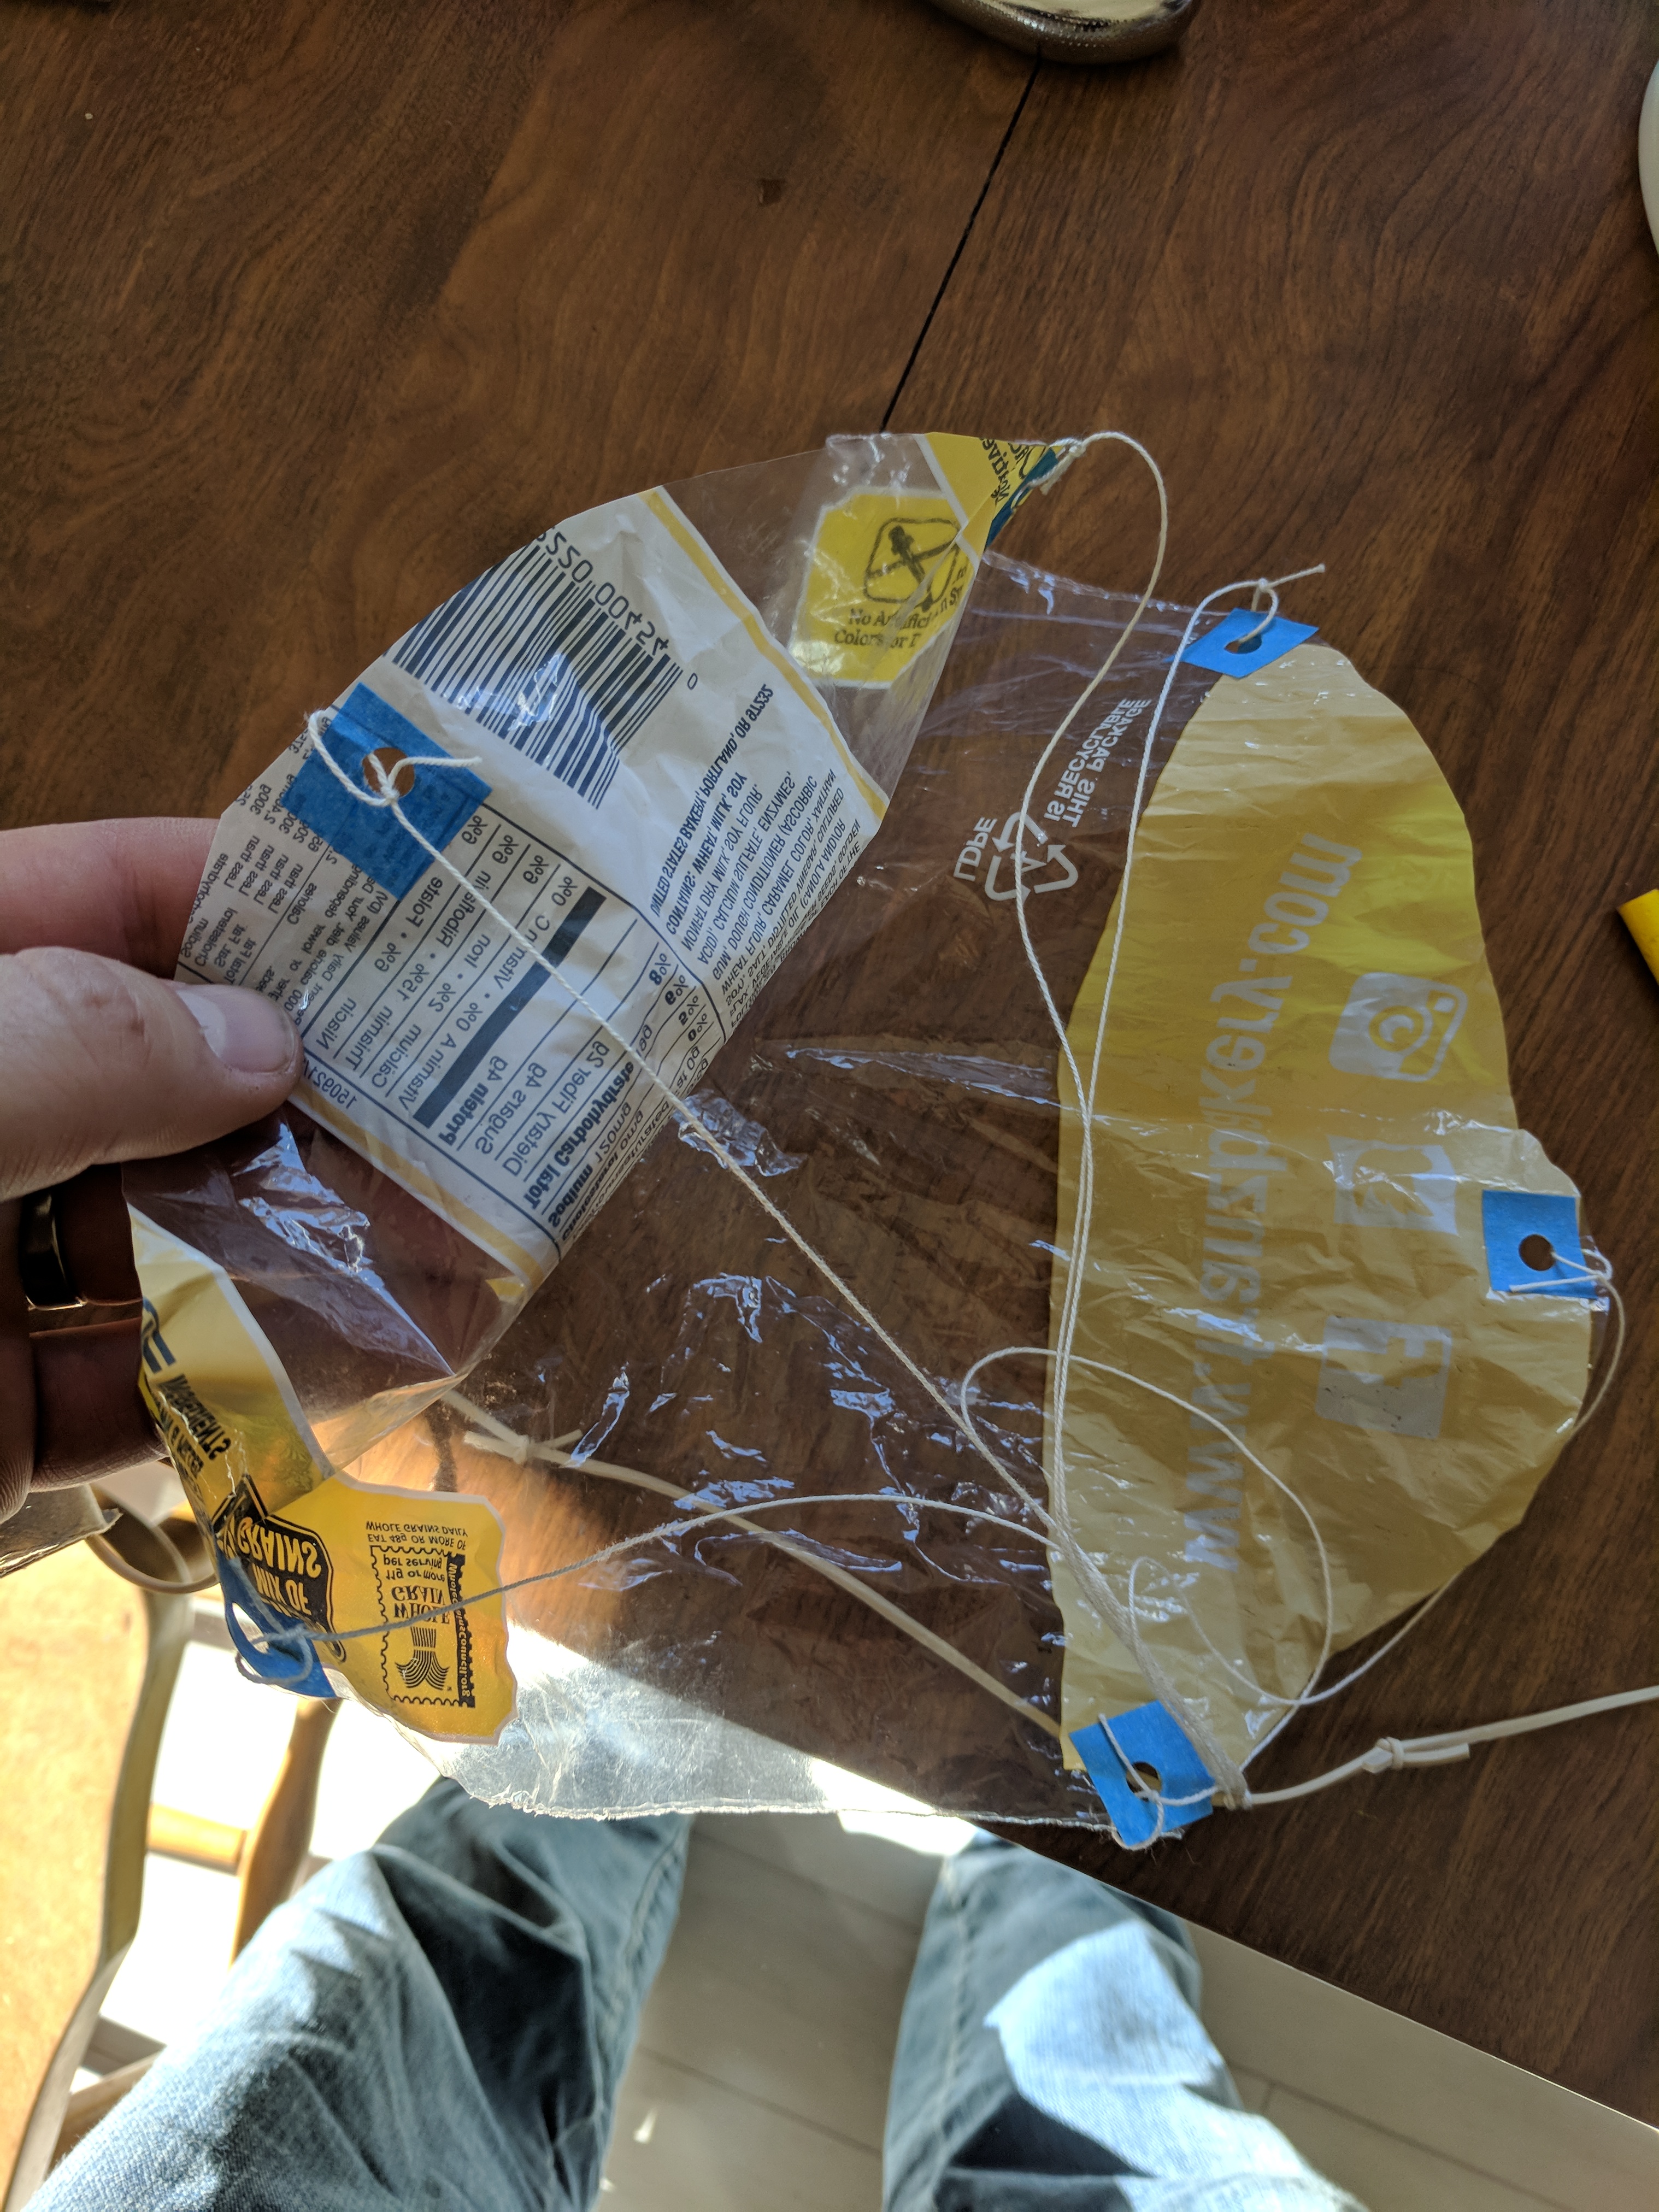
cut a 12″ diameter circle out of your plastic bag
put six small pieces of tape on the edges of the parachute. I like to put two on there opposite each other, then move around about 1/3: two opposites, then split what’s left: two opposites.
this tape should stick very well to the plastic bag. I think I used packing tape on one of my chutes, and blue painters tape on another. We’ll see what holds!
punch holes through the tape and plastic
cut three lengths of string about 18-24″ long
square knot the ends through adjacent holes. Try not to leave much of a tail.
this should get you three loops coming off three sides of the parachute
gather the three loops in one hand, and cow hitch them somewhere to the rubber band part of your shock cord. You’ll put the loop behind the rubber band, then jam the whole parachute through that loop to make the cow hitch.
Balanced flight
I’m embarrassed that I launched several rockets that were not balanced. The results was exciting to say the least.
There are two forces that need to be in alignment for a rocket like this to fly straight: center of mass, and center of pressure. Here’s an easy 1:30 youtube showing the process. Here’s a 13min in depth explanation from Apogee Rockets.
Put an engine into the tail end of your rocket.
Find the center of mass by balance your rocket on your finger.
Tie a 12ft string around that spot, add some tape to make sure it doesn’t slip around. Check it by hanging your rocket from that string, it should be approximately level with the ground.
Swing the rocket around your head like a lasso. If it settles into nose first round-and-round: you’re good to go. If it doesn’t, you need to:
Add some weight to the nose cone, glue a penny in there, or more.
Find new center of mass (#2 above) and move string forward.
Repeat experiment
Lots of steps, but you should be done! Pat yourself on the back, and look for a calm clear day and launch that rocket!!!