Bicycle theft and security

Just had a couple of bikes stolen, and looking back on it, I wish I would’ve done a few things differently. Seems like a multi-tier anti-theft plan is probably about best. Given certain situations, there are silver-bullet solutions to bicycle theft, a Kryptonite bike lock insured up to $2250 here.

Register your bike

There are several bicycle theft serial number websites out there, but the google result that comes up first, and my favorite is bikeindex.org. Friendly support, excellent system, and free.99. Snap two pictures of your bicycle: 1 the whole bike, and 2 the bottom of the bottom bracket where the frame serial number is stamped into the frame.

Buy a u-lock

“u-locks” are the way to go here. Kryptonite seem to be industry standard for awesome locks. They also guarantee actual dollar amounts on your bicycle, so if it’s locked up properly, they’ll guarantee up to some dollar amount to replace the bicycle. This pic is my second favorite bike lock hack: put a long loop of string on the key. When you’re not using the lock, lock the key to the lock. When you do use it, it’s easy to stick it in your pocket. Do this, and you will never lose your key. My #1 favorite lock hack.

Even more protection

I read somewhere that you could stick a Tile on your bike somewhere. Not a bad idea I think! I’d gorilla tape it under the seat. Bikeindex turned me on to iota GPS tracker which is a rechargeable actual GPS tracker.

Other resources and articles

Chainsawing with Jensen

I recently got to put into practice a plan of mine: getting wood to heat my house from the forest with a truck and a chainsaw. I gotta tell you, it was awesome.

IMG_20130909_123641

Alison and I went on our own and managed to get a couple of bits in our truck. Not a total wash, but a small amount. Her little, brand new, Stihl kicked butt. While my big ol’ 044 Stihl not so much. I forgot to put bar oil in it, and it got try and stopped spinning the chain. Thankfully I didn’t destroy it.

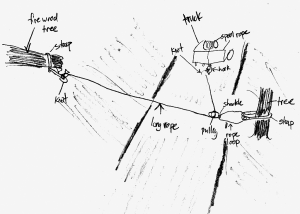
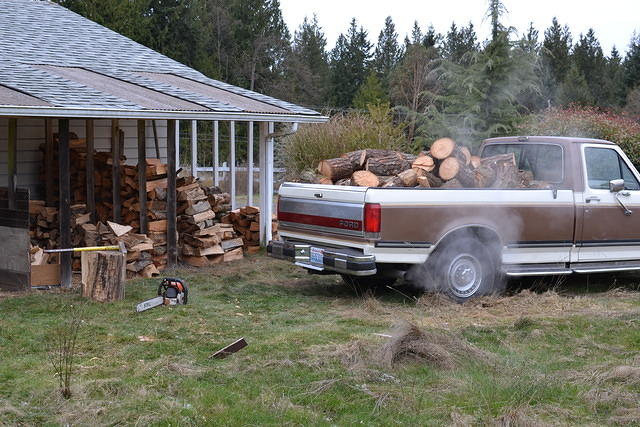
But then, later on, I went chainsawing with Jensen. That kid is lucky, I’ll tell you what! We stopped the truck twice, and managed to get a half load each time. By the end of the late afternoon, Jensen and I had piled that truck about as full as I’d ever want it to be. I need to get a net or something so I can pile higher, and still tie it all down. I have other plans for making life a little easier too. Here’s an awesome picture of my plan.

pull log planI’m going to get some rigging stuff, and use it to haul these little logs down (or up!) to the road. Then I can chop them up right there next to the road and it’ll be way easier on my back. This last time Jensen and I went, I had to throw the same stump like four or five times to get it into the back of the truck. Lots of hunching over, picking up, and chuckinDrew and Jensen selfyg.

Once I got my 044 back from the shop, got all the right fluids in it, and I had even been out chainsawing once before, everything went much smoother. Jensen and I went up there in a late afternoon, and in a couple of hours killed it. We filled the back of the pick up. Jensen had followed me out there, so he was able to just keep on driving home back to Seattle. What a great weekend I had with him. It’s so great to be close to family.

DSC_3864


Antec 300 case hack – unRaid media server

Wanted to post this case hack and a few of my observations, and things I’d do differently if I did it again. I had/have an Antec 300, and due to the spacing between each 3.5″ drive, I just couldn’t fit all the drives I wanted to in there.

I have an 8 cable SATA port replicator, and there are another six motherboard SATA ports, making for a lot of hard drives. I’d seen somewhere else where some dude had done this hack, and I wanted to try it myself.

materials
aluminum angle bar like this one. Estimate the height of your case x4, round up, and get enough of the stuff.
drill and bits
8x bolts-nuts-washer combos
adding more hard drives? Make sure you have enough drive screws, power cables (splitters are nice), and sata cables

Start by drilling out the aluminum pop-rivets holding in the steel drive bays.
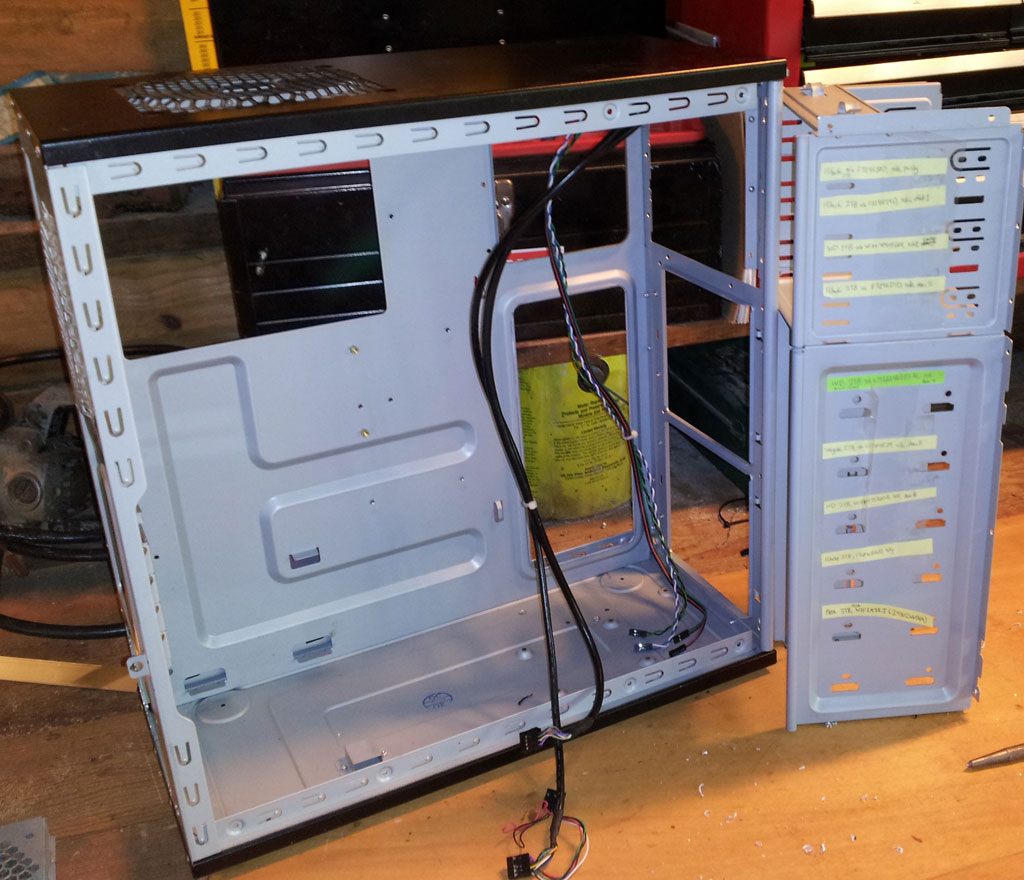
 

These come out pretty easy. I broke two drill bits doing this because I wasn’t applying straight even force to the drill. It helps to hold the butt of the drill with one hand, and squeeze the trigger with the other hand. You’ll have to put your case against something to keep it scooting away from you.

The next step is the most important, and most irritating. You need to measure and cut your aluminum angle bar. The adage of measure twice and cut once is a good one. Leave extra room on both the top and the bottom for a tab to bend over to put the bolt through to secure the bar.
In this shot you can see I’m trying out a drive in the rails. The angle is a little misleading because you can’t see the other side of the L shaped aluminum bar, but it’s there. These are NOT flat aluminum bars. I suppose they could be though.

Because my Antec 300 is a wide case, I’m going to put these drives in so their back sides are facing the main side door to the case.
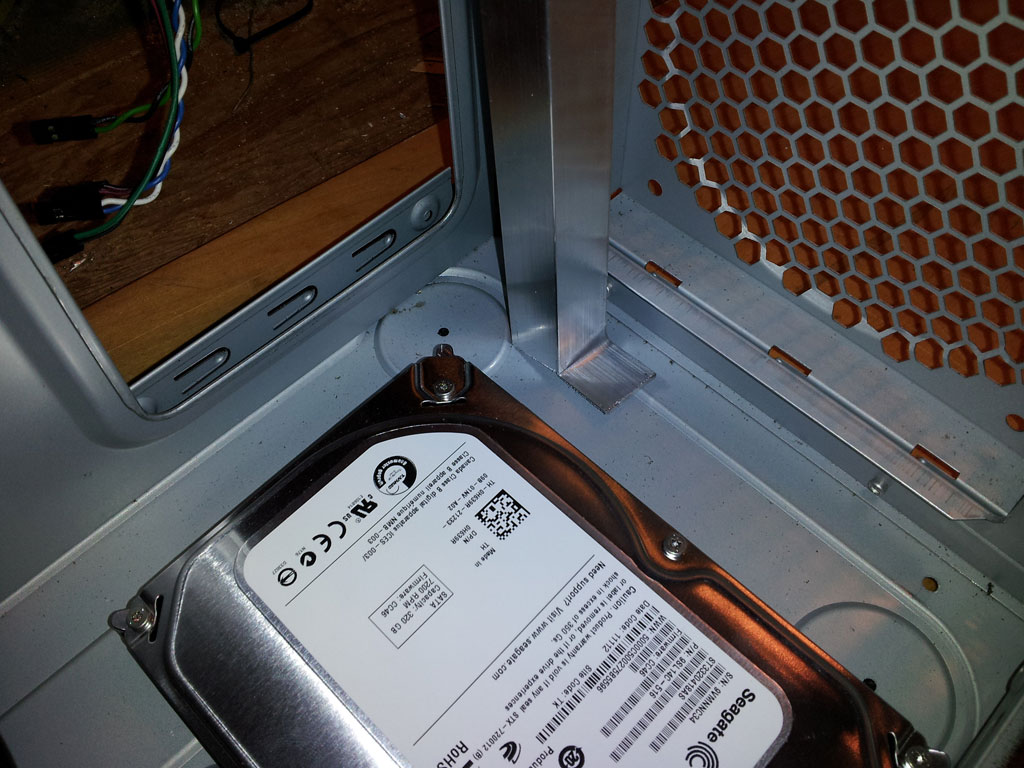
IMG_20130502_145433

Here’s a spot where you can save yourself some grief. You’re making this from scratch. Save yourself some trouble and install each bar so you can reach the drives screws easier. In the above photo, I should have bent the tab the other direction, and rotated that bar 180 degrees. It would be close between the lower most drive, and my securing bolt, but at least it would be easier to reach both of them.

Finish up the four bars, checking, and double checking for length. It’s okay if they’re a little short or a little long. Once you slam the securing bolts in there the case will bend, the aluminum will bend, and it will all be happy.
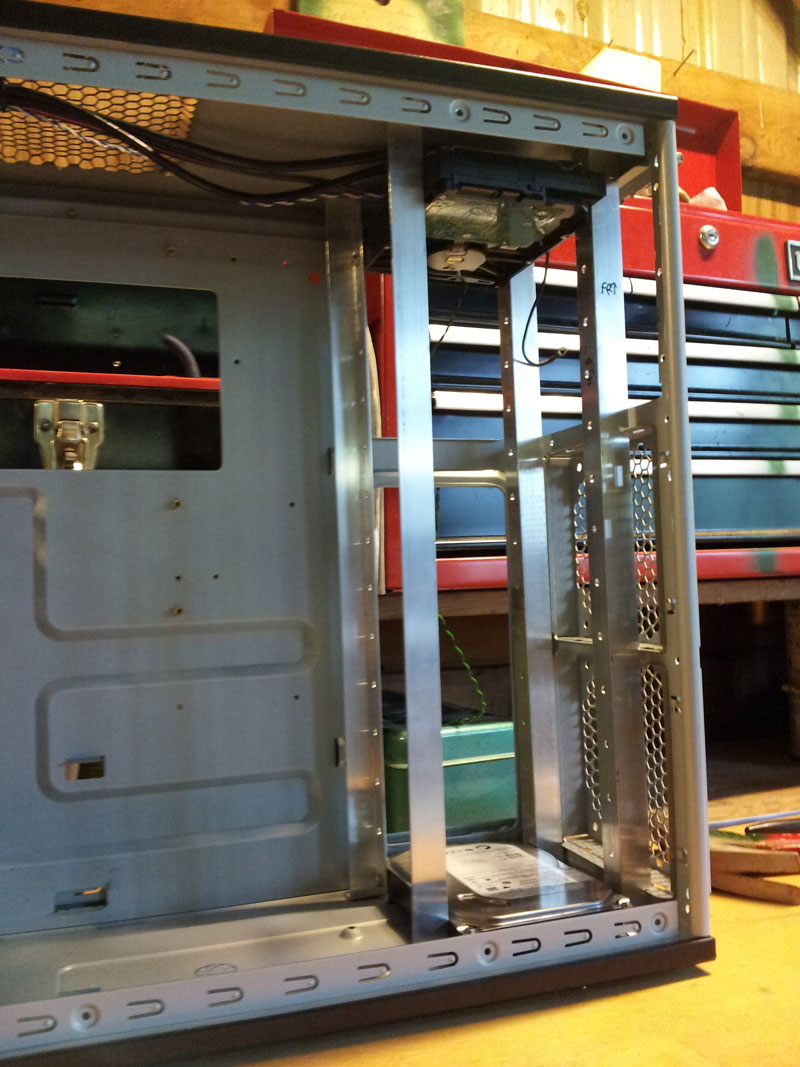
 

It’s a good idea to put a couple of drives in there. One at the bottom, and one at the top. Try it out for fit and see where you’re at.

Which brings me to another spot that’s tricky. With the rails in there, there’s no way you can get a drill in there from the inside. Here’s what you do. Pull your angle bars out, drill small holes in all of them. Put the two drives back in (top and bottom). Line them up with where you want them. Get a mechanical pencil, jam it in each hole and work it around a little. This should make an obvious mark where your four holes are going to go. Pull out the bars and drives, and drill the holes, from the inside out. Replace the bars and drives to check the location of your holes all the time.

Of course, I screwed something else up here, and cut one a little too long, then a little too short. This is what it looks like now, but it’s still totally serviceable.
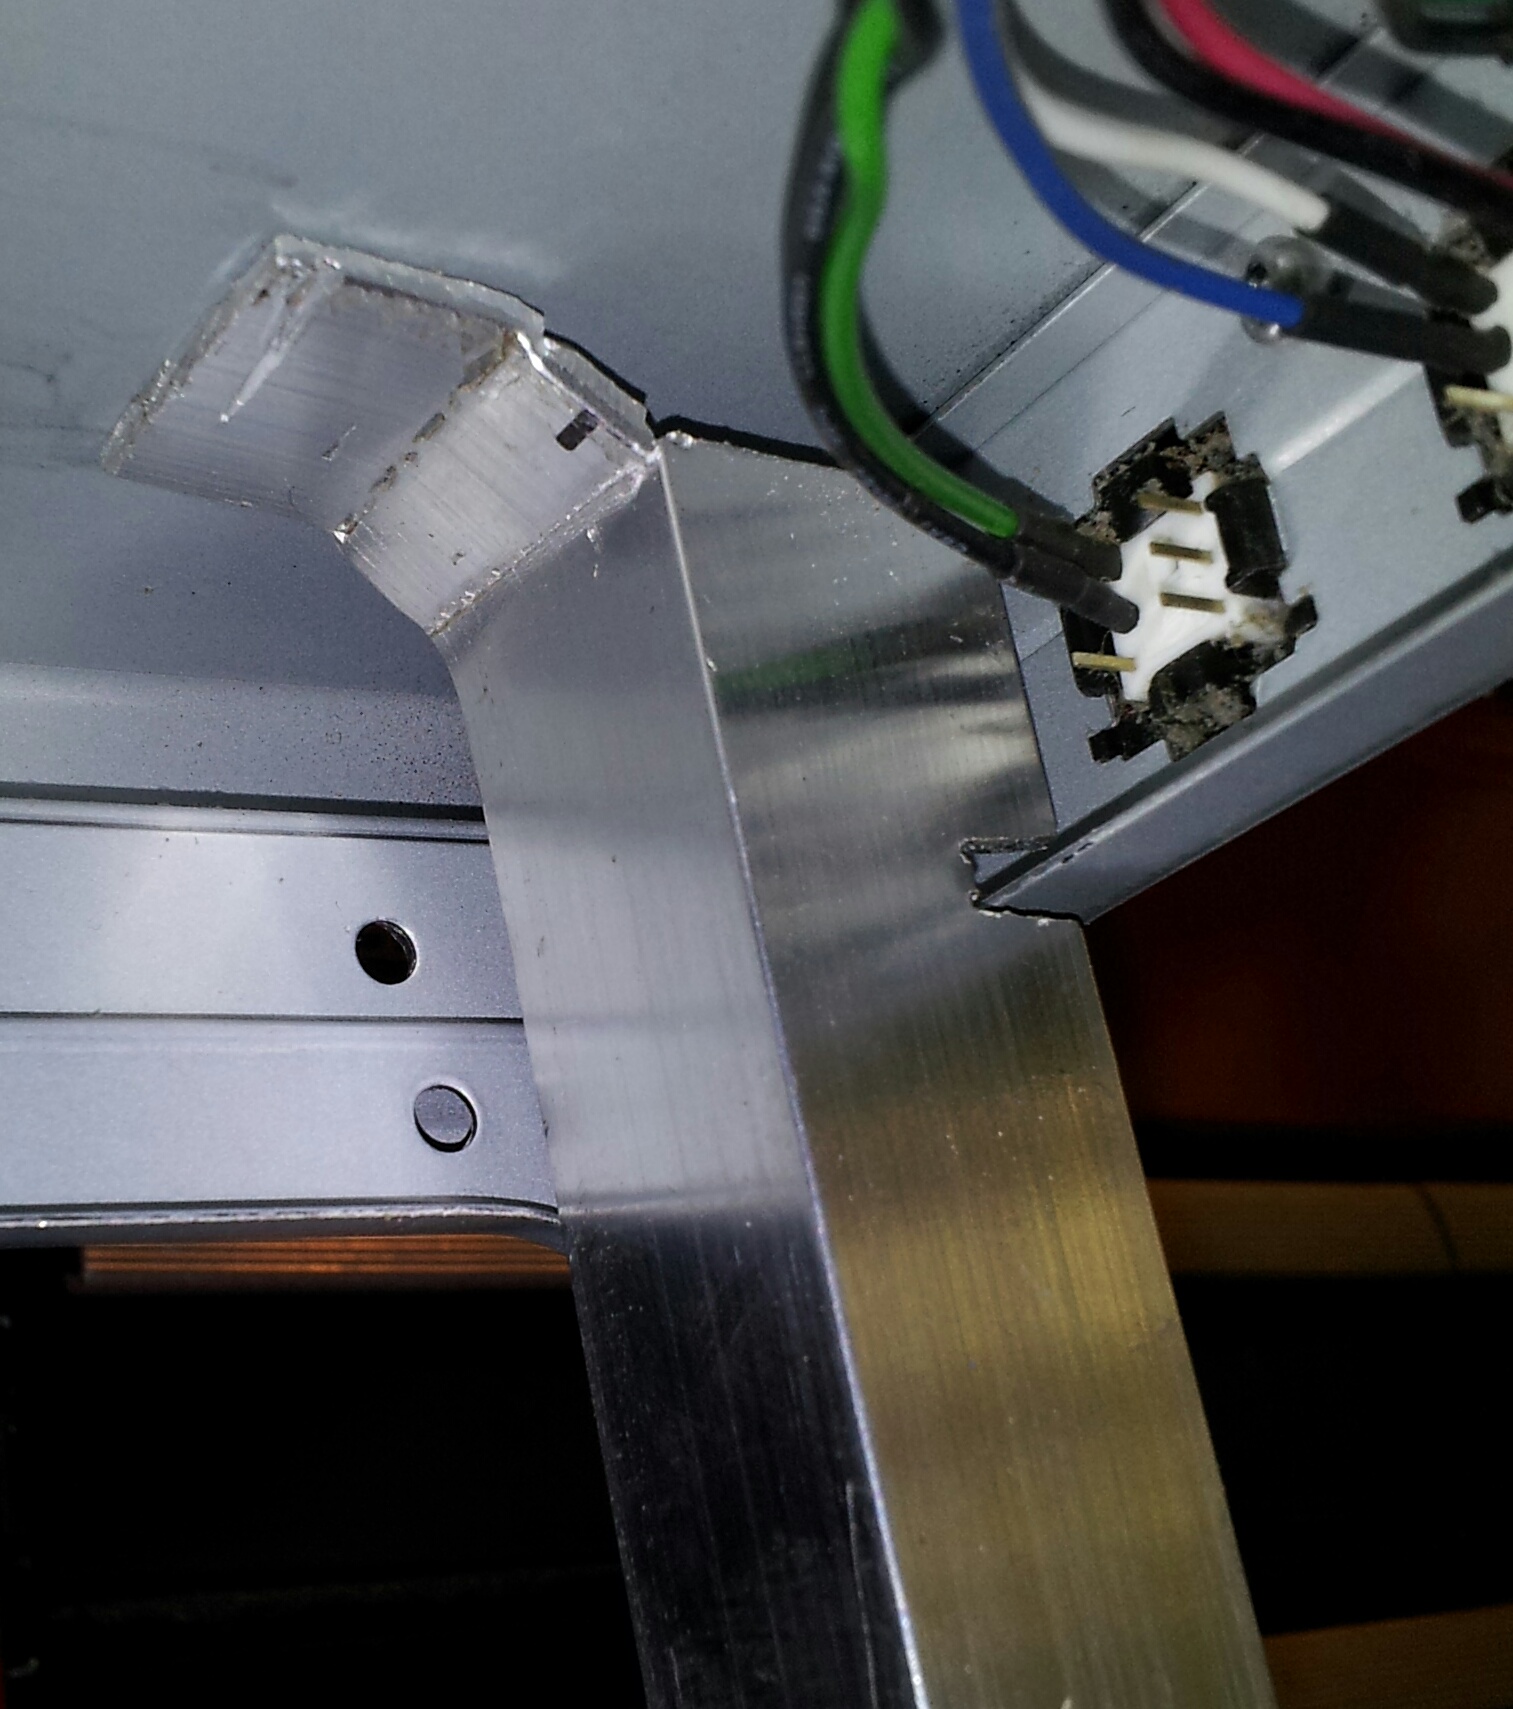
 

You can also see a little notch I made in the bar to accommodate some other bits of the case. You can gouge yours out as needed.

Now for a more fun part – drilling drive holes in all four bars. I put a couple of drives together and found that exactly 30mm from screw hole to screw hole would keep a small space between drives where I think enough wind could get through there to cool them off. At the moment, I have two drives at 37C/99F. Here are two machining tricks you can use with almost no tools.
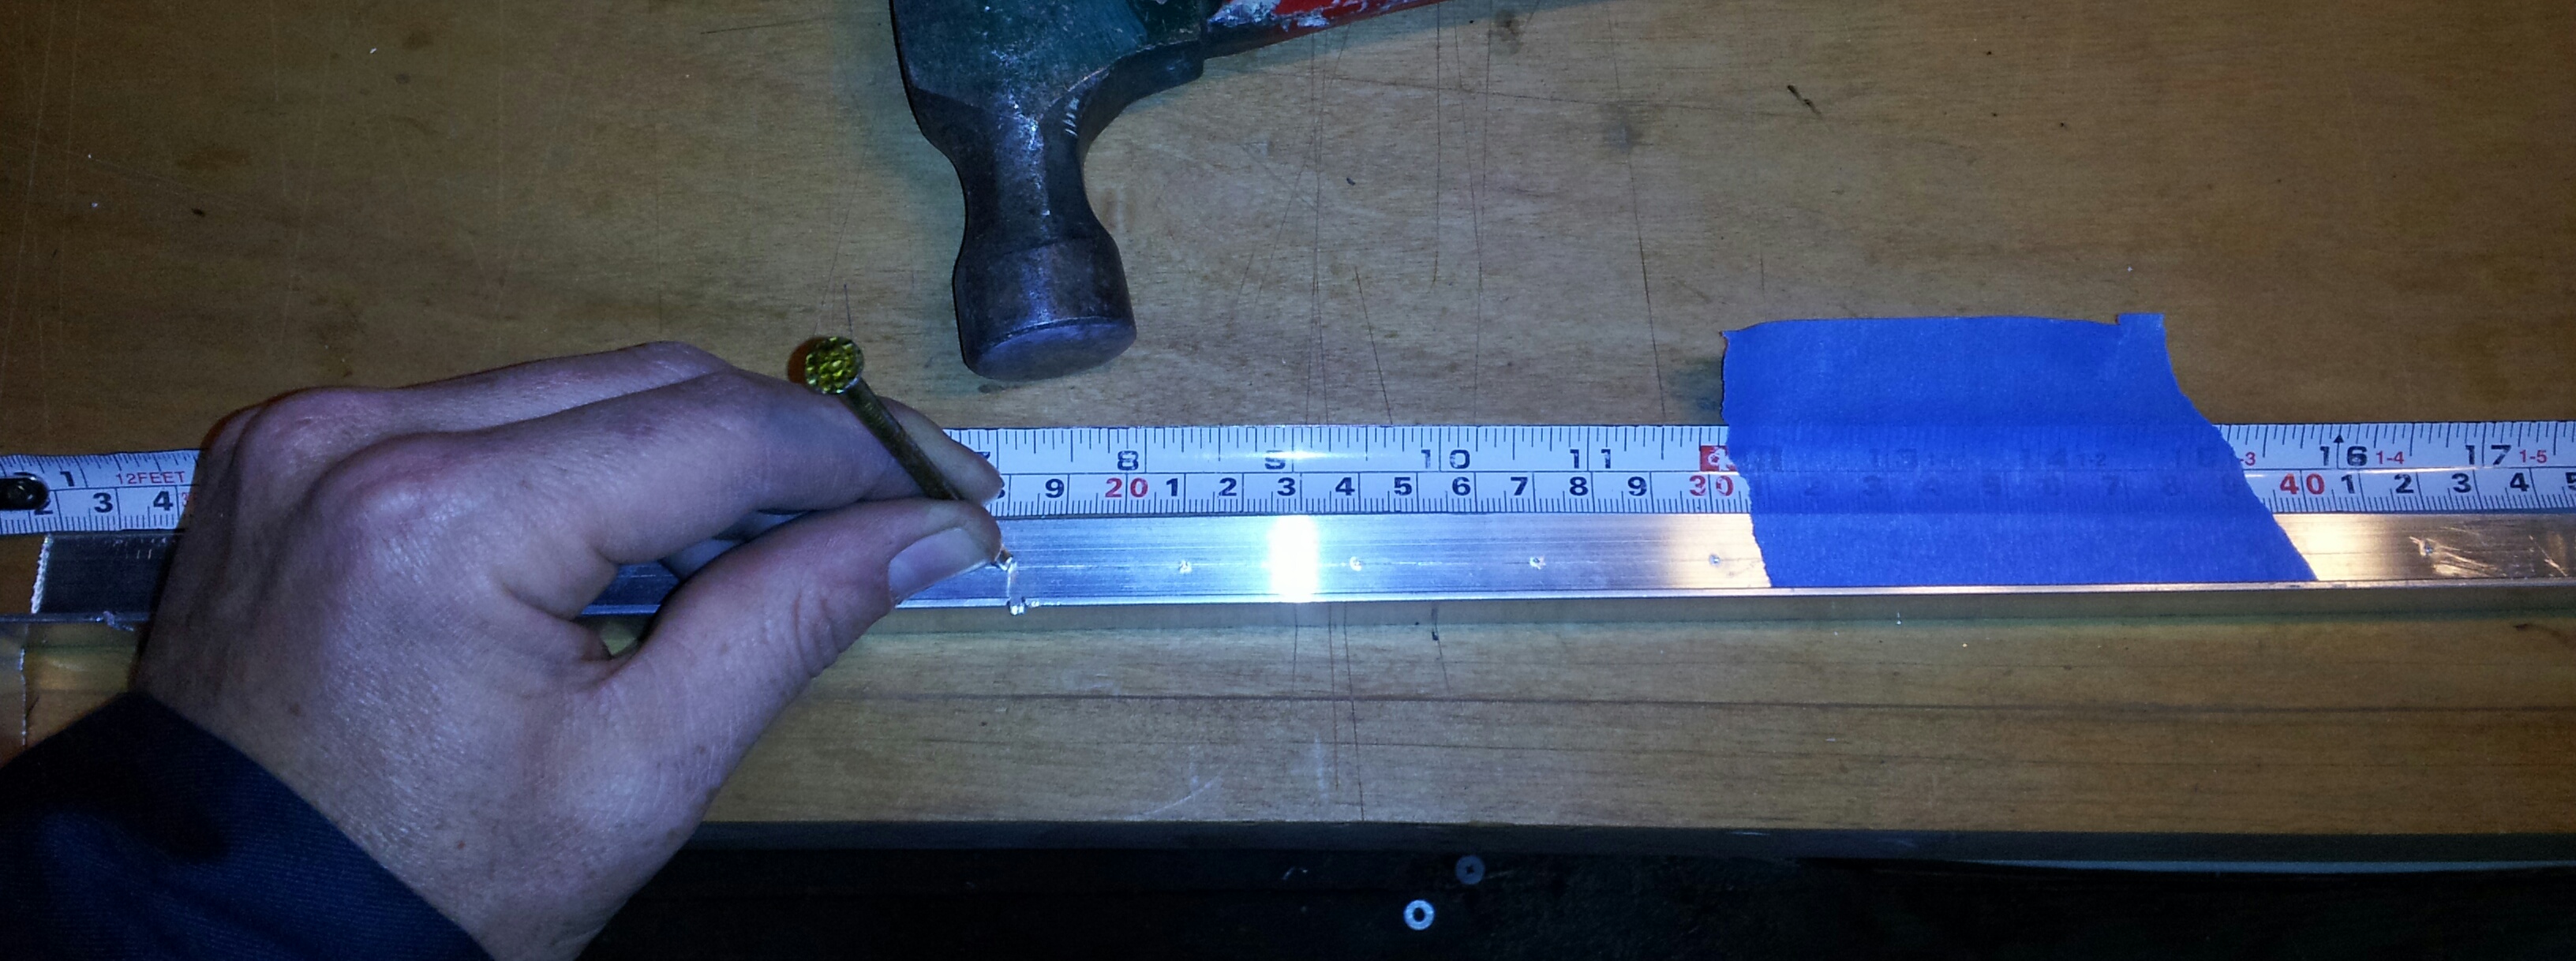
Use a nail (or nail punch is better) to score the bar right where you want to the hole to drill through. This makes a little dent for the drill bit to happily sit in and drill through. Otherwise, you’ll have a tough time getting the bugger to drill in the right spot. I used a straight edge (a different bar) to scratch a line down the whole bar right in the middle. I bluetaped the tape measure to the bar, then bonked a dent, centerline, every 3cm down the whole bar. Then I proceeded to break another two drill bits, until I put the bar on a crappy piece of wood and took it to a drill press.
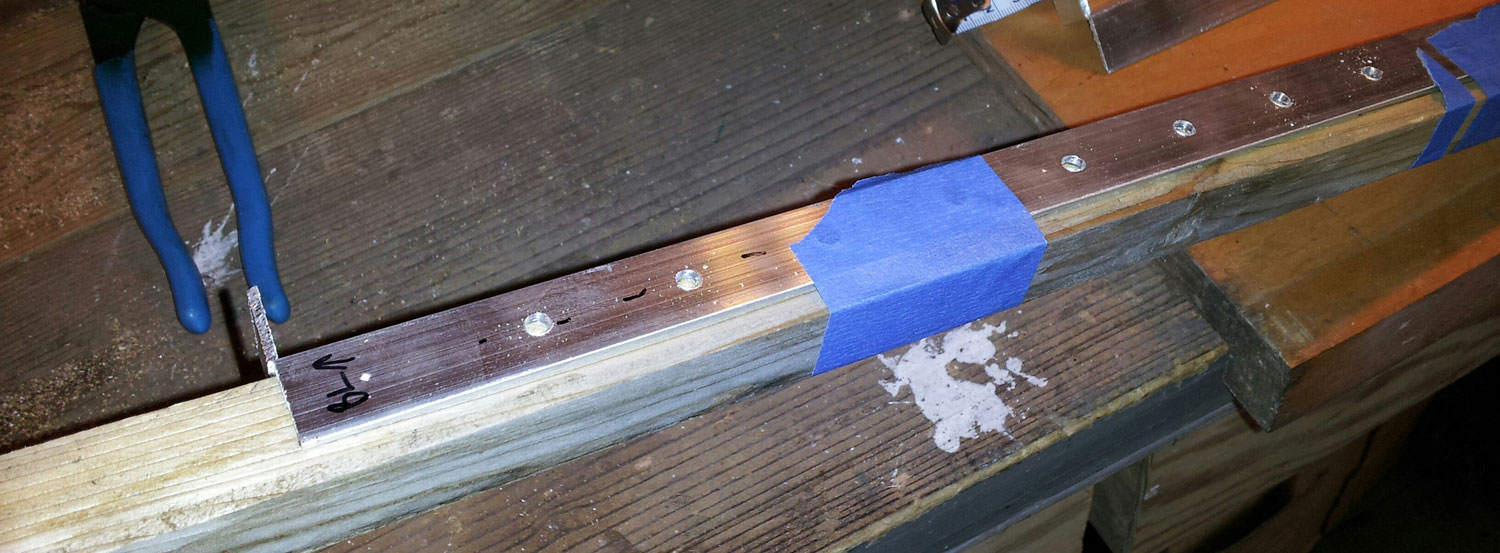
 

Mark the center with a scratch, pre-score all the holes, and you should be okay.
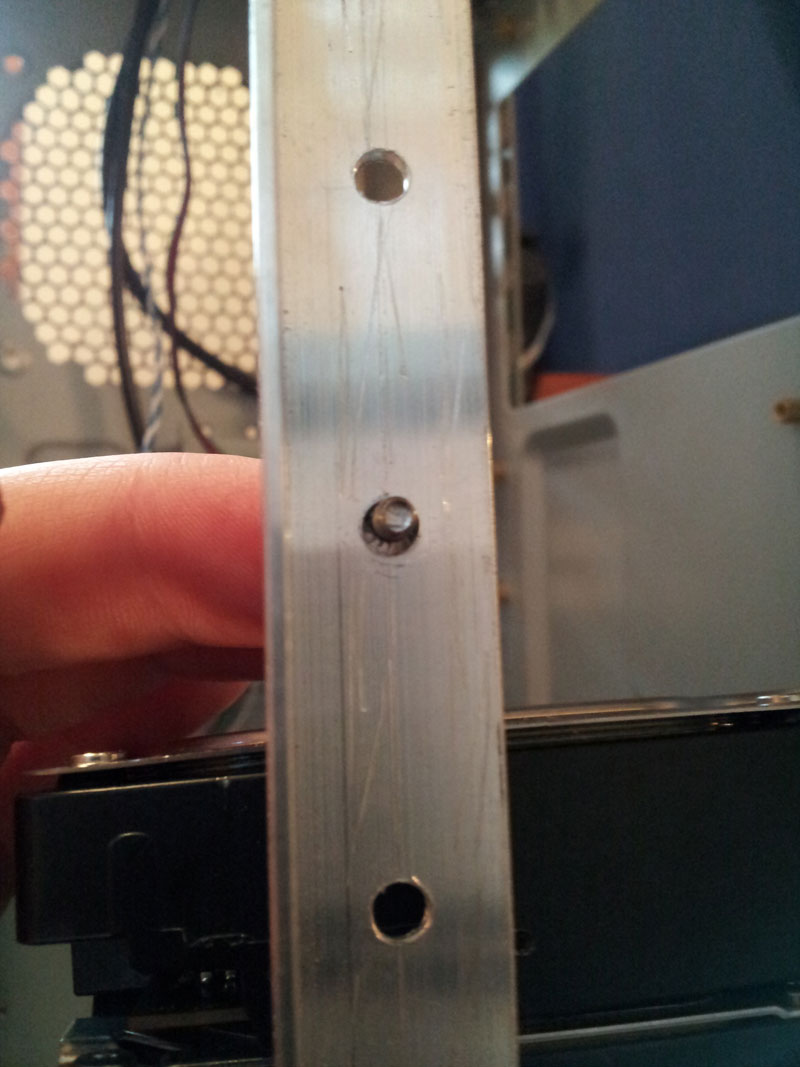
 

Also, use a bigger drill bit than you need, but not so big as the screw falls through. This will give you some leeway down the line. It’s real hard to do this perfectly!

Now that I’ve got all four rails the right length, mounting holes drilled, hard drive holes drilled, it’s time for the moment of truth. This is a pain in the ass. It’s impossible to pull out a single drive without unbolting the entire tower and scooting it about four inches from the front of the case so I can weasel a snub-nosed philips head in there to unscrew the hard drives screws. BUT, the case now holds all my drives with room for more!
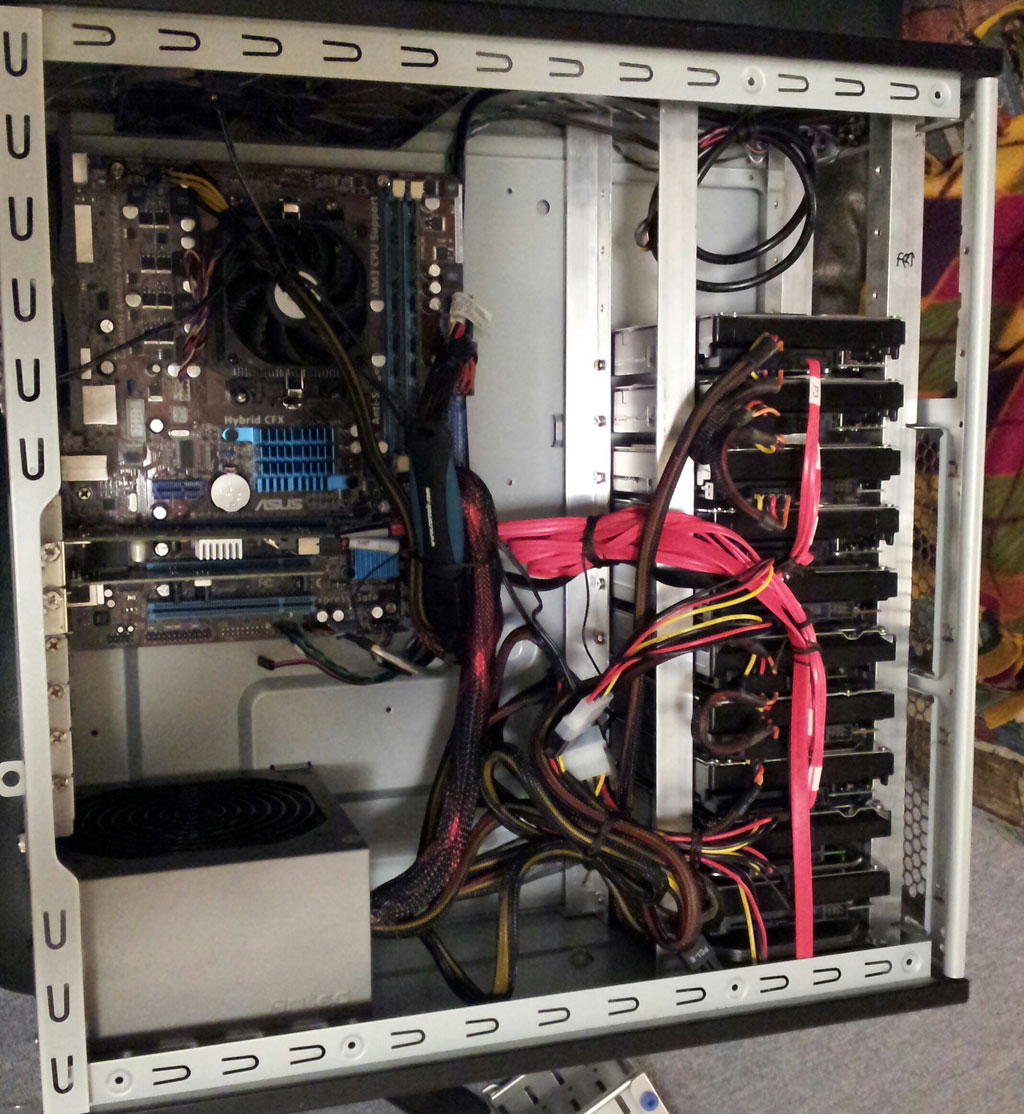
 

I haven’t tried moving any drives around yet after this initial installation. I don’t anticipate I’ll have to, but the real trick is if I can successfully get a drive out without having to pull the MOBO and PSU as well. Just like a modern car where you have to pull out three things just to get at one thing!

Jamming this many drives, in this configuration doesn’t seem to be too far fetched of an idea. I would think there is already some case manufacturer out there that has something identical to what I’ve done here.

Another note – Angled power and SATA cables. Some are angled UP and some are angled DOWN. If you look closely at those two links, you’ll see the yellow wire is on the other side from the other. Now check out my stack of hard drives. I have the wires on the top drives going down to the middle where they’re bunched up, and the bottom half of the drives heading up to that same bunch. It would be slick if the power and SATA cables were angled in the direction they needed to go. Mine, of course, are all over the place so I just had to bend the crap out of a few of them to get them to lay flat so I could close the lid.

It all worked out okay in the end, and the unRaid server is purring along nicely. If the drives start getting too hot, I can add two more 120mm fans in the front of the case that would intake directly to the drives. I’ll keep an eye on temps as time goes on to ensure they don’t get above 50C.

Leave me some comments on some other cases that are already like this. I’m curious of a better way to secure these drives without having to slide the whole damn tower to the side to reach screws.

OS at time of building: 5.0-rc12a
CPU: AMD Sempron 145 – 2.8 GHz
Motherboard: Asus M4A78LT-M
RAM:2GB Kingston valueram
Case: Antec 300
Drive Cage(s): Cooler Master STB-3T4-E3-GP 4 in 3
PSU: Antec NEO ECO 400C 400W
SATA Expansion Card: Supermicro AOC-SASLP-MV8
Cables: 3ware CBL-SFF8087OCF-05M, 2 qty
Fans: 1x140mm top exhaust, 1x120mm rear exhaust

Parity Drive: Seagate 3TB
Data Drives: 4xHitachi 2TB, 2xWD 2TB, 1xSeagate 2TB, 1xWD 1TB, 1xWD 1.5TB
Cache Drive: Seagate 320GB
Total Drive Capacity: 16.5TB

Primary Use: Plex media server, torrent seed box

Chicken coop, version 2.0


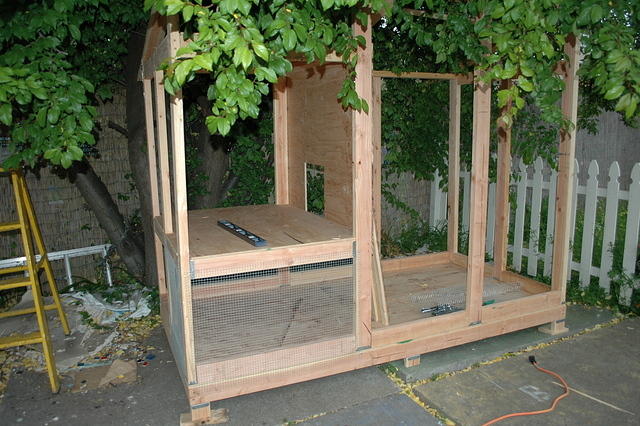
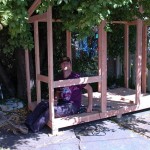
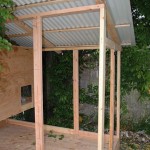
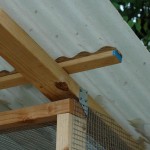
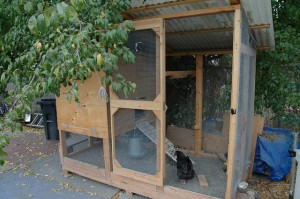
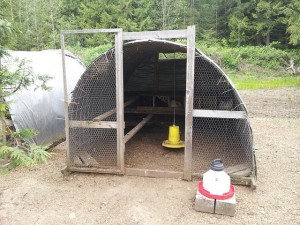
This coop has a few parts of it that make it terrific. It hasn’t gained occupancy yet, but the birds are soon to come. I’m sure it will work out fine. The first picture I’ve got here is the meat and potatoes of the coop.

The general idea of this coop is simplicity, light weight, and the re-purposing of materials.

Security
If you got birds, you need to think about their safety. Not much more annoying than you putting time and effort into them only to have a raccoon decapitate one of them. Your primary defense can be your yard fence, or it can actually be the coop. This depends on the type of predators that you have. For coyotes, animals that hunt in the day, you’re best off spending more time making your fence better. For raccoon, you cannot build a fence good enough, and should focus on the coop being their protection at night.

Portability
The last coop I made weighed about a million pounds. Chickens do not need much! So I suggest trying to use 2x2s where ever possible.
In this coop below, I used 2x4s which ended up being very very heavy! Resist the urge to build a coop like a house, and make it for chickens. No problemo.
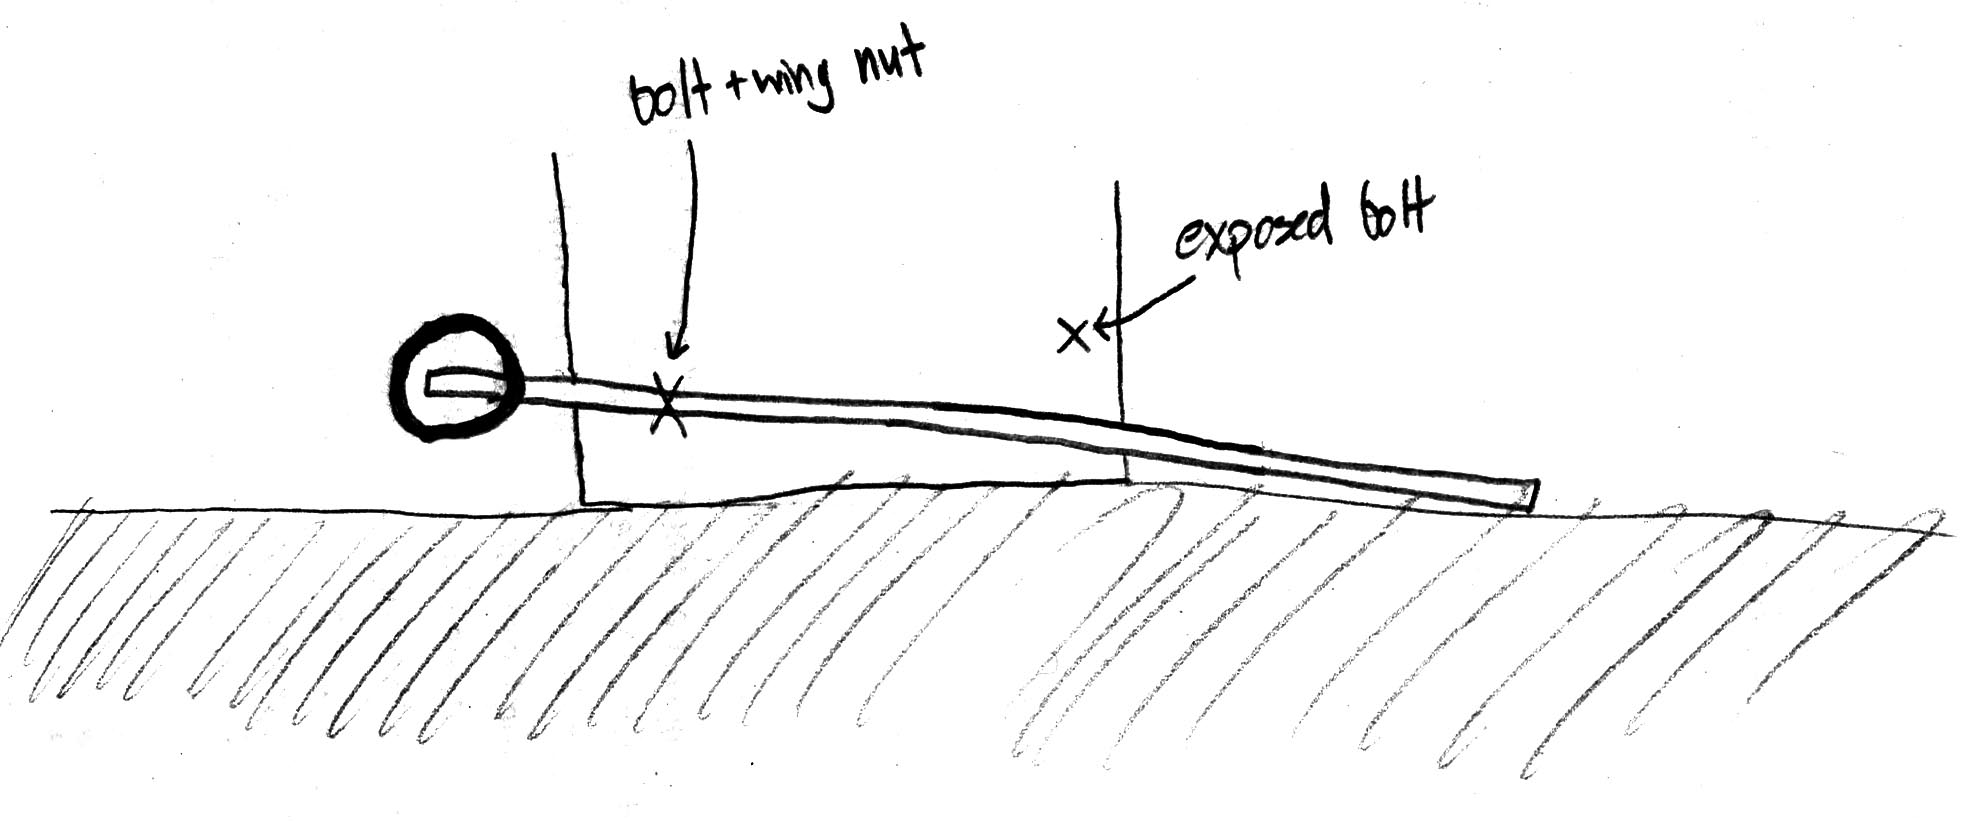
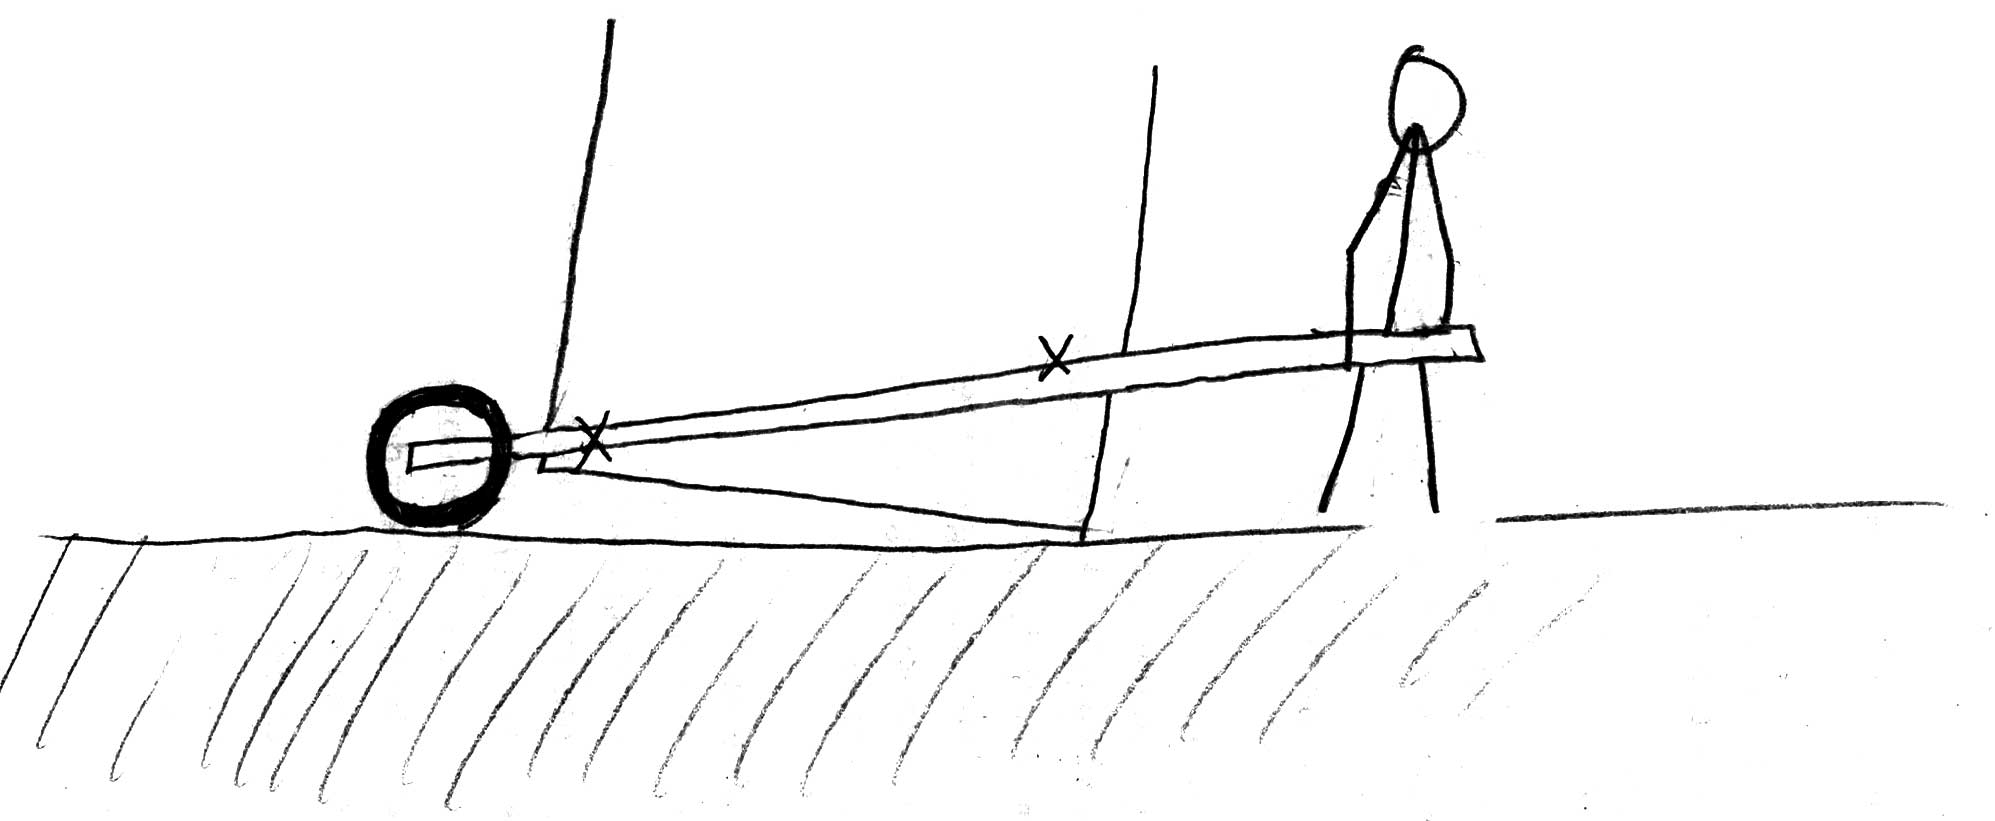
Now on to the fun part – the wheels. I had a good time designing this technique. Feel free to copy it and send me a picture. The basic idea is as follows.

I put an “x” where there is a bolt. The lifting happens in two stages. Stage one, where you first start to pull up on the handle, the wheel comes down to the ground, and as you lift more, you get a nice lever advantage to lift the rear of the coop off the ground. Then as you lift higher, the 2x4x12 (yes, twelve feet long) hits the second bolt and lifts the front off the ground.


At this point, there isn’t much getting around the fact that you have to lift that coop off the ground like a cart. It would be better to have the wheels closer to the center taking more of that load, short of getting out a jack to put on the wheels, I didn’t think that up.
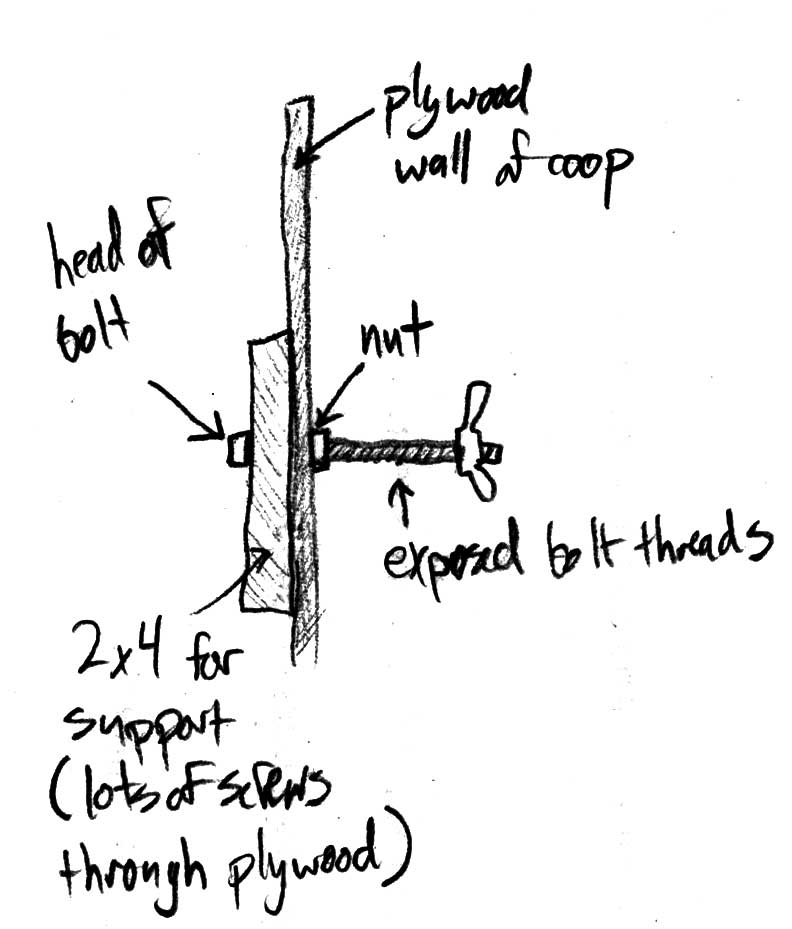
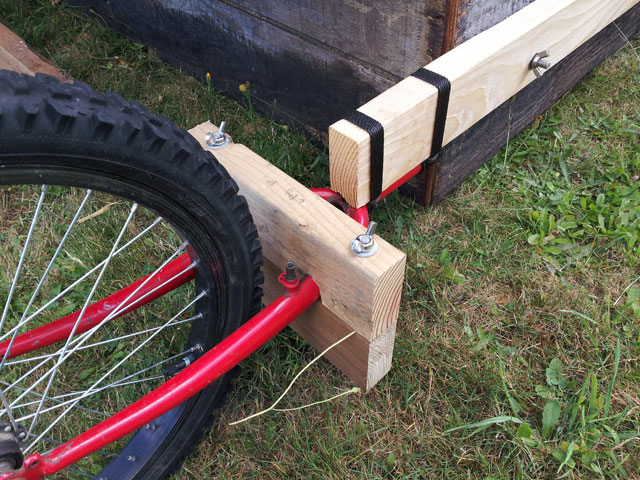
The bolt setup in the rear (the end with the wheel opposite the stickman) looks like this. The plywood I was using was pretty old and rotten, so I re-enforced the inside with a 12″ length of 2×4, and put a load of screws through the plywood into the board.

Now the other item of note here is the order of construction. No doubt your coop will be a little different, but if you follow these general steps, your chicken-cart will work just fine.

First build the coop on semi-level ground. Then get yourself the 2x4x12s with wheels on them. Set that wheeled board next to your coop, and lift the wheel slightly off the ground. Drill a hole through the center of your 2x4x12, mark the coop, and that will be your first bolt. At this point, when you bolt that 12′ handle to the side of the coop, you should easily be able to lift the end of the coop off the ground.

Next you need to install the front bolt. The height of this one will depend on where is most comfortable for you to lift. Also, how high you want the front edge of the coop off the ground as you walk around with it. Hold the handle so it’s comfortable, do a little squat, make a mark and drill. This bolt will come in contact with the top of the 2x4x12 as you lift and lift the front edge (the entire thing) off the ground on the wheels.

I did run into a few problems with my wheel attachment. As I rolled the coop around, the
wheels wanted to torque to the side. I put together a yoke to hold the wheels from torquing. I also added an additional 2×4 up front for the people to hold on to as they pull it around. Now, the coop is essentially surrounded by a 2×4 rectangle that can also lift the coop. It’s a little hard to tell from this picture, but the 2×4 on the bottom extends all the way across to the other wheel. This worked very well.
Next item that is good about this coop is the total lack of a floor. This cuts down on weight a ton. We did this so we could start doing something called “deep litter method.” The idea is that when the chickens turd all over the place, as they do, you just throw more yard waste on top of it. Get a mix of green and brown in there. From what I hear, if you can smell poop, you’re not doing it right. Of course, there isn’t a cute little memory trick for telling you WHAT to do! We’ll see how that works. Once the floor builds up, say about 12″ or so, you move the coop. Then you’ve got a nice heap of compost you can use throughout your garden. Thank you chickens, and thank you to me for doing less work.

Next we left off the largest wall and used chicken wire only. Again, cuts down on weight. I saw pictures on the internet of chickens clucking away in their coops while the ground was covered in snow. I guess their feathers work well as insulators and they do not, in fact, need to be in a box every night. Just leave a wall off, badda-bing. I’ll let you know if they freeze…

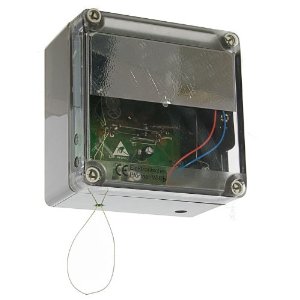
A holdover from coop version 1.0 is the amazing chicken door opener. You install a guillotine type of hatch, then order this battery operated, light activated, chicken door
opener from Wells Poultry in the UK. Shipping is $40, and the British pound is spanking everyone, so it cost me $180 all said and done. But I will tell you, if you’ve ever had chickens, THE most annoying part of them is having to let them out in the morning, and close them in at night. This door opener takes care of both of those items automatically. A true life changing invention for chicken owners.

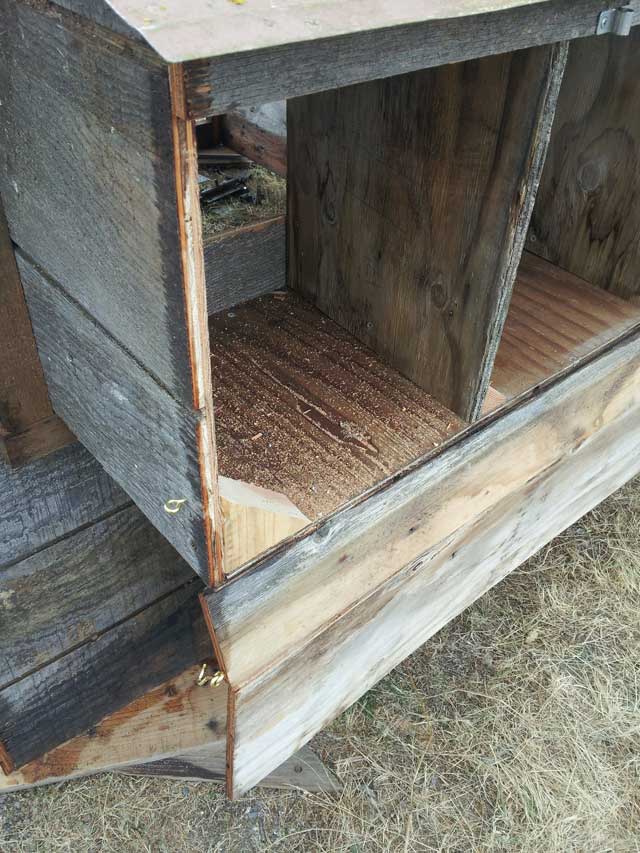
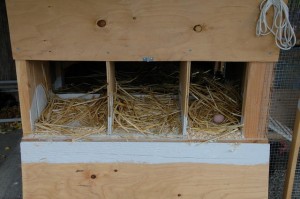
Next we’ve got the nesting boxes. Before I had four birds, and they all fought over one of the three boxes available to them. In this coop, I’m planning on
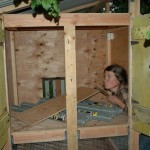
17 birds and they all have to use four boxes. Should be fine. The design feature in this part is a double hinge door. For the first hinge, it opens from the top down. You can open the hatch from the outside to reach in and grab eggs which will be an everyday occurrence. Secondly, if you undo the additional clasps on the side, you use the lower most hinge. Doing this, the entire wall falls away leaving an open edge to the nest box. Then you can easily scrape the entire contents onto the ground. Boom, done. Also of note – the floor of the nest box is the only floor in the entire coop. Less to clean: yay!
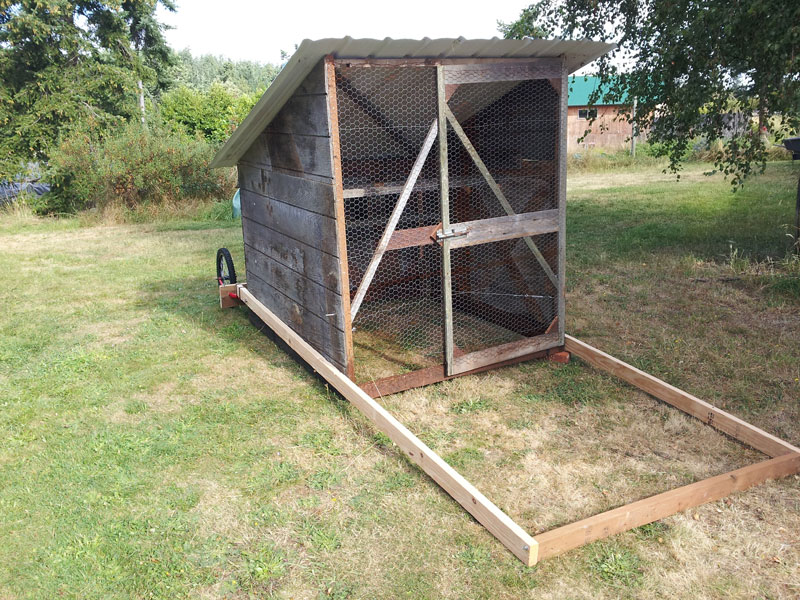
Here’s a photo of the final product


Machining wedding rings

I was like, oh great, I’m going to save tons of money! While the 1″ bar stock of titanium was a steal at less than $200 for a four foot bar, the number of hours I’ve put into the project, even at a monkey’s wages, has pretty much rendered the entire project moot. The folks as Supra Alloys in southern California were very friendly and have good prices on bar stock. But, I do have something to show for it!

For those of you who don’t know, a metal lathe is the exact same thing as a wood lathe. The idea is a machine holds on tightly and spins the stock. You move a “tool bit” around to scrape off bits of metal making something round. You can make a screw, ring, engine parts, many many things. You can get brass, aluminum, steel, or high grade titanium. The sky is the limit there too. With a real hard metal like titanium, you’ll spend more time sharpening the tool bit through, whereas brass, by comparison, is like lathing a bar of soap.

lathes come in many shapes and sizes. These shots are not instagram, they are literally scans of old timey machinists using lathes to make big diesel engines for ships. Pretty interesting stuff.

I decided to make the first couple of rings out of stainless steel as it was sitting around the machine shop and I could just borrow some of it. Stainless turns our real nice. After coming off a lathe, the rings have a matte look to them due to the tool bit scraping up the sides, or the filing taking down the edges. As the ring is still on the bar, and not yet cut off, you can make the outer corner of the ring look perfect. Use a combination of emery cloth (glorified cloth sandpaper) and a nice file to make the outside edge and inside edge nice

and friendly to a human finger. In this shot I’m including you can see the spinning lathe head, the titanium bar stock with the OD cut, and the tool bit in it’s chuck. For this part I’m facing off the end. The tool bit starts in the center of the piece, then slowly feeds from the center to the outside. This leaves a real purdy surface to drill into.


So once you’ve got the ring’s OD lathed down, you drill the center. The drill bits tend to burn up because they’re made of high speed steel, whereas my bar stock is titanium and quite a bit harder than the stock. I would just alternate between drill bits to give one some time to cool off between cutting. Once I cut the ring off, I had the right sized ring with one pretty side, and one not so pretty side. Enter mandrel trick. I didn’t take a good picture of the mandrels that I made but basically they’re chunks of brass whose OD is cut to a few thousandths of an inch less than the ID of the ring in question. I would then drill a hole, and tap (to screw a cutter into a hole that makes threads) it only half way down. Then I pulled that brass out of the lathe, and cut an X in it with a hack saw. The picture of the mandrel above is the basic idea. I would put the ring on the mandrel, and start forcing a set screw into the hole. This would make the four cut parts of the mandrel expand and hold that ring from the good side so that I could spin it and work on the outside OD and ID to make it nice.

So at this point I’ve got a round ring, with offset ID. On one half of the ring, there is more “meat” which is where I cut the lego nubbin into. I rotated the ring 90 degrees, and was able to get it centered up in the four jaw chuck again. This is also where I wish I would’ve done a better job. The ring was as close as I could eyeball it, which was off about 1/20 of an inch or so. When I rotated the ring on it’s side, I was able to start cutting around to make the lego nubbin all by itself on the fat side of the offset ring.

Compost it all

~2010

Starting up a compost has been surprisingly entertaining. It’s neat to see my “garbage” turn into something more useful simply by sitting there.

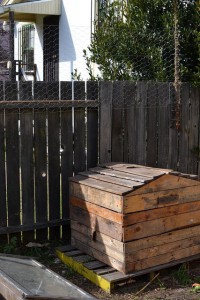
I decided to make our compost container out of old pallets that we picked up from stores in Berkeley. (+) free (-) old wood = brittle wood. You also need to paint the wood bits or the damp compost will compost the boards too.

DSC_2639DSC_2621DSC_2618DSC_2619DSC_0055

The basic idea here is that the bottom is made of two rectangular bits. This way, you can pull off the top, pull of the top section and set it somewhere else in the yard. Then with a shovel, you shovel out the old heap from the old location into the new location. This rotates the heap up side down. Once you get some worms going in there, they will probably go bonkers. Bugs and worms are good!

Apparently it’s also good to relieve yourself on the compost heap. Just want to do my part 🙂 http://www.guardian.co.uk/lifeandstyle/gardening-blog/2009/nov/13/composting-urine

Ah, what goes in there. Everything except meat bits and bones. Pay attention to the general color of the compost. If it looks to gooey, add some grass clippings, and vica-versa. There are many “experts” on compost. I have a hunch there isn’t much you can screw up here except to not use it and add to it! Just go for it.

~2012
DSC_2800After using regular compost for quite some time, I thought I’d give a go at a worm bin. I used plans for a double plastic bin design I found somewhere on the internet. Essentially you buy two plastic bins that nest into each other. The inner bin, I cut little vents in the sides just under the rim. Then I drilled about ten evenly spaced small holes on the bottom of the bin. That modified bin nests into an unmodified bin. I also added a couple chunks of junk wood between the two so when the inner bin sags down, it’s got something to rest on.

DSC_2801I started with 100 red composting worms from some dude named Uncle Jim Worms off amazon. Totally reasonable, $25 for 1000 worms. The bag came with instructions that made it simple to start them off properly.

I think the challenging part with these worms is keeping them at maximum productivity. That and then getting your worm casings (worm turd aka black perfect dirt) out once the bin weighs 40 lbs without killing everyone. Oh, that reminds me there is an awesome book with way better instructions that I’ve got here “Worms Eat My Garbage.”

I throw about 90% of our kitchen scraps into this bin. I fill it up, then go back a few days later and lo-and-behold, it’s magically gone back to essentially the same amount that was in there before. These little guys are magic.

DSC_2804
the finished product on day 1

From time to time, I just add water to the mix. The book describes it as being able to wring a little water out if you squeeze it, similar to soggy cardboard. So if it gets a little dry in there, I just add water. The other side benefit of adding water is that the water goes through the worms and their casings, and black nutritious water comes out the bottom. I empty it out from time to time (and save the swimming worms that found a hole and jumped through) and use it to water plants around the house.

I’ve had the bin going for over a year now, and haven’t yet pulled the casings out, but it’s certainly high time I did. Good easy fun!

Oh last note: it’s been getting real cold in Port Angeles. I had the bin under a tree just outside the kitchen door for a while. But after we got some snow, I moved the bin into the garage. I was worried they’d all frozen to death, but these dudes are resilient! They just move slower. I could wrap the bin in some leftover house insulation that I’ve got to keep the coldest part of the nights off them. But for now, I’m happy with them being slow.

Urban Chickens

Some of these descriptions/pictures are a little mis-matched. But I think you’ll get the idea.

Chickens have been pretty interesting. I think they are a gateway drug to animals. They are far easier than cats or dogs – if you can even imagine. They crap all over the yard, so get a big broom. They eat young grass. If you have them free-range, their range will not have grass or many other plants for that matter. There are books that talk about chicks with plants… this is it . I saw Alibot reading it the other day.

DSC_3078She really wanted chickens, so I had to oblige. Let me tell you, like all projects, they are more expensive than you’d think. I wanted to look back to see what the costs were, but my stupid online banking doesn’t go back that far. The two expensive parts were the corrugated fiberglass roof parts, and the rolls and rolls of hardware cloth. Here’s a thought on an area I could’ve saved money in. The chickens are in the coop portion at night. The run, the outer portion, doesn’t not need to be protected as much because night creatures, racoons, couldn’t reach in and get them in the coop anyways. That’s almost entirely enclosed in plywood.

DSC_3092Design we used. Suffice to say, these are chickens . Once you spend a little time with them (yes they do have personalities) but you can tell they are meant to be eaten. This one day I was digging a hole in the back yard. I was taking full swings on this pick axe that this chicken was standing two inches away from this thing coming down with a vengance. I swear I thought I could see her feathers blowing from the swing of the pick axe. Anyways, inches away from her head: doesn’t even phase her. These birds are food for everything. Don’t worry about making a perfect coop – they won’t notice. What you don’t want is sickness, death, and general irritation. Things you do want:

  1. easy access to eggs
  2. easy removal of turd
  3. safety of poultry

Floor plan
4’x8′ piece of plywood. I put 2×4’s underneath to support the plywood. I cut small bits of 2×4 for the six feet that hold the coop above the ground.

DSC_3089The front of the coop is about 7′ (you should now that this: ‘ means feet, and this ” means inches) tall. The back is about 5 1/2′ or 6’. The coop is just a plywood box.
But here are the side turd clean out doors. Re-purposed gates or something.The latch there is simply three eye bolts  where the one in the middle is in the coop, and the outer two are on the doors. Then you jam a rod/stick through all three – and bang, you’re secure. The important thing about having big doors like this is that you can open them for full access to the coop and the turdy floor. Then you move a bucket over to the doors, and sift the turd out easy with a piece of hardware cloth  that you’ve bent into a bucket shaped thing. DSC_3086For wood chips in there, we have a local wood working place called MacBeth lumber. They don’t care if I come by from time to time to get garbage bags full of sawdust. Who knew: they like to perch on a stick when the sleep. I’d lay on the ground. But they kinda drape their fatty bodies over a stick and sleep up there. You can also see the side of the three nesting boxes there on the right. That’s all there is in there! Simple.

The front side

DSC_3093For here we’ve got the main door. It’s a great idea to install a piece of string to pull the handle incase you lock yourself in. When the door is new, it shuts so easily! Both Alibot and I have locked ourselves into the coop. Whoops.

Referring to the front size picture above, you’ve got the door, and the coop. The coop has a little door that opens right to the nesting boxes. We’ve got four chickens and three nesting boxes. They all share the same nesting box, like how boys generally always use the same urinal. NEVER have I seen more than one of our birds in a nesting box at once. For this reason I think you could get away with four birds and one box. Or even six and one box.

DSC_3579Anyways, when you go to put the away in the evening, you grab the eggs out of the handy little door. They chickens have already put themselves to roost (when it gets dark), you sweep up the yard and Bob’s your uncle. The tree is starting to come in, but you can still see the run (4×8′ floor) where the door is going to go, and the front part of the coop without the egg door, and without the nesting boxes.

DSC_3586I’d like to stress here that this does not have to be a poultry palace. These creatures have been chosen for their egg laying capability and have been domesticated over generations and generations. They have no idea you’re swinging an axe by their heads, and make awesome eggs. They take care of them selves, and are a great way to start getting into some more exciting gardening!

http://www.youtube.com/watch?v=bx3OY5efOTo

A note on paint. When you put all your time and money into the coop, you’re going to want to start using it right away. Try to hold off just a little while longer. A little paint goes a long way for longevity of the coop. Paint everything that will have stuff on it. I have a couple of inches of fill sand all over the floor – it got painted. The floor of the coop, which is covered in sawdust and chicken turd also got painted. Any part of the wood that is directly exposed to the weather, especially end grain, gets painted too. Any paint is better than nothing.

DSC_3582I just got the neatest toy from the UK… So the only thing that has been a bummer with these little guys is the requirement to let them out, and put them in. If you let them out, you MUST put them back in. I’ve read about stories of people leaving the doors open and coming out the next morning to a massacre complete with bloody raccoon prints walking away – varmints!

I wanted an electric chick door opener. And why not!? It would be so fun! There are a few howto’s on the internet, but I found them slightly more than I could bite off. This one was the most promising:
http://blog.makezine.com/2010/01/20/automatic-chicken-coop-door-opener/
or this guy: http://www.fabiens.org/ckblog/?page_id=106

So after all these shenanigans of trying to figure out some solar vs 120V house solution, I just ponyed up $150 and bought a battery powered one from the UK. I installed it today, and so far it works! I can’t speak for racoons getting to the chicken feed, but the coop door shuts and opens with the sunlight and that is great! I may try swapping out the AA batteries for some D batteries to see if they last longer.

IMG_20130427_131339You can see the battery powered door opener there at the top. The two wires leading off to the right are for the light sensor, and the timer. The entry level opener has a light sensor in the box itself. That means you’d need a pulley or two and have to mount the motor box outside the coop. I got the external light sensor so I could mount the motor box inside the coop. The thing runs off four double AA batteries. We’ll see how long it lasts. I’m curious what it would take to get a solar panel and some NiCad’s in there… another day.

Oh, and total costs. I estimate the total coop ran me about… $500. Like I’d said above, the most expensive parts were the hardware cloth (square galvanized chicken wire with 1/2″ holes). I’ve got four chickens. I bought a fifty pound bag of UN-organic chicken feed for $28 on 12/28/11, then again on 3/26/12. So food is about $10/month, plus all the kitchen scraps you can throw at them. During the summer we get about 3.5 eggs/day. Winter more like 1 egg/day. So average throughout the year I’d say 2 eggs/day. That’s 700 eggs/year, $120/year food, so that works out to 17 cents/egg. A good deal, if you don’t count the coop! I’ve had these girls since May 2011. They didn’t start laying until Sept 2011. Let’s say between then and now they averaged 2 eggs/day, that means about 500 eggs. 1 year $120 food, $500 coop, so far I get about $1.25/egg. You can get “grass fed” organic eggs for like $5 dozen, so I’m at $15 per dozen! But I’ve got a coop and four fat birds… mmmmmm.

Definitely get chickens! It’s fun, and relatively easy. Like I said, easier than a cat or a dog. Check your city regulations for poultry. For instance, no roosters are allowed in Berkeley city limits. Also, check your local craigslist for people unloading coops, or people offering to build them. If you still want to do it, you could talk to the builder guy and see if he’d sell you the materials only – like a coop-kit or something. Doing it from nothing with just you and Home Depot can get spendy.

Good luck!

Thinking about a road trip?!

I didn’t want to drive across the country, but alas, I dragged ass on selling my car and still had it the day before I had to leave. This sucks! Plan B, drive the car across and try to sell it for real in California.

So, I kept a little log as I drove across. It’s pretty interesting, here’s a link to the spreadsheet I made to get these fascinating numbers:

miles: 3315, this is from NYC to Arcata CA
gas: 113 gallons
estimated cost of gas: $350
average MPG: 29
total time: 101 hours, or 4 days
average speed 24 hours a day to complete trip: 33MPH
longest day: 6/28/07, 904 miles
average mileage per day: 663, at 80MPH that’s a little over 8 hours
estimaged insects killed: 453,981
glow bugs killed (really cool lookin on windshield): 23
small rodent deaths: 1
birds killed: 0, but some real close calls
tickets: 0 (yesssssss, thank you cruise control)
estimated times gunned by cops: 3
bare asses: 1
little kid provoking trucker to blow horn by pumping the fist: 1
stupid high school caravans: 1
funerals: 0
accidents by side of road: 2
radioactive trucks passed: 2

Google map of approximate journey:
google map

A plane ticket across would’ve been $350. I had to cancel the damn ticket and get a “credit” I have no idea which f’ing airline it’s even with; and come to mention it, I think I had “credit” from a plane flight I canceled a long time ago… I wonder what airline that was with? Hell with it. Thinking of all the hours I was on the road, and all the opportunity that something could’ve gone wrong (nothing did though) it is much much safer and mostly likely much cheaper to take a f’ing airplane!

New item by Drew Kerlee / Google Photos