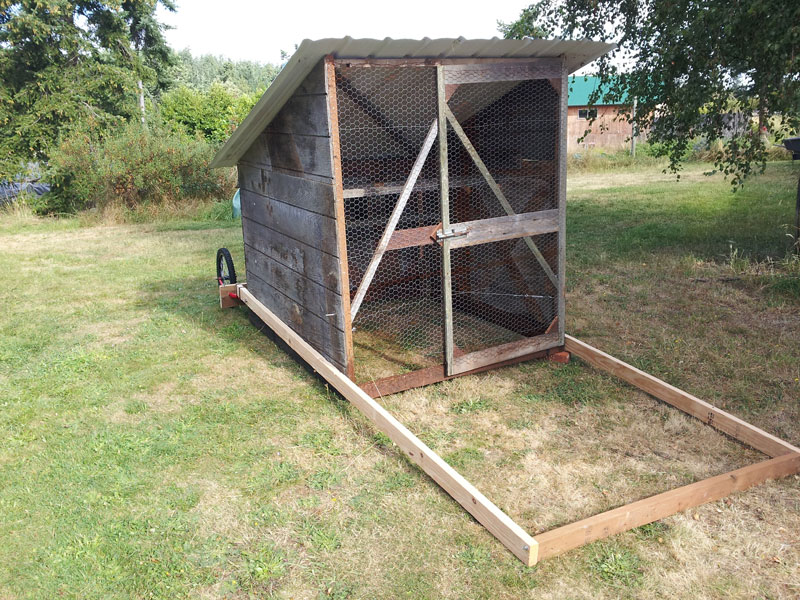
This coop has a few parts of it that make it terrific. It hasn’t gained occupancy yet, but the birds are soon to come. I’m sure it will work out fine. The first picture I’ve got here is the meat and potatoes of the coop.
The general idea of this coop is simplicity, light weight, and the re-purposing of materials.
Security
If you got birds, you need to think about their safety. Not much more annoying than you putting time and effort into them only to have a raccoon decapitate one of them. Your primary defense can be your yard fence, or it can actually be the coop. This depends on the type of predators that you have. For coyotes, animals that hunt in the day, you’re best off spending more time making your fence better. For raccoon, you cannot build a fence good enough, and should focus on the coop being their protection at night.
Portability
The last coop I made weighed about a million pounds. Chickens do not need much! So I suggest trying to use 2x2s where ever possible.
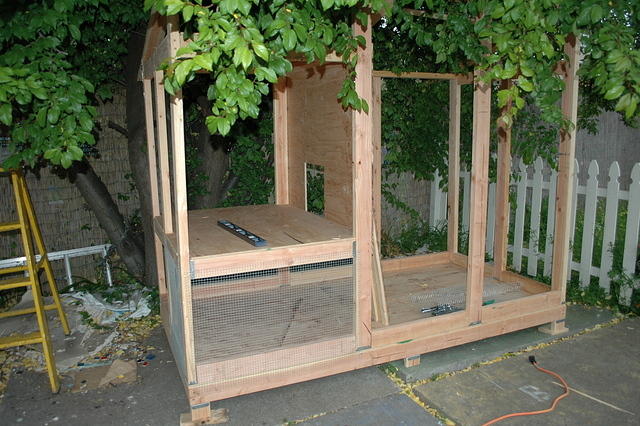 In this coop below, I used 2x4s which ended up being very very heavy! Resist the urge to build a coop like a house, and make it for chickens. No problemo.
Now on to the fun part – the wheels. I had a good time designing this technique. Feel free to copy it and send me a picture. The basic idea is as follows.
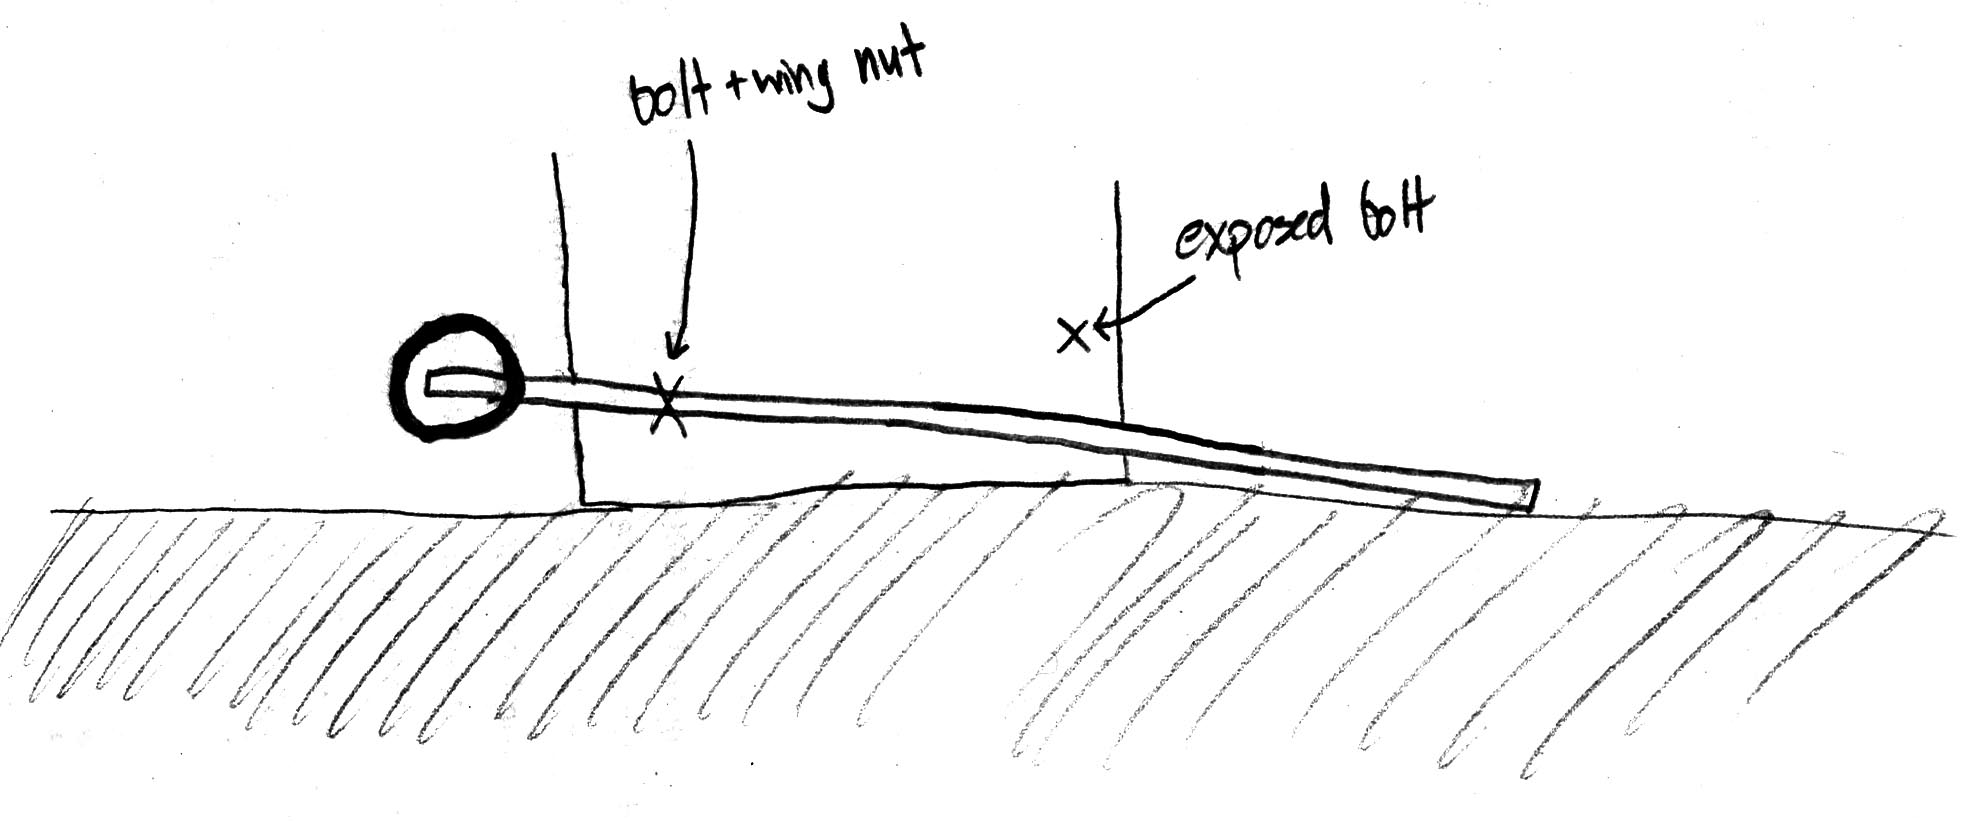
I put an “x” where there is a bolt. The lifting happens in two stages. Stage one, where you first start to pull up on the handle, the wheel comes down to the ground, and as you lift more, you get a nice lever advantage to lift the rear of the coop off the ground. Then as you lift higher, the 2x4x12 (yes, twelve feet long) hits the second bolt and lifts the front off the ground.
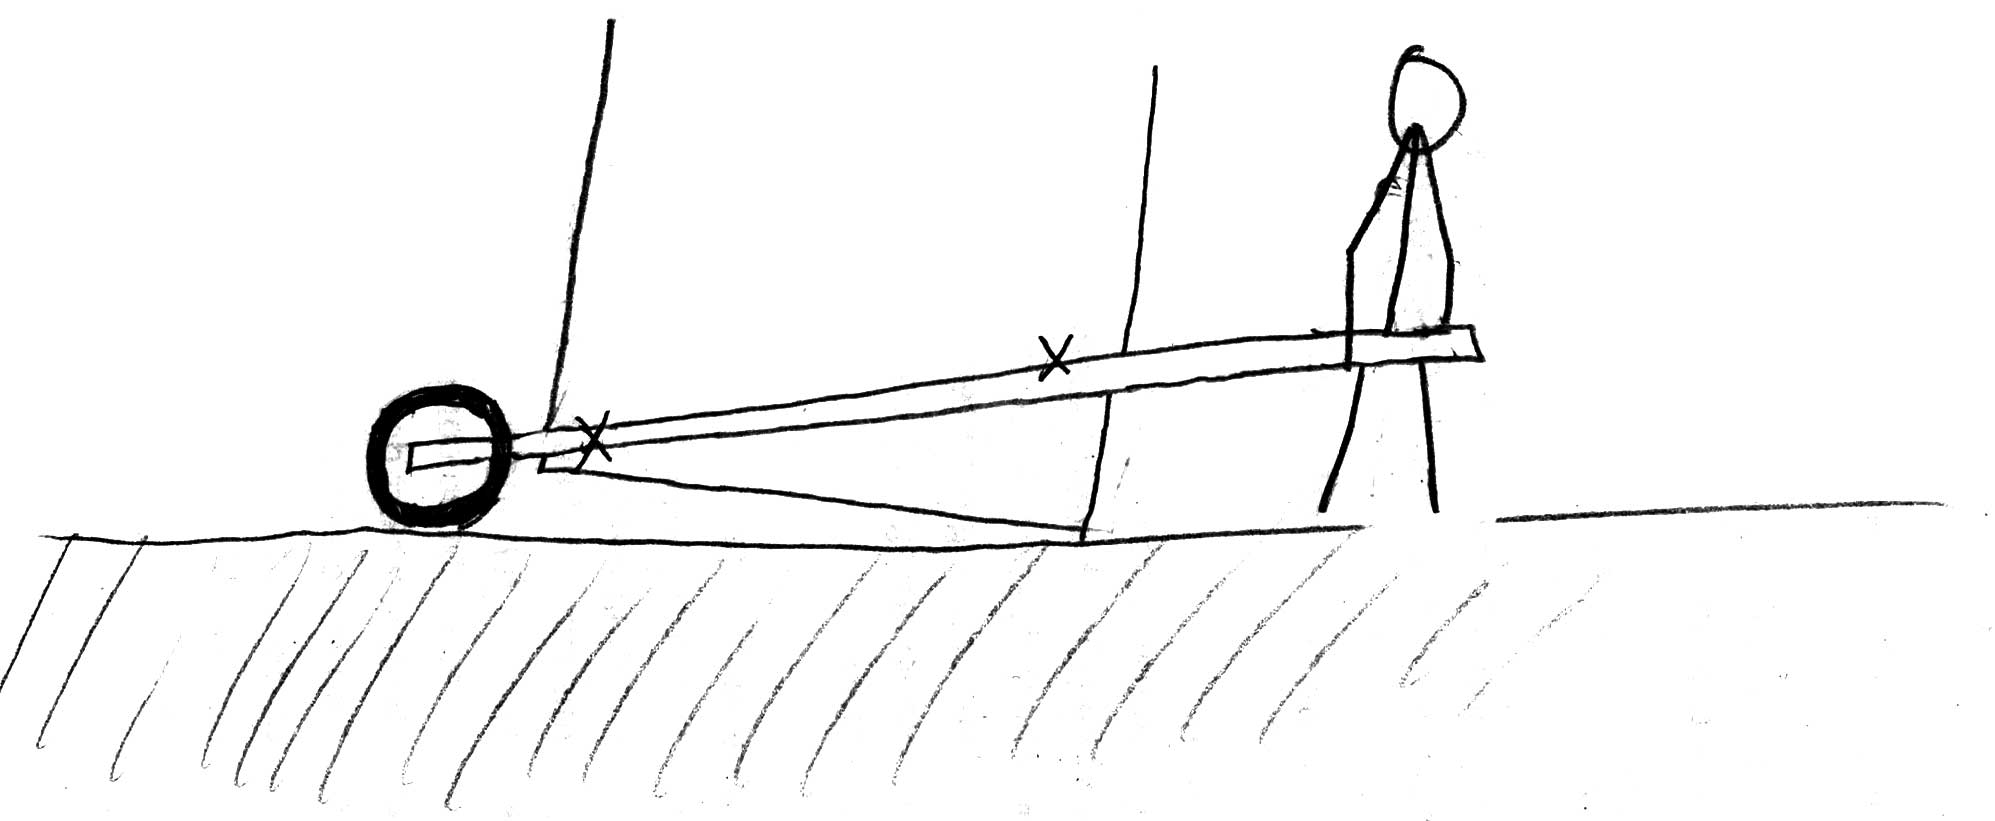 At this point, there isn’t much getting around the fact that you have to lift that coop off the ground like a cart. It would be better to have the wheels closer to the center taking more of that load, short of getting out a jack to put on the wheels, I didn’t think that up.
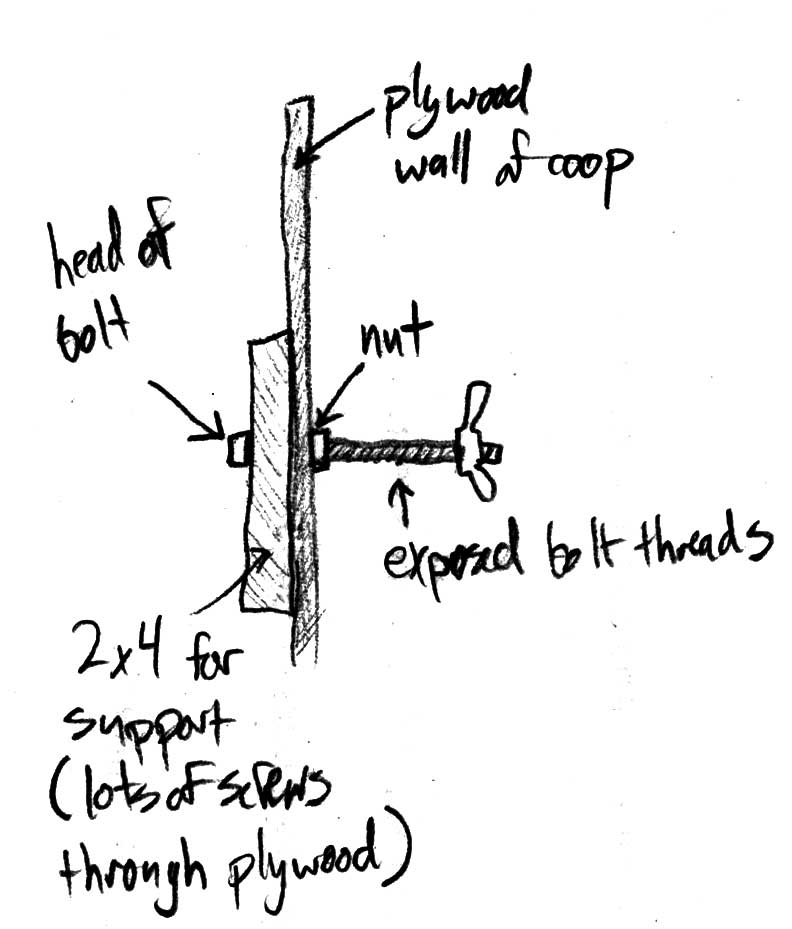
The bolt setup in the rear (the end with the wheel opposite the stickman) looks like this. The plywood I was using was pretty old and rotten, so I re-enforced the inside with a 12″ length of 2×4, and put a load of screws through the plywood into the board.
Now the other item of note here is the order of construction. No doubt your coop will be a little different, but if you follow these general steps, your chicken-cart will work just fine.
First build the coop on semi-level ground. Then get yourself the 2x4x12s with wheels on them. Set that wheeled board next to your coop, and lift the wheel slightly off the ground. Drill a hole through the center of your 2x4x12, mark the coop, and that will be your first bolt. At this point, when you bolt that 12′ handle to the side of the coop, you should easily be able to lift the end of the coop off the ground.
Next you need to install the front bolt. The height of this one will depend on where is most comfortable for you to lift. Also, how high you want the front edge of the coop off the ground as you walk around with it. Hold the handle so it’s comfortable, do a little squat, make a mark and drill. This bolt will come in contact with the top of the 2x4x12 as you lift and lift the front edge (the entire thing) off the ground on the wheels.
I did run into a few problems with my wheel attachment. As I rolled the coop around, the
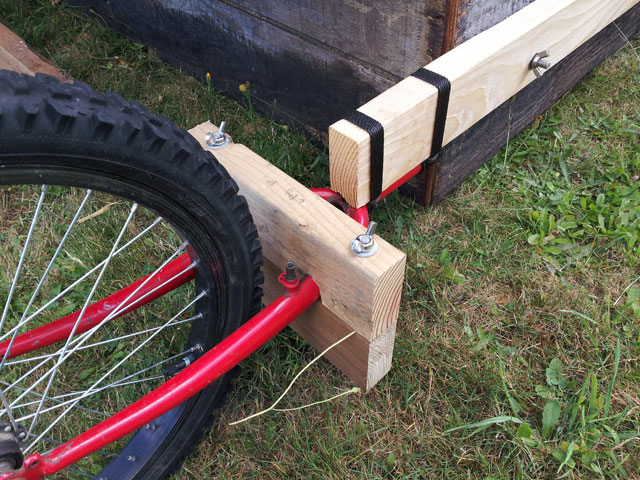 wheels wanted to torque to the side. I put together a yoke to hold the wheels from torquing. I also added an additional 2×4 up front for the people to hold on to as they pull it around. Now, the coop is essentially surrounded by a 2×4 rectangle that can also lift the coop. It’s a little hard to tell from this picture, but the 2×4 on the bottom extends all the way across to the other wheel. This worked very well.
Next item that is good about this coop is the total lack of a floor. This cuts down on weight a ton. We did this so we could start doing something called “deep litter method.” The idea is that when the chickens turd all over the place, as they do, you just throw more yard waste on top of it. Get a mix of green and brown in there. From what I hear, if you can smell poop, you’re not doing it right. Of course, there isn’t a cute little memory trick for telling you WHAT to do! We’ll see how that works. Once the floor builds up, say about 12″ or so, you move the coop. Then you’ve got a nice heap of compost you can use throughout your garden. Thank you chickens, and thank you to me for doing less work.
Next we left off the largest wall and used chicken wire only. Again, cuts down on weight. I saw pictures on the internet of chickens clucking away in their coops while the ground was covered in snow. I guess their feathers work well as insulators and they do not, in fact, need to be in a box every night. Just leave a wall off, badda-bing. I’ll let you know if they freeze…
A holdover from coop version 1.0 is the amazing chicken door opener. You install a guillotine type of hatch, then order this battery operated, light activated, chicken door
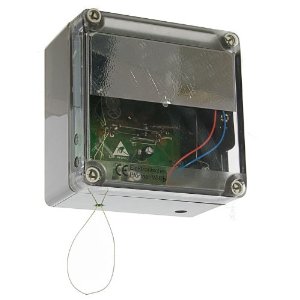 opener from Wells Poultry in the UK. Shipping is $40, and the British pound is spanking everyone, so it cost me $180 all said and done. But I will tell you, if you’ve ever had chickens, THE most annoying part of them is having to let them out in the morning, and close them in at night. This door opener takes care of both of those items automatically. A true life changing invention for chicken owners.
Next we’ve got the nesting boxes. Before I had four birds, and they all fought over one of the three boxes available to them. In this coop, I’m planning on
 17 birds and they all have to use four boxes. Should be fine. The design feature in this part is a double hinge door. For the first hinge, it opens from the top down. You can open the hatch from the outside to reach in and grab eggs which will be an everyday occurrence. Secondly, if you undo the additional clasps on the side, you use the lower most hinge. Doing this, the entire wall falls away leaving an open edge to the nest box. Then you can easily scrape the entire contents onto the ground. Boom, done. Also of note – the floor of the nest box is the only floor in the entire coop. Less to clean: yay!
Here’s a photo of the final product