Chicken coop, version 2.0


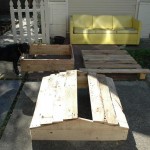
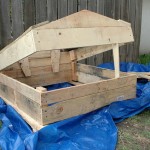
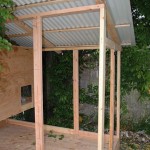
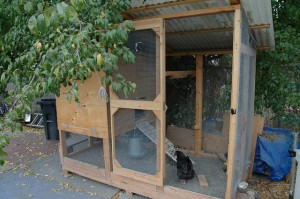
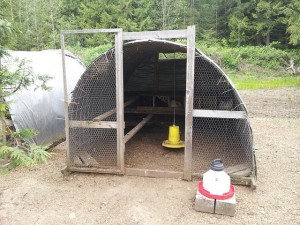
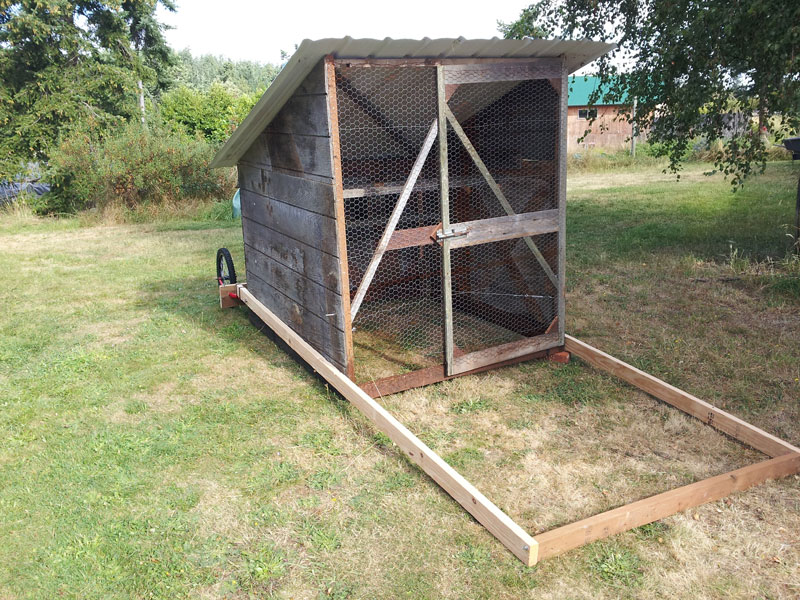
This coop has a few parts of it that make it terrific. It hasn’t gained occupancy yet, but the birds are soon to come. I’m sure it will work out fine. The first picture I’ve got here is the meat and potatoes of the coop.

The general idea of this coop is simplicity, light weight, and the re-purposing of materials.

Security
If you got birds, you need to think about their safety. Not much more annoying than you putting time and effort into them only to have a raccoon decapitate one of them. Your primary defense can be your yard fence, or it can actually be the coop. This depends on the type of predators that you have. For coyotes, animals that hunt in the day, you’re best off spending more time making your fence better. For raccoon, you cannot build a fence good enough, and should focus on the coop being their protection at night.

Portability
The last coop I made weighed about a million pounds. Chickens do not need much! So I suggest trying to use 2x2s where ever possible.
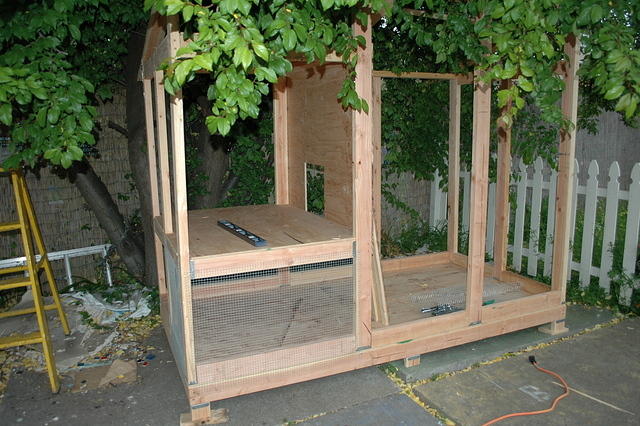
In this coop below, I used 2x4s which ended up being very very heavy! Resist the urge to build a coop like a house, and make it for chickens. No problemo.

Now on to the fun part – the wheels. I had a good time designing this technique. Feel free to copy it and send me a picture. The basic idea is as follows.
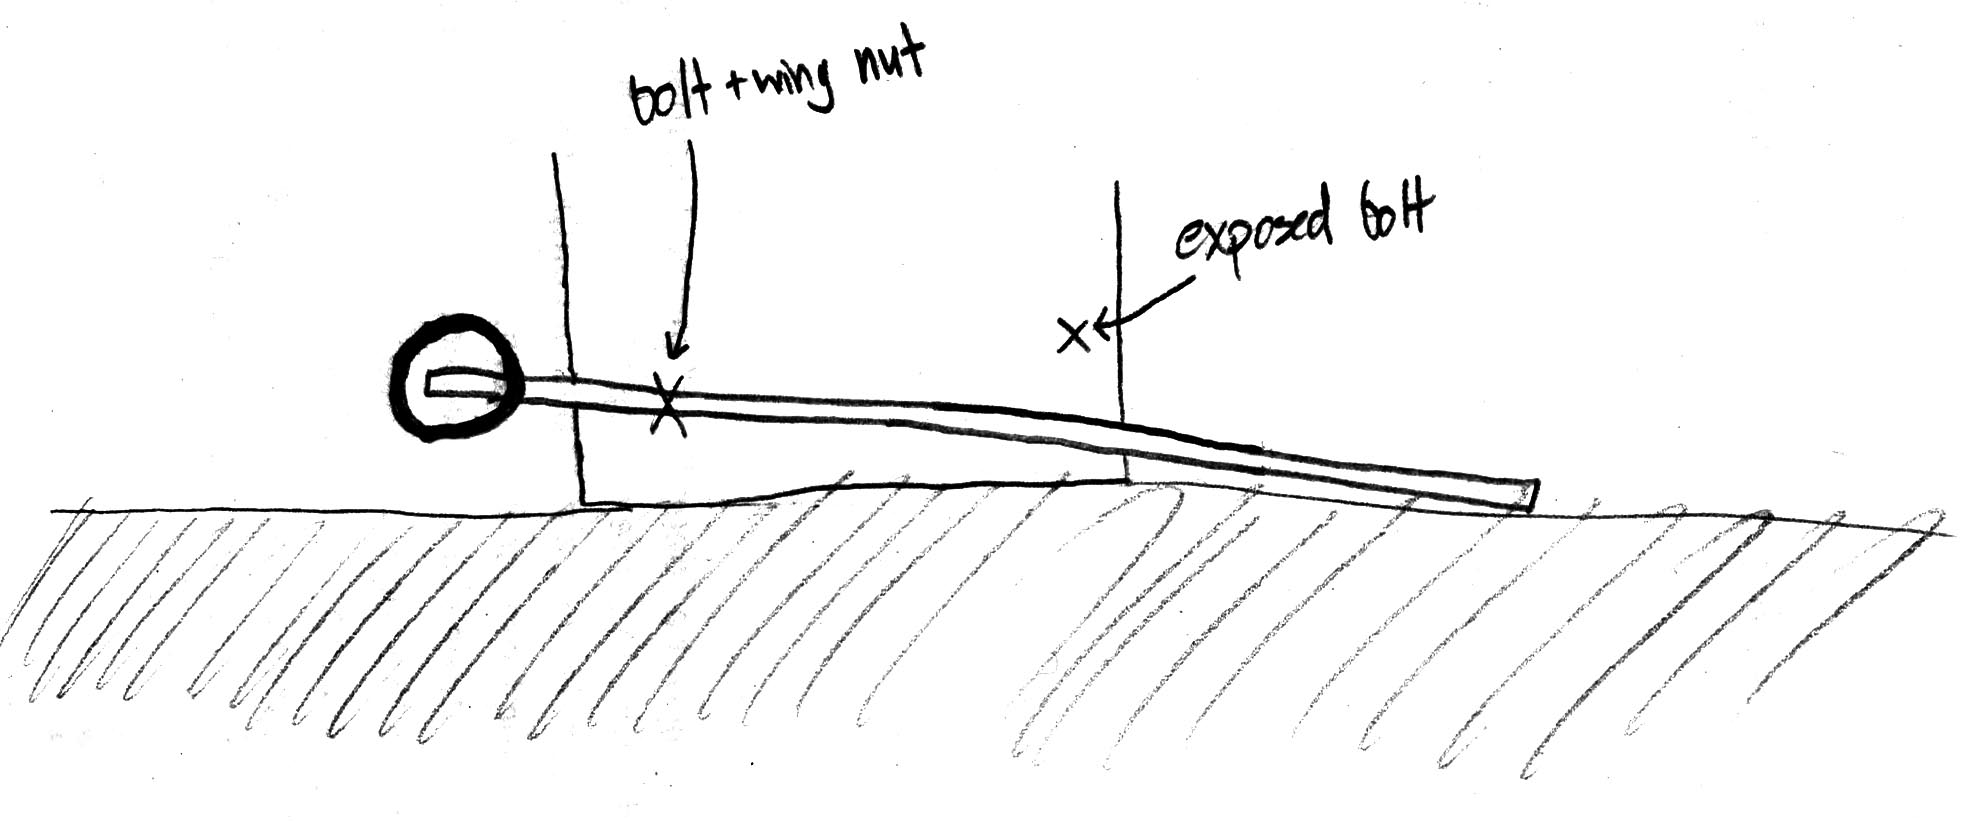
I put an “x” where there is a bolt. The lifting happens in two stages. Stage one, where you first start to pull up on the handle, the wheel comes down to the ground, and as you lift more, you get a nice lever advantage to lift the rear of the coop off the ground. Then as you lift higher, the 2x4x12 (yes, twelve feet long) hits the second bolt and lifts the front off the ground.
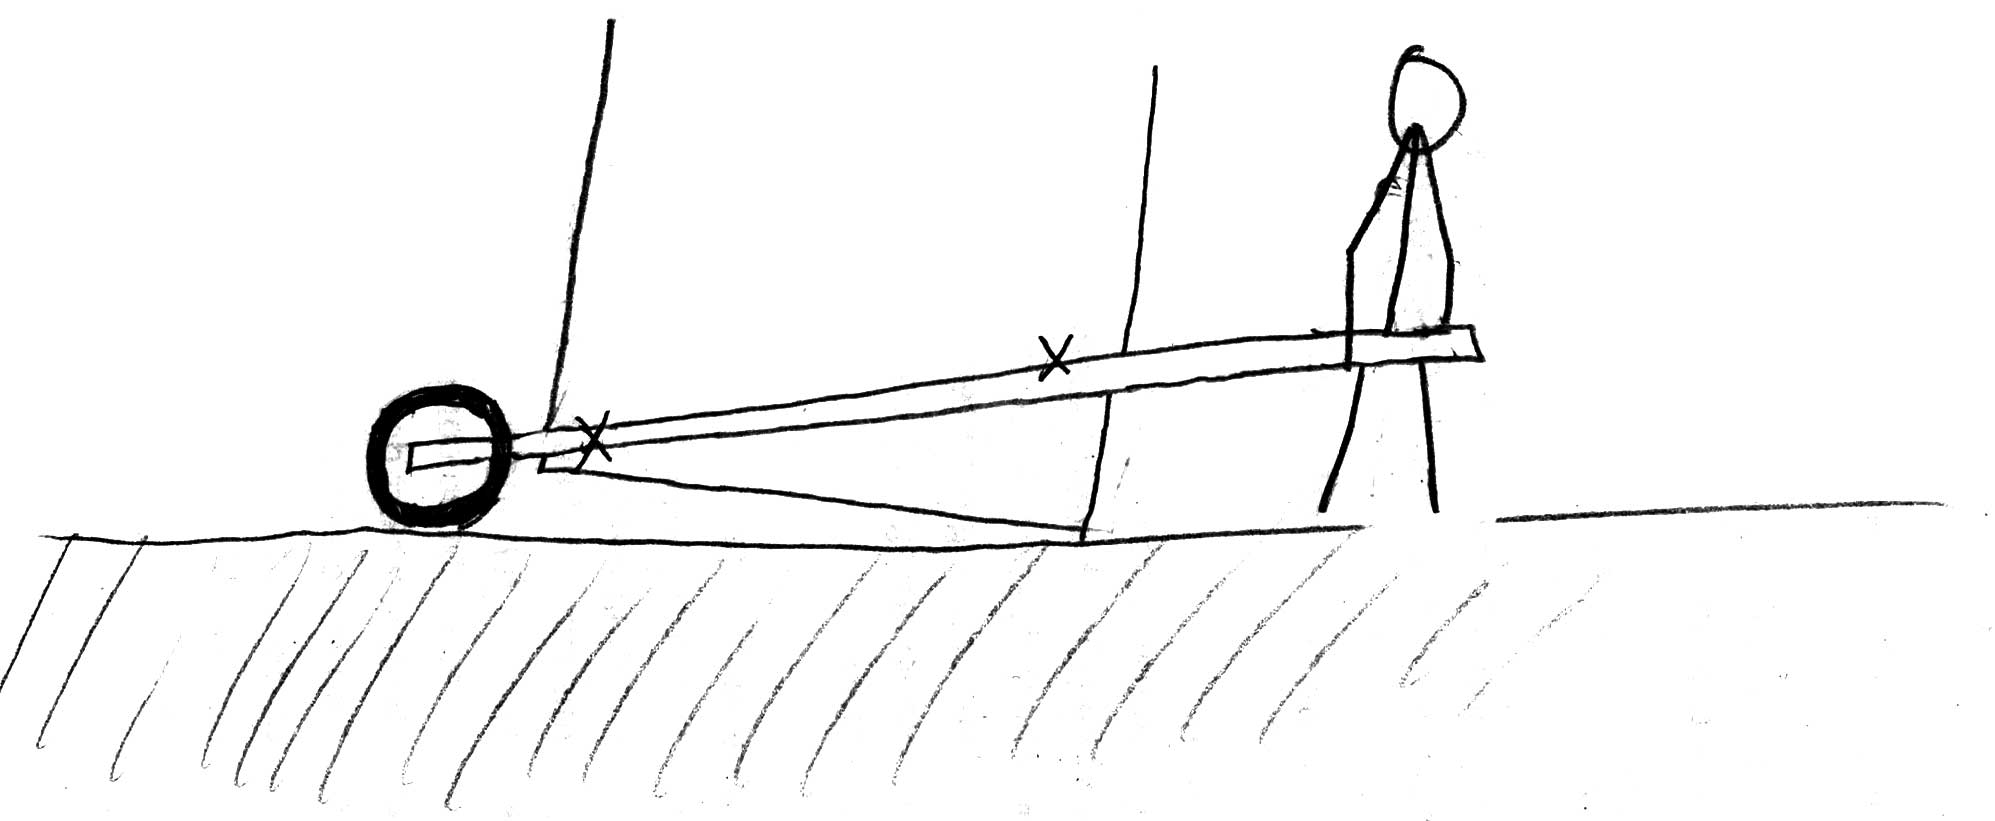

At this point, there isn’t much getting around the fact that you have to lift that coop off the ground like a cart. It would be better to have the wheels closer to the center taking more of that load, short of getting out a jack to put on the wheels, I didn’t think that up.
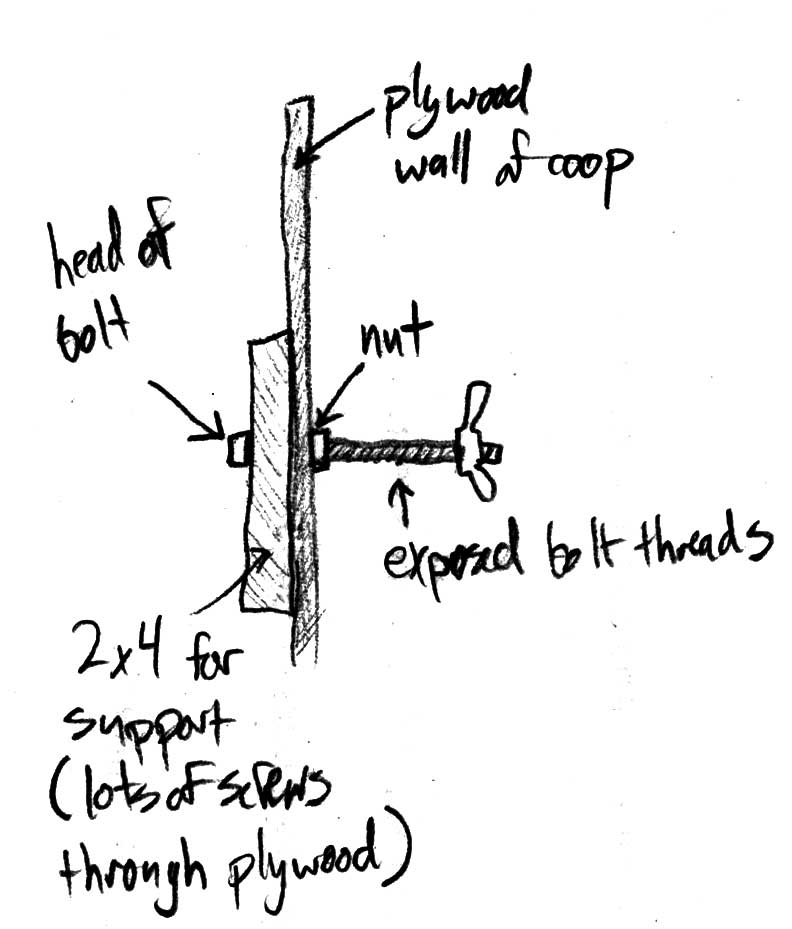
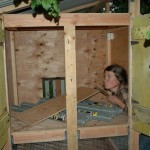
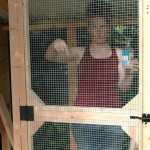
The bolt setup in the rear (the end with the wheel opposite the stickman) looks like this. The plywood I was using was pretty old and rotten, so I re-enforced the inside with a 12″ length of 2×4, and put a load of screws through the plywood into the board.

Now the other item of note here is the order of construction. No doubt your coop will be a little different, but if you follow these general steps, your chicken-cart will work just fine.

First build the coop on semi-level ground. Then get yourself the 2x4x12s with wheels on them. Set that wheeled board next to your coop, and lift the wheel slightly off the ground. Drill a hole through the center of your 2x4x12, mark the coop, and that will be your first bolt. At this point, when you bolt that 12′ handle to the side of the coop, you should easily be able to lift the end of the coop off the ground.

Next you need to install the front bolt. The height of this one will depend on where is most comfortable for you to lift. Also, how high you want the front edge of the coop off the ground as you walk around with it. Hold the handle so it’s comfortable, do a little squat, make a mark and drill. This bolt will come in contact with the top of the 2x4x12 as you lift and lift the front edge (the entire thing) off the ground on the wheels.

I did run into a few problems with my wheel attachment. As I rolled the coop around, the
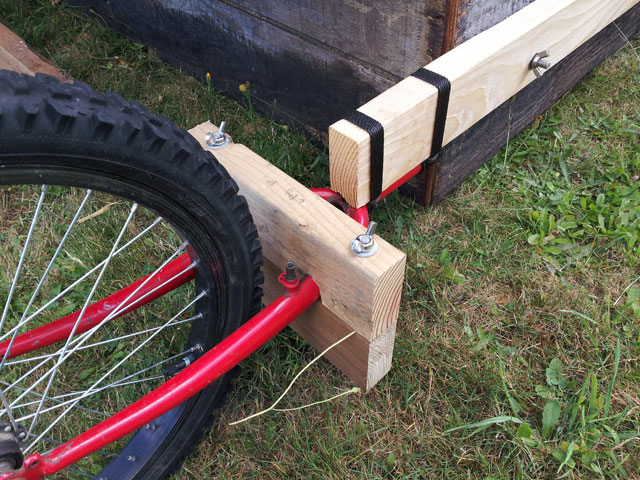
wheels wanted to torque to the side. I put together a yoke to hold the wheels from torquing. I also added an additional 2×4 up front for the people to hold on to as they pull it around. Now, the coop is essentially surrounded by a 2×4 rectangle that can also lift the coop. It’s a little hard to tell from this picture, but the 2×4 on the bottom extends all the way across to the other wheel. This worked very well.

Next item that is good about this coop is the total lack of a floor. This cuts down on weight a ton. We did this so we could start doing something called “deep litter method.” The idea is that when the chickens turd all over the place, as they do, you just throw more yard waste on top of it. Get a mix of green and brown in there. From what I hear, if you can smell poop, you’re not doing it right. Of course, there isn’t a cute little memory trick for telling you WHAT to do! We’ll see how that works. Once the floor builds up, say about 12″ or so, you move the coop. Then you’ve got a nice heap of compost you can use throughout your garden. Thank you chickens, and thank you to me for doing less work.

Next we left off the largest wall and used chicken wire only. Again, cuts down on weight. I saw pictures on the internet of chickens clucking away in their coops while the ground was covered in snow. I guess their feathers work well as insulators and they do not, in fact, need to be in a box every night. Just leave a wall off, badda-bing. I’ll let you know if they freeze…

A holdover from coop version 1.0 is the amazing chicken door opener. You install a guillotine type of hatch, then order this battery operated, light activated, chicken door
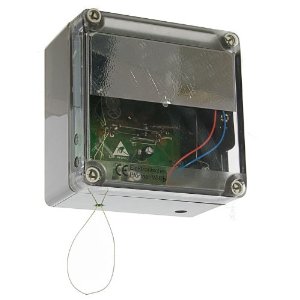
opener from Wells Poultry in the UK. Shipping is $40, and the British pound is spanking everyone, so it cost me $180 all said and done. But I will tell you, if you’ve ever had chickens, THE most annoying part of them is having to let them out in the morning, and close them in at night. This door opener takes care of both of those items automatically. A true life changing invention for chicken owners.

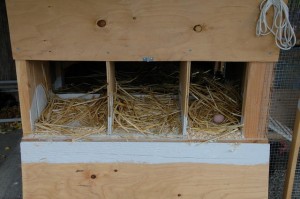
Next we’ve got the nesting boxes. Before I had four birds, and they all fought over one of the three boxes available to them. In this coop, I’m planning on
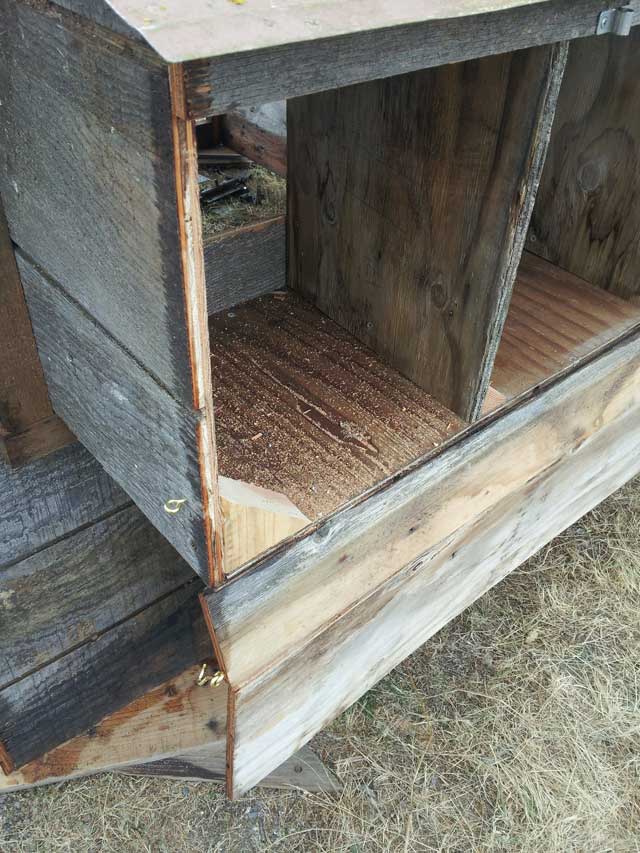
17 birds and they all have to use four boxes. Should be fine. The design feature in this part is a double hinge door. For the first hinge, it opens from the top down. You can open the hatch from the outside to reach in and grab eggs which will be an everyday occurrence. Secondly, if you undo the additional clasps on the side, you use the lower most hinge. Doing this, the entire wall falls away leaving an open edge to the nest box. Then you can easily scrape the entire contents onto the ground. Boom, done. Also of note – the floor of the nest box is the only floor in the entire coop. Less to clean: yay!

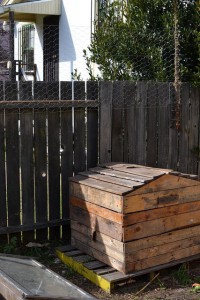
Here’s a photo of the final product
 

Rocket Mass Heater, upside down wood stove

I came across this idea from a friend of mine. I got the book and have been reading through it. It’s a fascinating idea where the flue/chimney of the stove goes down, then out the side, rather than up away from the fire. It’s taken me about forty pages of the book to wrap my head around this idea – but I think a picture is worth a thousand words.

So here you can see the wood there on the left. The fresh air is sucked down by the wood/fire, through the fire tunnel on the right, up the heat riser, back down the outside of the heat riser then out the flue. The most important part here that isn’t pictured is what’s creating the suction for the air to follow this path! What happens to the right of the picture is that the flue extends through something interesting like a big cobb bench or bed, or clay furniture. The furniture acts as a heatsink taking up heat from the flu gasses. There is a long straight run out of the house and up the chimney. The heat rising out of the chimney like that creates a low pressure in the flue system and continues to suck up more fresh air by the fire.

There are two heat ideas at work here. First off, the heat riser. You can see the heat riser in the picture, the fat vertical tube. The walls of that tube are covered in insulation. The whole riser is then covered by a metal 55 gallon barrel. Thin metal barrels like that are awesome at conducting heat (horrible insulators) and will get nice and hot. This type of heat is different from the radiant heat we’re used to at an outdoor campfire. When you’re sitting in front of a campfire your feet or front side of your jeans are usually almost on fire, while your backside is freezing. This heat is radiant heat transferred by the light of the fire. Wiki on mechanisms of heat transfer. When you stick a barrel over all that heat, you don’t get the radiant heat as the barrel heats up. You don’t lose the radiant heat, it’s just transferred to a different type of heat.

The barrel itself isn’t enough to take up all the heat either, so you can run those flue gasses through the cob furniture or something before you expel it from the smoke stack of the house. The goal here is to have hot combustion at the fire area, and cool gasses coming out of the final stage of your stove (including all the ducting etc.).

This project is currently a twinkle in my minds eye. The book is really great. It appears to be self published by some folks in nearby Oakland and is for sale for $18 from their website, http://www.rocketstoves.com/

Compost it all

~2010

Starting up a compost has been surprisingly entertaining. It’s neat to see my “garbage” turn into something more useful simply by sitting there.

I decided to make our compost container out of old pallets that we picked up from stores in Berkeley. (+) free (-) old wood = brittle wood. You also need to paint the wood bits or the damp compost will compost the boards too.

DSC_2639DSC_2621DSC_2618DSC_2619DSC_0055

The basic idea here is that the bottom is made of two rectangular bits. This way, you can pull off the top, pull of the top section and set it somewhere else in the yard. Then with a shovel, you shovel out the old heap from the old location into the new location. This rotates the heap up side down. Once you get some worms going in there, they will probably go bonkers. Bugs and worms are good!

Apparently it’s also good to relieve yourself on the compost heap. Just want to do my part 🙂 http://www.guardian.co.uk/lifeandstyle/gardening-blog/2009/nov/13/composting-urine

Ah, what goes in there. Everything except meat bits and bones. Pay attention to the general color of the compost. If it looks to gooey, add some grass clippings, and vica-versa. There are many “experts” on compost. I have a hunch there isn’t much you can screw up here except to not use it and add to it! Just go for it.

~2012
DSC_2800After using regular compost for quite some time, I thought I’d give a go at a worm bin. I used plans for a double plastic bin design I found somewhere on the internet. Essentially you buy two plastic bins that nest into each other. The inner bin, I cut little vents in the sides just under the rim. Then I drilled about ten evenly spaced small holes on the bottom of the bin. That modified bin nests into an unmodified bin. I also added a couple chunks of junk wood between the two so when the inner bin sags down, it’s got something to rest on.

DSC_2801I started with 100 red composting worms from some dude named Uncle Jim Worms off amazon. Totally reasonable, $25 for 1000 worms. The bag came with instructions that made it simple to start them off properly.

I think the challenging part with these worms is keeping them at maximum productivity. That and then getting your worm casings (worm turd aka black perfect dirt) out once the bin weighs 40 lbs without killing everyone. Oh, that reminds me there is an awesome book with way better instructions that I’ve got here “Worms Eat My Garbage.”

I throw about 90% of our kitchen scraps into this bin. I fill it up, then go back a few days later and lo-and-behold, it’s magically gone back to essentially the same amount that was in there before. These little guys are magic.

DSC_2804
the finished product on day 1

From time to time, I just add water to the mix. The book describes it as being able to wring a little water out if you squeeze it, similar to soggy cardboard. So if it gets a little dry in there, I just add water. The other side benefit of adding water is that the water goes through the worms and their casings, and black nutritious water comes out the bottom. I empty it out from time to time (and save the swimming worms that found a hole and jumped through) and use it to water plants around the house.

I’ve had the bin going for over a year now, and haven’t yet pulled the casings out, but it’s certainly high time I did. Good easy fun!

Oh last note: it’s been getting real cold in Port Angeles. I had the bin under a tree just outside the kitchen door for a while. But after we got some snow, I moved the bin into the garage. I was worried they’d all frozen to death, but these dudes are resilient! They just move slower. I could wrap the bin in some leftover house insulation that I’ve got to keep the coldest part of the nights off them. But for now, I’m happy with them being slow.

Bibliography

Some entertainment, some fiction, all good stuff – or I wouldn’t write it here. I’m learning it’s a slipperly slope to apocolypse b.s., but it’s still a fun and interesting premise to think and read about. So, with a grain of salt: Enjoy.

Books
World Made By Hand, 2008 book, uplifting post-apocalyptic book about how things might be
Alton Brown and his cookbooks are terrific, his tv show is terrific
Supernatural Everyday, by Heidi Swanson. A must have
Tender by Nigel Slater. He also has a tv show
Chicken and Egg recipes, and many things you can do with your new chickens
Food In Jars
Wool, by Hugh Howey

Movies
Jeremiah Johnson, 1972 movie, Robert Redford
The Road, 2009 movie, Viggo Mortensen, based on a NY Times bestseller of the same name, cannibalism, murder, scary. The book is supposed to be excellent as well of course.
The Book of Eli, 2010 movie, Denzel Washington, NOT a good movie. But if you’re into sci-fi post apocalypse, this one is not to be missed. Sorta reminds me of that video game called Fallout
Mad Max, 1980-1985 movies. Mel Gibson, epic Australian post-apocalypse movies. A must see. I can only speak for the first two, which are suh-weet.
Waterworld, and The Postman. Both total garbage movies, but I love them.
Rotten Tomatoes 10 Post-apocalypse movies

TV
Jericho, 2006 tv series that ran for two seasons. Premise is some sort of terrorist attack on all major cities in the US and what happens
Edible Garden on the BBC with Alys Fowler
Alton Brown’s Good Eats food tv, a cooking show for dudes. But I don’t watch it, Alison goes through phases of binging on the show
Nigel Slater’s Simple Suppers

The goal

To grow and eat only food we’ve grown

The thinking here is that I’ll be gone for half the year. Alibot and I also wanted to do cool stuff with our homelanddiet, eventual family, and our lives. We don’t want to screw up the planet with garbage. We want to be healthy and avoid crappy foods with additives, coloring, preservatives, and general chemicals. What better way to accomplish this than grow our own food?

There are a lot of things we’ve got to get much better at to realize this goal. Here are a few:

  • farming, seasonal planting, keeping seeds
  • food preservation, canning, jarring, smoking
  • animal husbandry, bacon is good, meat is good too

I don’t want to have to reinvent all this stuff. I know that mankind in general has already figured all this stuff out! Often some of the coolest research you can do is finding out what people have already done. There are many, many books and stuff on the subject. In fact, there are even movies on it! Check out the bibliography for all of them.

Intentional communities

I start my career as a sailor this summer of 2012. I will be gone for two months, then home for two months throughout the year. This means there will be lots of time when Alibot won’t have anyone to bother her, or leave messes around the house.  Being as how we want a family sooner or later, we decided to move back to the Washington area to be closer to our families.

We also started chatting with a friend about permaculture. That conversation led is into something called intentional communities (IC).

For Alibot and I, intentional communities are a great idea.

  • built in community. You live with or near people who share your common interests. Thinking of starting a weird project? Someone who you live with can probably start you on your way!
  • animal sharing. One family would have a hard time eating an entire cow, or drinking milk every day. But, with a community to share in the benefits and labor, you can have the benefits without the full amount of daily work required.
  • Access to more than you can afford. If you live in a place like this, you will probably get access to community resources like land, vehicles, wood shops, all kinds of stuff.

I got an email forward from this same friend who told me about a just starting place out in rural southern Washington. I spoke with that lady on the phone, real friendly, and she told me about Port Townsend Ecovillage. Alibot and I went there, loved it, and have put in a rental application. We’re going to spend a year or so doing research into different kinds of communities before we “buy in.”

There are many other eco villages. The clearinghouse for all of them is pretty much IC.org. You can browse by state (California, Washington). Keep a wary eye for those that say forming. It means it’s a group of people who intend to form a community but have yet to do so. Depending on where you want to get in, you can do what ever you want.

I feel the two main parts to consider when thinking about IC are the people, and the level of rural-ness. There are good and bad things about being in a city, near a city, or BFE. The people are the other most important part and are a deal breaker. You absolutely need to visit these places. Walk around, meet as many people as possible, see what kind of things you share in common.

The reasons I do not want to to the traditional thing is because I want more community than an American housing development. How well can you know your neighbors if you’ve all got your own little place? Your own little box, own washer/dryer, garage, tools trucks, etc. Some of it might be that you’re just a weird dude, and want all your own stuff. But I don’t think humans were meant to live this way. We to go work, we drive home, we buy stuff, we make babies who perpetuate those same things. There is a better way.

Some homework. The book with the unfortunate title of Building a Life Together. It has information geared mostly towards those starting an IC from scratch. It was very enlightening. There are chapters on all sorts of topics. It’s unassuming, easy to read, great layout. A must purchase for your research. After reading about all the stuff that goes into making an IC successful, I can tell you I really appreciate how far Port Townsend EV has come. The fact they have a small group of fantastic people there, got the city permits, and utilities ran out to each plot, is a huge and expensive accomplishment. So much work has already been done, so it’s a real plus for me.

Alibot also recommends Cohousing: A Contemporary Approach to Housing Ourselves. She told me there were lots of pictures, and illustrations. She found it inspiring and  creative.

I enjoy listening to KEXP’s sustainability podcast when I’m in the car. I’ve discovered some cool stuff there. The interviewer, Diane Horne is pretty horrible, but the topics are good and the guests are almost without exception engaging and eloquent.

Urban Chickens

Some of these descriptions/pictures are a little mis-matched. But I think you’ll get the idea.

Chickens have been pretty interesting. I think they are a gateway drug to animals. They are far easier than cats or dogs – if you can even imagine. They crap all over the yard, so get a big broom. They eat young grass. If you have them free-range, their range will not have grass or many other plants for that matter. There are books that talk about chicks with plants… this is it . I saw Alibot reading it the other day.

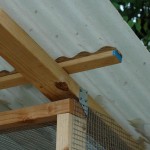
DSC_3078She really wanted chickens, so I had to oblige. Let me tell you, like all projects, they are more expensive than you’d think. I wanted to look back to see what the costs were, but my stupid online banking doesn’t go back that far. The two expensive parts were the corrugated fiberglass roof parts, and the rolls and rolls of hardware cloth. Here’s a thought on an area I could’ve saved money in. The chickens are in the coop portion at night. The run, the outer portion, doesn’t not need to be protected as much because night creatures, racoons, couldn’t reach in and get them in the coop anyways. That’s almost entirely enclosed in plywood.

DSC_3092Design we used. Suffice to say, these are chickens . Once you spend a little time with them (yes they do have personalities) but you can tell they are meant to be eaten. This one day I was digging a hole in the back yard. I was taking full swings on this pick axe that this chicken was standing two inches away from this thing coming down with a vengance. I swear I thought I could see her feathers blowing from the swing of the pick axe. Anyways, inches away from her head: doesn’t even phase her. These birds are food for everything. Don’t worry about making a perfect coop – they won’t notice. What you don’t want is sickness, death, and general irritation. Things you do want:

  1. easy access to eggs
  2. easy removal of turd
  3. safety of poultry

Floor plan
4’x8′ piece of plywood. I put 2×4’s underneath to support the plywood. I cut small bits of 2×4 for the six feet that hold the coop above the ground.

DSC_3089The front of the coop is about 7′ (you should now that this: ‘ means feet, and this ” means inches) tall. The back is about 5 1/2′ or 6’. The coop is just a plywood box.
But here are the side turd clean out doors. Re-purposed gates or something.The latch there is simply three eye bolts  where the one in the middle is in the coop, and the outer two are on the doors. Then you jam a rod/stick through all three – and bang, you’re secure. The important thing about having big doors like this is that you can open them for full access to the coop and the turdy floor. Then you move a bucket over to the doors, and sift the turd out easy with a piece of hardware cloth  that you’ve bent into a bucket shaped thing. DSC_3086For wood chips in there, we have a local wood working place called MacBeth lumber. They don’t care if I come by from time to time to get garbage bags full of sawdust. Who knew: they like to perch on a stick when the sleep. I’d lay on the ground. But they kinda drape their fatty bodies over a stick and sleep up there. You can also see the side of the three nesting boxes there on the right. That’s all there is in there! Simple.

The front side

DSC_3093For here we’ve got the main door. It’s a great idea to install a piece of string to pull the handle incase you lock yourself in. When the door is new, it shuts so easily! Both Alibot and I have locked ourselves into the coop. Whoops.

Referring to the front size picture above, you’ve got the door, and the coop. The coop has a little door that opens right to the nesting boxes. We’ve got four chickens and three nesting boxes. They all share the same nesting box, like how boys generally always use the same urinal. NEVER have I seen more than one of our birds in a nesting box at once. For this reason I think you could get away with four birds and one box. Or even six and one box.

DSC_3579Anyways, when you go to put the away in the evening, you grab the eggs out of the handy little door. They chickens have already put themselves to roost (when it gets dark), you sweep up the yard and Bob’s your uncle. The tree is starting to come in, but you can still see the run (4×8′ floor) where the door is going to go, and the front part of the coop without the egg door, and without the nesting boxes.

DSC_3586I’d like to stress here that this does not have to be a poultry palace. These creatures have been chosen for their egg laying capability and have been domesticated over generations and generations. They have no idea you’re swinging an axe by their heads, and make awesome eggs. They take care of them selves, and are a great way to start getting into some more exciting gardening!

http://www.youtube.com/watch?v=bx3OY5efOTo

A note on paint. When you put all your time and money into the coop, you’re going to want to start using it right away. Try to hold off just a little while longer. A little paint goes a long way for longevity of the coop. Paint everything that will have stuff on it. I have a couple of inches of fill sand all over the floor – it got painted. The floor of the coop, which is covered in sawdust and chicken turd also got painted. Any part of the wood that is directly exposed to the weather, especially end grain, gets painted too. Any paint is better than nothing.

DSC_3582I just got the neatest toy from the UK… So the only thing that has been a bummer with these little guys is the requirement to let them out, and put them in. If you let them out, you MUST put them back in. I’ve read about stories of people leaving the doors open and coming out the next morning to a massacre complete with bloody raccoon prints walking away – varmints!

I wanted an electric chick door opener. And why not!? It would be so fun! There are a few howto’s on the internet, but I found them slightly more than I could bite off. This one was the most promising:
http://blog.makezine.com/2010/01/20/automatic-chicken-coop-door-opener/
or this guy: http://www.fabiens.org/ckblog/?page_id=106

So after all these shenanigans of trying to figure out some solar vs 120V house solution, I just ponyed up $150 and bought a battery powered one from the UK. I installed it today, and so far it works! I can’t speak for racoons getting to the chicken feed, but the coop door shuts and opens with the sunlight and that is great! I may try swapping out the AA batteries for some D batteries to see if they last longer.

IMG_20130427_131339You can see the battery powered door opener there at the top. The two wires leading off to the right are for the light sensor, and the timer. The entry level opener has a light sensor in the box itself. That means you’d need a pulley or two and have to mount the motor box outside the coop. I got the external light sensor so I could mount the motor box inside the coop. The thing runs off four double AA batteries. We’ll see how long it lasts. I’m curious what it would take to get a solar panel and some NiCad’s in there… another day.

Oh, and total costs. I estimate the total coop ran me about… $500. Like I’d said above, the most expensive parts were the hardware cloth (square galvanized chicken wire with 1/2″ holes). I’ve got four chickens. I bought a fifty pound bag of UN-organic chicken feed for $28 on 12/28/11, then again on 3/26/12. So food is about $10/month, plus all the kitchen scraps you can throw at them. During the summer we get about 3.5 eggs/day. Winter more like 1 egg/day. So average throughout the year I’d say 2 eggs/day. That’s 700 eggs/year, $120/year food, so that works out to 17 cents/egg. A good deal, if you don’t count the coop! I’ve had these girls since May 2011. They didn’t start laying until Sept 2011. Let’s say between then and now they averaged 2 eggs/day, that means about 500 eggs. 1 year $120 food, $500 coop, so far I get about $1.25/egg. You can get “grass fed” organic eggs for like $5 dozen, so I’m at $15 per dozen! But I’ve got a coop and four fat birds… mmmmmm.

Definitely get chickens! It’s fun, and relatively easy. Like I said, easier than a cat or a dog. Check your city regulations for poultry. For instance, no roosters are allowed in Berkeley city limits. Also, check your local craigslist for people unloading coops, or people offering to build them. If you still want to do it, you could talk to the builder guy and see if he’d sell you the materials only – like a coop-kit or something. Doing it from nothing with just you and Home Depot can get spendy.

Good luck!

Dropped out

A number of years ago I stopped listening to FM radio stations, and disconnected my TV. A strange thing to do for sure. The first thing that comes to mind when someone says they’ve turned off their TV is that they sit around all day long drinking coffee, reading, writing, solving world hunger, and arguing with their intellectual friends. This image of me post radio and TV couldn’t be farther from the truth.

One moment that comes to mind when I think of when I came to be more of what I am today is some time that I spent in Hawaii. I lived in Hilo for five years from sometime around 2000. I remember driving around in my car, hearing, or seeing, an advertisement for a BigMac or something. I forgot about it, then realized I was standing in line for a BigMac not a half hour later. I like to think of myself as a pretty informed person, but I realized I’m just as susceptible to advertising as anyone else. It was a yucky feeling.

It got me thinking about where I run into advertisements. Pretty much everywhere, but I think the majority of them were any time I spent on TV or listening to radio. I decided to cut out all TV and radio. This hasn’t stopped any of my TV watching or radio listening habits. I had some experience with computers and the internet. I upgraded my internet connection and started getting 95% of all my media via the internet. I subscribe to pod-casts, and watch all the popular shows on the internet. If anything, my radio, TV, and movie intake increased.

Every time I would start to hear or watch commercials, I’d change my source for that media. It’s been a constant search, but a fun challenge. Alison thinks I have a short circuit in my hunter-gatherer Cro-Magnon brain that fuels my constant search for collect things.

Alibot said I should also look at this radio story about a dude “divorcing google.”