I recently completed an installation of a NMEA 15-50 plug in my basement to plug an eMotorwerks Juicebox Pro 40. It was too big of a deal, and with a little assistance from a knowledgeable Craigslist contractor, I think it went off without a hitch. Here’s my experience.
I decided to call in a pro, but for that pro, I went with a Craigslist general contractor that “has experience with electricity,” rather than a full blown electrician. The initial quote I got from an electrician to install this plug was $1800. Seemed like extortion to me. The contractor I got came out once to look over the project and advise me on where the conduit should go, and which materials I should go with. He came out a second time to make the final connections to the electrical panel. All in all, he cost me $300. It was about $200 in materials, and I got a $200 Dewalt impact driver (I love this thing, and will get Dewalt Max XR tier stuff from now on). Still way ahead that initial bid, and I got a fancy drill out of it: For The Win.
My Juicebox is installed on a concrete wall in my basement. I drive the Leaf into the basement. The plug and conduit goes up to the wooden beam, then over to the panel, down a concrete wall again, and into the panel. Total run is about 25′.
While the Nissan only draws about 24 amps (6.6kw 240v) the charger can max out at 40 amps and therefore needs a higher rated plug and wires. I used 3x 6awg thhn wires, and one 8awg green ground wire. I consulted an EMT fill chart, and found I’d be using 3/4 conduit. The contractor recommended renting a Roto hammer from Homedepot and Tap-con screws to go into the concrete. I used my shiny impact drill to drive those screws into the holes. Be sure you look at the box of screws to get the screw size and hole size matched with the bit on the Roto-hammer (one more hardware store trip).
Also, the length of the screws is important. At one point I’m screwing nearly flat galvinized conduit clips into concrete, 1 1/4 were sufficient; 2 1/2 would strip out before biting and getting screwed in far enough. Another place, I was drilling through a 5/8″ piece of plywood. Get a few different lengths of Tap-con screws to save a trip (another hardware store trip).
While measuring and cutting conduit, measure twice cut once of course. Use a rat tail file to clean up the inside of your cut conduit. I didn’t bother with a bender. I just purchased 10′ lengths, a few 90°s, and some little conduit box offsets to get from the deep 2 gang box to a conduit that’s also flat against the wall. You can leave all the couplers a little loose as you’re holding the operation up to where you think it needs to go.
I didn’t use the 25′ wire snake I bought. Once I’d bundled the thhn wires together, I was able to shove them 3/4 of the way through the entire thing. Then I could pull some of the conduits apart and the couplers, and push and pull it the rest of the way through.
My electrical panel was totally full of course. I combined 4 regular low amperage breakers into 2 tandem breakers, which freed up two adjacent spots for a double pole 50amp breaker.
Once I got all those pieces all installed, I had my contractor come out again. I’d purchased the wrong breakers, and a few of my Tapcons screws had 5/8″ wooden blocks to make them work. He did one more run to Homedepot (on my clock ?) but returned with all the correct stuff. He did breaker switcharoos and connections, and I’m up and running. The breaker install didn’t look too tough. But monkeying around with your electrical panel is no joke. I feel like I did a smart thing hiring that small piece of the job out.
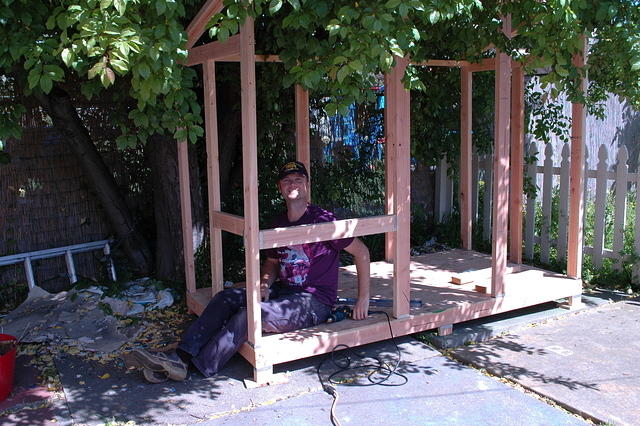
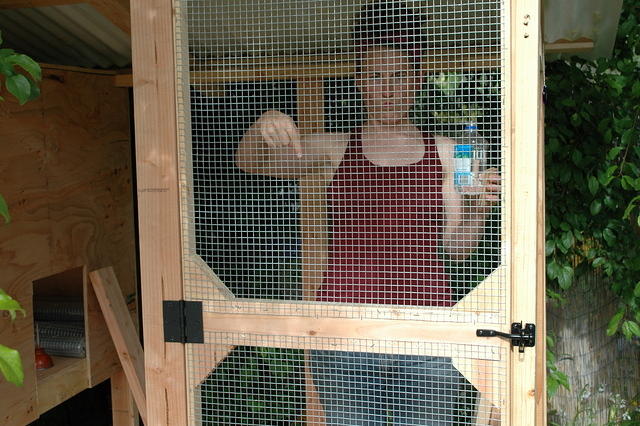
Some of these descriptions/pictures are a little mis-matched. But I think you’ll get the idea.
Chickens have been pretty interesting. I think they are a gateway drug to animals. They are far easier than cats or dogs – if you can even imagine. They crap all over the yard, so get a big broom. They eat young grass. If you have them free-range, their range will not have grass or many other plants for that matter. There are books that talk about chicks with plants… this is it . I saw Alibot reading it the other day.
She really wanted chickens, so I had to oblige. Let me tell you, like all projects, they are more expensive than you’d think. I wanted to look back to see what the costs were, but my stupid online banking doesn’t go back that far. The two expensive parts were the corrugated fiberglass roof parts, and the rolls and rolls of hardware cloth. Here’s a thought on an area I could’ve saved money in. The chickens are in the coop portion at night. The run, the outer portion, doesn’t not need to be protected as much because night creatures, racoons, couldn’t reach in and get them in the coop anyways. That’s almost entirely enclosed in plywood.
Design we used. Suffice to say, these are chickens . Once you spend a little time with them (yes they do have personalities) but you can tell they are meant to be eaten. This one day I was digging a hole in the back yard. I was taking full swings on this pick axe that this chicken was standing two inches away from this thing coming down with a vengance. I swear I thought I could see her feathers blowing from the swing of the pick axe. Anyways, inches away from her head: doesn’t even phase her. These birds are food for everything. Don’t worry about making a perfect coop – they won’t notice. What you don’t want is sickness, death, and general irritation. Things you do want:
easy access to eggs
easy removal of turd
safety of poultry
Floor plan
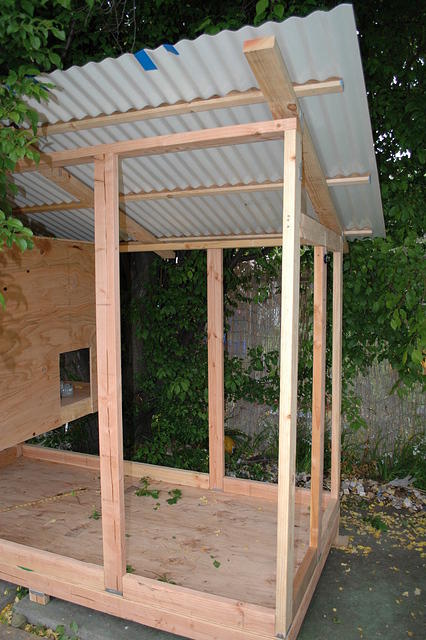
4’x8′ piece of plywood. I put 2×4’s underneath to support the plywood. I cut small bits of 2×4 for the six feet that hold the coop above the ground.
The front of the coop is about 7′ (you should now that this: ‘ means feet, and this ” means inches) tall. The back is about 5 1/2′ or 6’. The coop is just a plywood box.
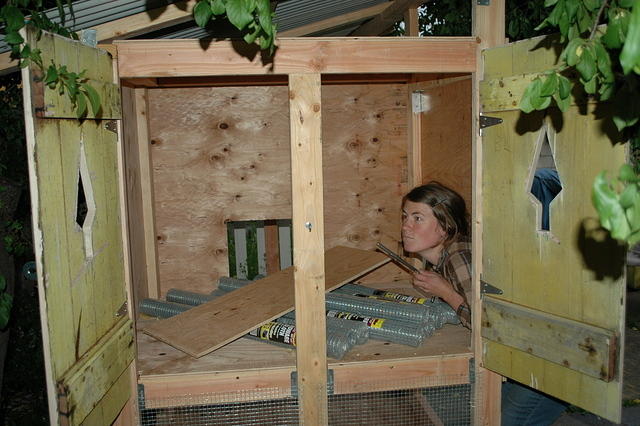
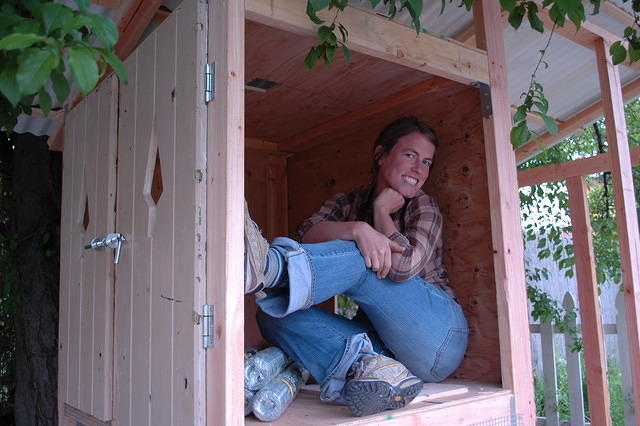
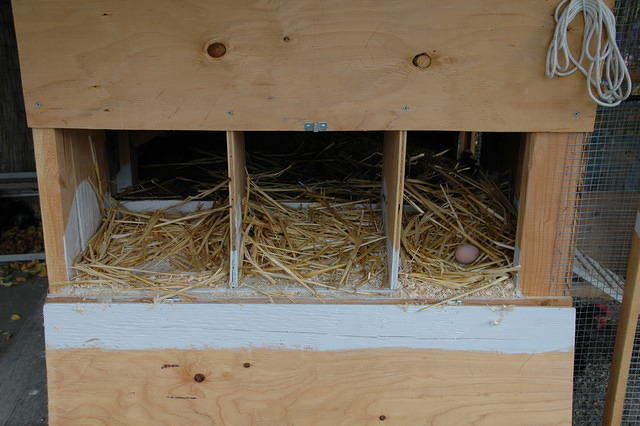
But here are the side turd clean out doors. Re-purposed gates or something.The latch there is simply three eye bolts where the one in the middle is in the coop, and the outer two are on the doors. Then you jam a rod/stick through all three – and bang, you’re secure. The important thing about having big doors like this is that you can open them for full access to the coop and the turdy floor. Then you move a bucket over to the doors, and sift the turd out easy with a piece of hardware cloth that you’ve bent into a bucket shaped thing. For wood chips in there, we have a local wood working place called MacBeth lumber. They don’t care if I come by from time to time to get garbage bags full of sawdust. Who knew: they like to perch on a stick when the sleep. I’d lay on the ground. But they kinda drape their fatty bodies over a stick and sleep up there. You can also see the side of the three nesting boxes there on the right. That’s all there is in there! Simple.
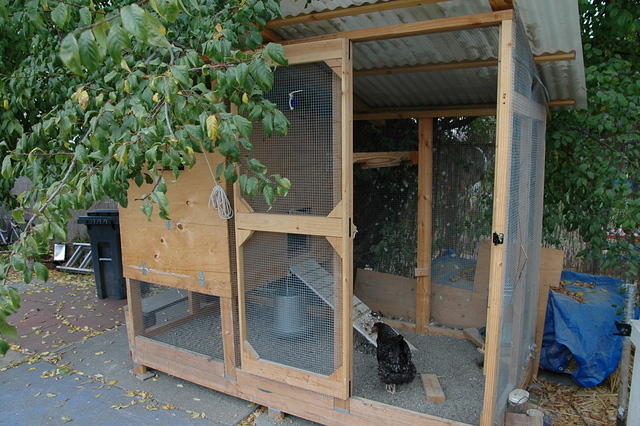
The front side
For here we’ve got the main door. It’s a great idea to install a piece of string to pull the handle incase you lock yourself in. When the door is new, it shuts so easily! Both Alibot and I have locked ourselves into the coop. Whoops.
Referring to the front size picture above, you’ve got the door, and the coop. The coop has a little door that opens right to the nesting boxes. We’ve got four chickens and three nesting boxes. They all share the same nesting box, like how boys generally always use the same urinal. NEVER have I seen more than one of our birds in a nesting box at once. For this reason I think you could get away with four birds and one box. Or even six and one box.
Anyways, when you go to put the away in the evening, you grab the eggs out of the handy little door. They chickens have already put themselves to roost (when it gets dark), you sweep up the yard and Bob’s your uncle. The tree is starting to come in, but you can still see the run (4×8′ floor) where the door is going to go, and the front part of the coop without the egg door, and without the nesting boxes.
I’d like to stress here that this does not have to be a poultry palace. These creatures have been chosen for their egg laying capability and have been domesticated over generations and generations. They have no idea you’re swinging an axe by their heads, and make awesome eggs. They take care of them selves, and are a great way to start getting into some more exciting gardening!
A note on paint. When you put all your time and money into the coop, you’re going to want to start using it right away. Try to hold off just a little while longer. A little paint goes a long way for longevity of the coop. Paint everything that will have stuff on it. I have a couple of inches of fill sand all over the floor – it got painted. The floor of the coop, which is covered in sawdust and chicken turd also got painted. Any part of the wood that is directly exposed to the weather, especially end grain, gets painted too. Any paint is better than nothing.
I just got the neatest toy from the UK… So the only thing that has been a bummer with these little guys is the requirement to let them out, and put them in. If you let them out, you MUST put them back in. I’ve read about stories of people leaving the doors open and coming out the next morning to a massacre complete with bloody raccoon prints walking away – varmints!
So after all these shenanigans of trying to figure out some solar vs 120V house solution, I just ponyed up $150 and bought a battery powered one from the UK. I installed it today, and so far it works! I can’t speak for racoons getting to the chicken feed, but the coop door shuts and opens with the sunlight and that is great! I may try swapping out the AA batteries for some D batteries to see if they last longer.
You can see the battery powered door opener there at the top. The two wires leading off to the right are for the light sensor, and the timer. The entry level opener has a light sensor in the box itself. That means you’d need a pulley or two and have to mount the motor box outside the coop. I got the external light sensor so I could mount the motor box inside the coop. The thing runs off four double AA batteries. We’ll see how long it lasts. I’m curious what it would take to get a solar panel and some NiCad’s in there… another day.
Oh, and total costs. I estimate the total coop ran me about… $500. Like I’d said above, the most expensive parts were the hardware cloth (square galvanized chicken wire with 1/2″ holes). I’ve got four chickens. I bought a fifty pound bag of UN-organic chicken feed for $28 on 12/28/11, then again on 3/26/12. So food is about $10/month, plus all the kitchen scraps you can throw at them. During the summer we get about 3.5 eggs/day. Winter more like 1 egg/day. So average throughout the year I’d say 2 eggs/day. That’s 700 eggs/year, $120/year food, so that works out to 17 cents/egg. A good deal, if you don’t count the coop! I’ve had these girls since May 2011. They didn’t start laying until Sept 2011. Let’s say between then and now they averaged 2 eggs/day, that means about 500 eggs. 1 year $120 food, $500 coop, so far I get about $1.25/egg. You can get “grass fed” organic eggs for like $5 dozen, so I’m at $15 per dozen! But I’ve got a coop and four fat birds… mmmmmm.
Definitely get chickens! It’s fun, and relatively easy. Like I said, easier than a cat or a dog. Check your city regulations for poultry. For instance, no roosters are allowed in Berkeley city limits. Also, check your local craigslist for people unloading coops, or people offering to build them. If you still want to do it, you could talk to the builder guy and see if he’d sell you the materials only – like a coop-kit or something. Doing it from nothing with just you and Home Depot can get spendy.